Execute statements
You can run SQL scripts in several ways: executing an entire script, a selected text block, an individual statement, or up to the cursor current position.
Execute an entire script
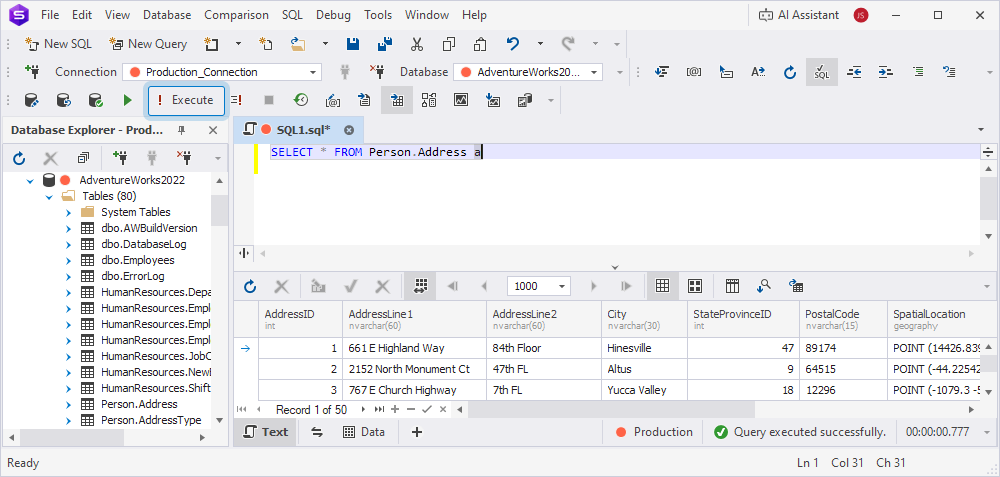
Click Execute on the SQL toolbar or press F5.
Alternatively, select SQL > Execute.
Execute selected text
1. Select the text block.
2. Click Execute on the SQL toolbar or press F5.
Execute the current statement
1. Click anywhere in the statement.
The Studio automatically defines the statement boundaries.
2. Click ![]() Execute Current Statement on the SQL toolbar or press F8.
Execute Current Statement on the SQL toolbar or press F8.
Alternatively, right-click the statement and select Execute Current Statement.
Execute to cursor
To run a script up to the cursor’s current position, right-click the required position and select Execute To Cursor. Alternatively, place the cursor in the required position and press Ctrl+Shift+F10.
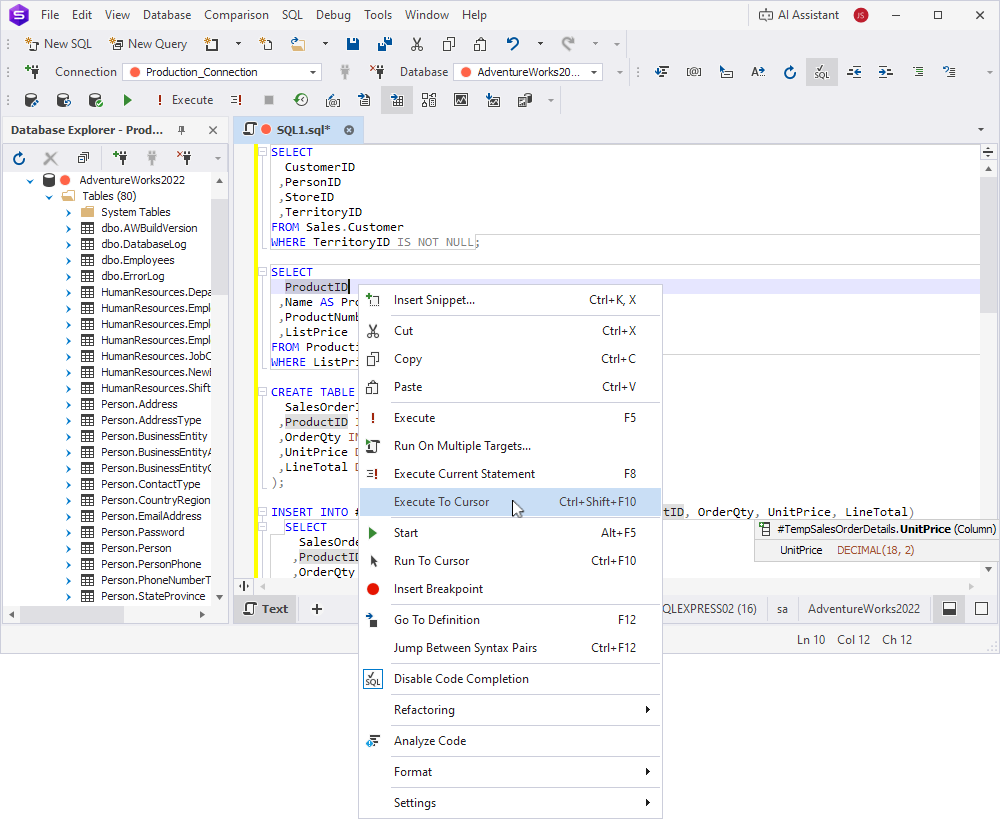
If the script contains multiple queries or T-SQL commands, the Execute To Cursor option runs all statements up to and including the one where the cursor is placed. Statements after the cursor aren’t executed.
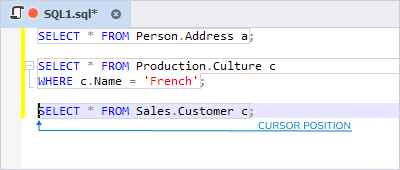
To better understand the Execute To Cursor option, review the following examples.
Example 1.
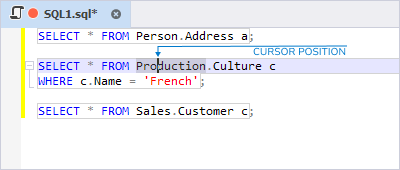
The SELECT Address and SELECT Culture queries are executed. Note that the WHERE clause of the SELECT Culture query also is executed. The SELECT Customer query isn’t executed.
Example 2.
The SELECT Address, SELECT Culture, and SELECT Customer queries are executed.
Example 3.

The SELECT Address and SELECT Culture queries are executed, but the SELECT Customer query isn’t executed.
Stop the execution
Click ![]() Stop Execution on the SQL toolbar.
Stop Execution on the SQL toolbar.
Choose the query results display format
You can choose how the query execution results are displayed:
- To display the query results as text, click
 Results as Text on the SQL toolbar before query execution.
 - To display the query results as a grid, click
 Results as Grid on the SQL toolbar before query execution.
Multi-database execution
You can run a script against multiple databases.
Note
To run the script in a single batch, the databases must reside on the same server. If they are on different servers, you need to switch connections and execute the script in separate steps.
1. Right-click anywhere in the SQL document and select Run On Multiple Targets.
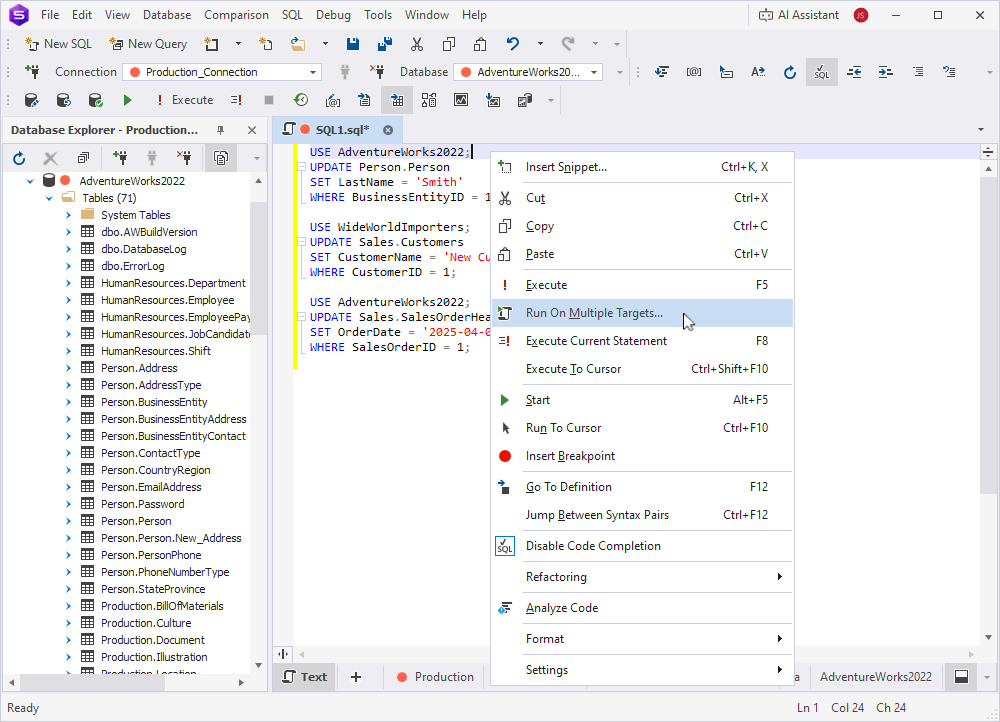
2. In Connection, select the database server connection.
3. In File Name, provide the path to the script file or leave the field empty to run a script from the SQL document.
4. Under Databases, select the databases against which you want to run the script. For convenience, you can hide the system databases from the list by selecting Hide system databases.
5. Under Script Execution Mode, select how to run the script:
- Execute in series – The script runs against the first database in the list. After the execution is completed, the script runs against the next database in the list.
- Execute in parallel – The script runs against all selected databases simultaneously.
6. Click Execute.

Execution warnings
The Studio analyzes the script for the presence of DELETE, DROP, TRUNCATE, and UPDATE statements and produces a blocking message if the statements are used in certain types of environments. For example, it alerts you if the DELETE statement targets a production database. This feature helps prevent accidental or intentional data loss caused by untested code, unintended commands, leftover statements, or other errors that could irreversibly damage data or objects.

Configure execution warnings
To configure the behavior of execution warnings:
1. Select Tools > Options.
2. Select Environment > Documents > Execution Warnings.
3. In Max script size to analyze, enter the maximum size (in kilobytes) of scripts that will be analyzed.
4. In the table, select the environments and statements to enable execution warnings for.
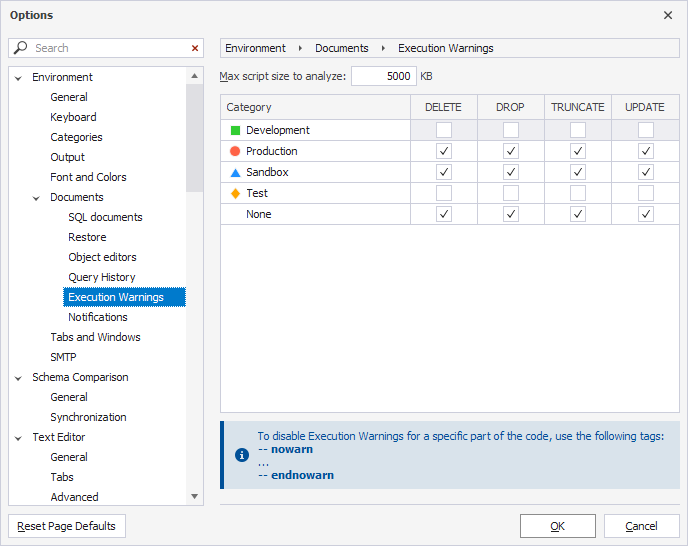
To disable execution warnings for a specific piece of code, wrap it with the nowarn and endnowarn tags.
--nowarn
<code>
--endnowarn

Execution notifications
Execution notifications inform you about the query execution result. They appear in the lower-right corner of the screen.
The notification contains the following information:
- The name of the document.
- The duration of a query.
-
Query execution status:
- Query completed with errors.
- Query executed successfully.
- Query canceled.

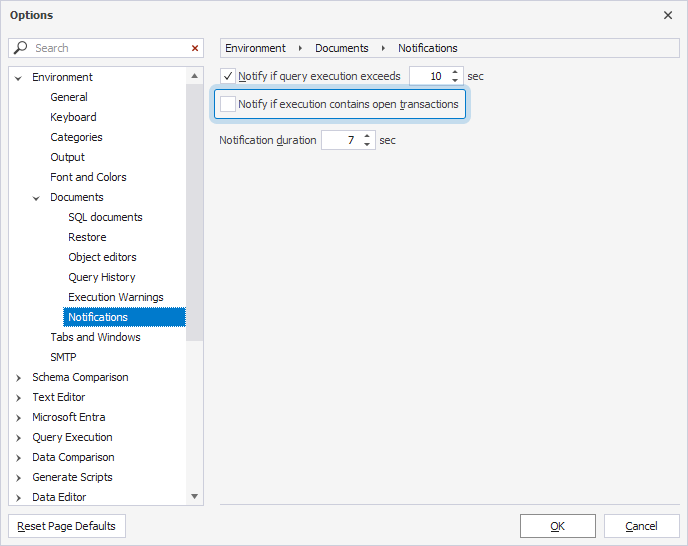
Configure execution notifications
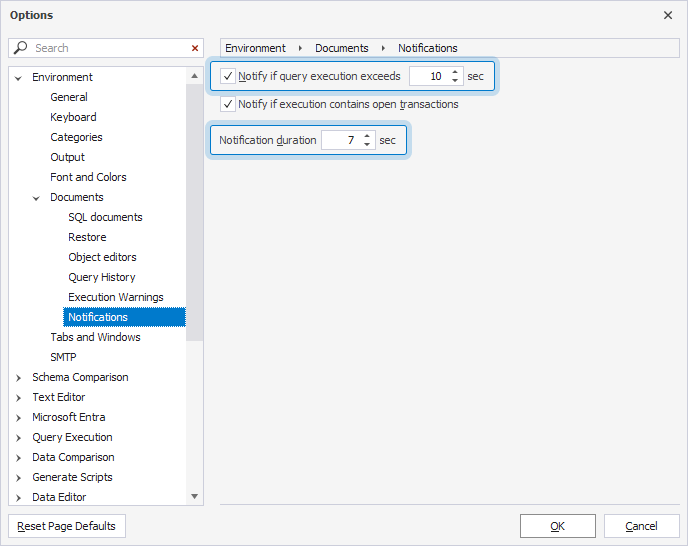
1. Select Tools > Options.
2. Select Environment > Documents > Notifications.
3. Adjust the settings:
- Notify if query execution exceeds – Specifies the maximum allowed query execution time (in seconds) before a notification is shown. To disable this notification, clear the checkbox.
- Notification duration – Specifies the duration (in seconds) that the notification remains visible.
Note
If a query exceeds 23:59:59 in execution time, the duration in the notification includes days.
Uncommitted transaction notifications
If there are open transactions during the query execution, a notification appears in the lower-right corner of the screen.
The notification contains the document name and the number of open transactions.

Note
The VIEW DATABASE STATE permission must be granted on the database for this feature to work properly.
Disable uncommitted transaction notifications
1. Select Tools > Options.
2. Select Environment > Documents > Notifications.
3. Clear Notify if execution contains open transactions.