How to view index scan results using the Index Manager functionality
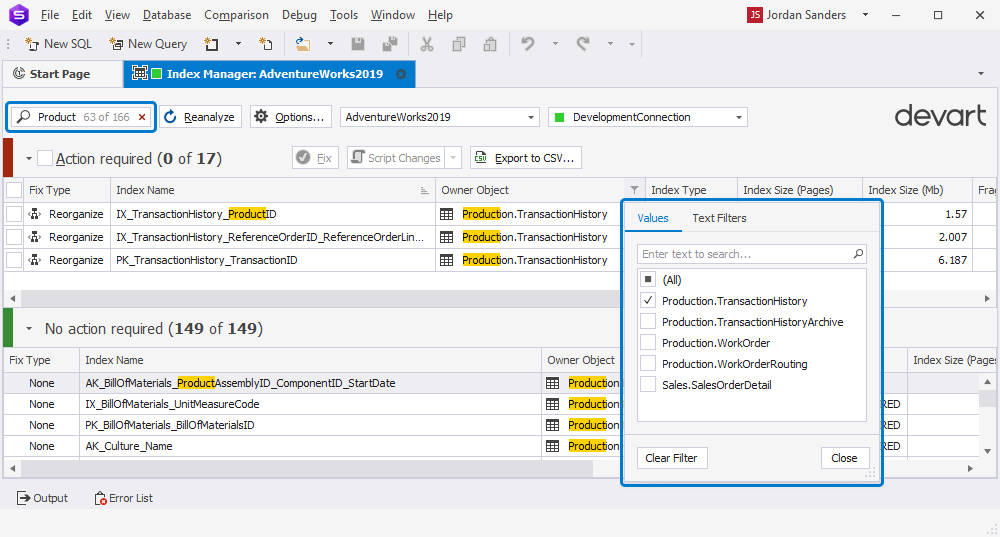
When the index scan is over, all scanned indexes appear in the Index Manager document. The document is divided into two sections:
- The Action required section lists all indexes that require maintenance according to the preset index analysis criteria.
- The No action required section lists all indexes that do not require maintenance, according to the preset index analysis criteria.
Both sections provide exhaustive details for the scanned indexes, including index name, size and owner, fragmentation volume, reason for fragmentation etc.
Navigate through the document
Scan results can be easily grouped by a certain column and filtered with default or custom filters. Also, you can use the Search box for locating indexes that meet the search string.
To filter indexes:
1. Navigate to the Action required section of the document.
2. Click the filter glyph on a column header.
3. Select a filter from the list or create a custom filter.

Sort indexes
To sort indexes in the document or to change the sort order, click the header of a column.
To assign a secondary sorting, click another column header, while holding down the SHIFT key. You can set as many sorting columns as you need. To stop sorting on a certain column, click it while holding the CTRL key.
To clear column sorting, click the column header once again,.
The current sort order of a column is indicated by the sort glyph (a small arrow displayed at the column header’s right edge). If data is sorted in ascending order, the sort glyph represents an up-arrow. When sorting in descending order, the sort glyph is displayed as a down-arrow. If the column isn’t sorted, the sort glyph is hidden.