Restore a SQL Server database to a new server
You can restore a database backup to a different SQL Server instance to migrate or duplicate a database between environments or to recover a database on a different machine.
Note
You can’t restore a backup to an older SQL Server version. For example, you can’t restore a SQL Server 2022 backup to SQL Server 2019. To transfer data between versions, use SQL scripts or import/export tools. For more information, see How to Restore a SQL Server 2019 Backup on a SQL Server 2017 Instance.
Prerequisites
-
Connect to the target SQL Server instance.
-
Create a backup of the database that includes a full backup and, optionally, differential and transaction log backups. For more information, see Back up a database.
-
Copy the created backup to the target server’s file system.
To restore a database to a new server
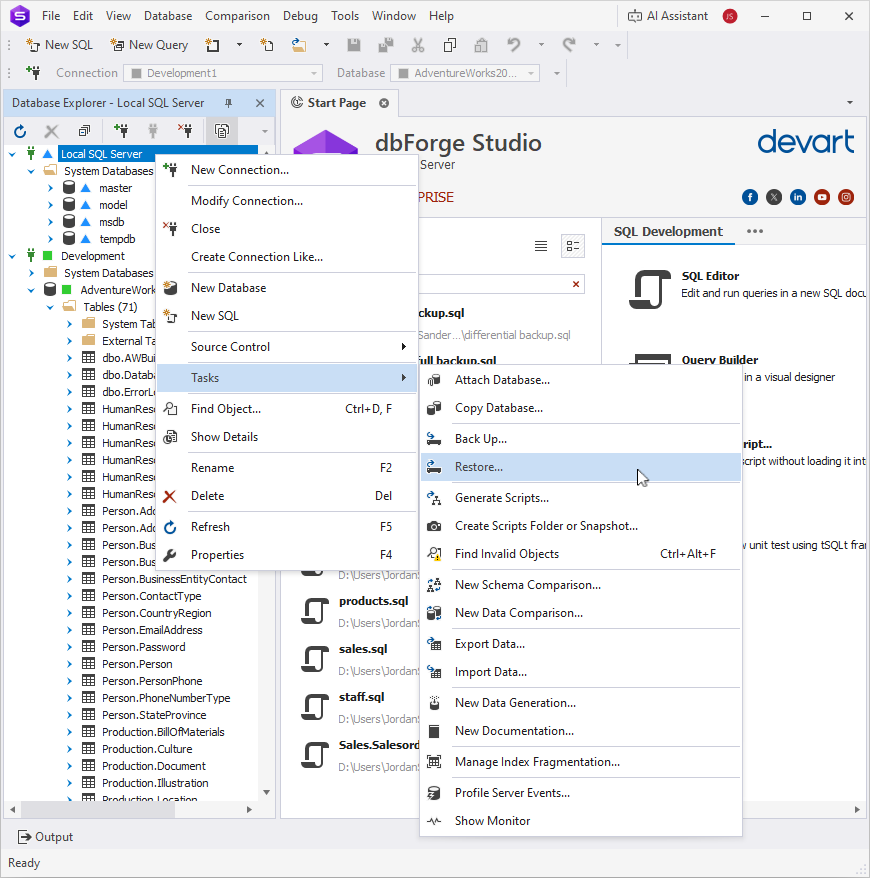
1. In Database Explorer, right-click the target server name or any database and select Tasks > Restore to open the Restore Database wizard.

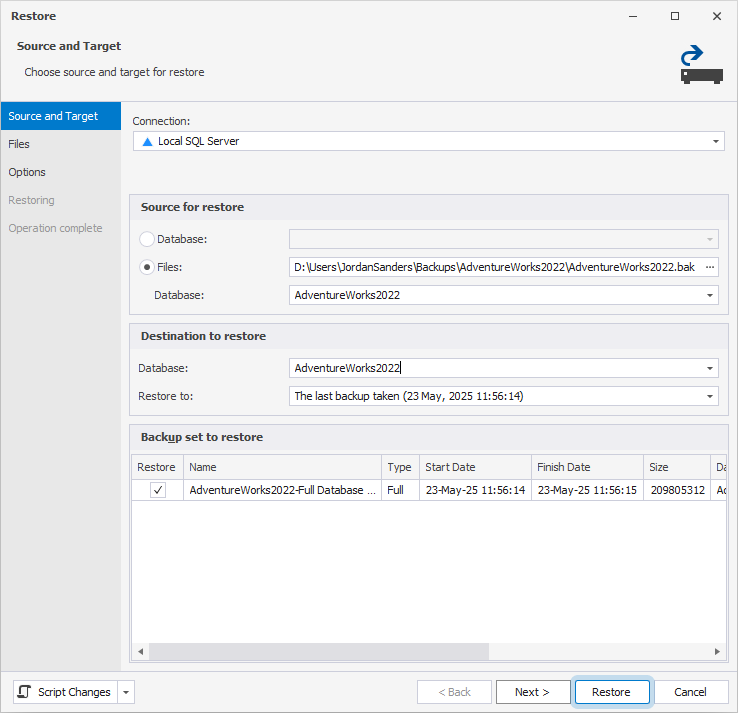
2. On the Source and Target page, under Source for restore, select Files and specify the following:
- Path – The path to a
.bakfile stored on the target SQL Server machine. - Database – The name of the source database from the source server that is contained in the backup.
3. Under Destination to restore, in Database, enter the name for the database on the new server. You can use the name of the source database or specify a different name.
4. Optional: For a point-in-time restore, in Restore to, specify a point in time to restore the database to, or keep To the last backup taken to restore it to the latest available state.
Note:
Restore to is available only when backup metadata is accessible—for example, when restoring from backup history or from backup files in the SQL Server default backup directory. If this option is unavailable, the database is restored to the end of the selected backup.
5. In the Backup set to restore grid, review the available backups and select the backup set you want to restore.

6. Optional: Configure the custom file locations and restore options. For more information, see Restore a full backup.
7. Click Restore.
After the restore is complete, the database appears in Database Explorer under the target server.
