Attach a database in SQL Server
This topic describes how to attach a database using dbForge Studio for SQL Server.
You can also use this feature as part of the process to copy, move, or upgrade a SQL Server database.
Limitations
Attaching a database directly from a newer version of SQL Server to an older version may fail or cause compatibility errors. For example, files detached from SQL Server 2022 can’t be attached to SQL Server 2017. Attempting to do so will result in the following error:
An error occurred while attaching the database. The database < database_name > cannot be opened
because it is version < version_number >. This server supports version < version_number > and earlier.
A downgrade path is not supported. Could not open new database < database_name >. CREATE DATABASE is aborted.
Since a direct downgrade isn’t possible, you can use an alternative way to transfer data from 2022 to 2017:
1. Attach the database detached from SQL Server 2022 to any available SQL Server 2022.
2. Create an empty database on SQL Server 2017.
3. Copy the schema and data from the database on SQL Server 2022 to the database on SQL Server 2017 using the Schema and Data Compare features of dbForge Studio.
4. Verify that the database on SQL Server 2017 contains all required data.
5. Detach the original database from the SQL Server 2022.
Permissions
You must be a member of the sysadmin or db_owner role.
Prerequisites
- Before moving a database to a different SQL Server instance, detach it from the current instance first.
- All data files, such as MDF and NDF files, must be available.
- Specify the current path for any data file that has been moved since the database was created or last attached.
- When moving a database, check the files associated with it and their current locations by querying the
sys.database_filessystem catalog view before detaching it from the existing SQL Server instance:
SELECT type_desc, name, physical_name
FROM sys.database_files;
where:
type_desc– The description of the file type:ROWS,LOG,FILESTREAM, andFULLTEXT.name– The logical name of the file in the database.physical_name– The operating-system file name.
Attach a database
1. Connect to a server instance.
2. Open the Attach Database dialog in one of these ways:
- In the top menu, select Database > Tasks > Attach Database.
- In Database Explorer, right-click the instance to which you want to attach a database and select Tasks > Attach Database.
- On the Start Page, select Administration > Attach Database.
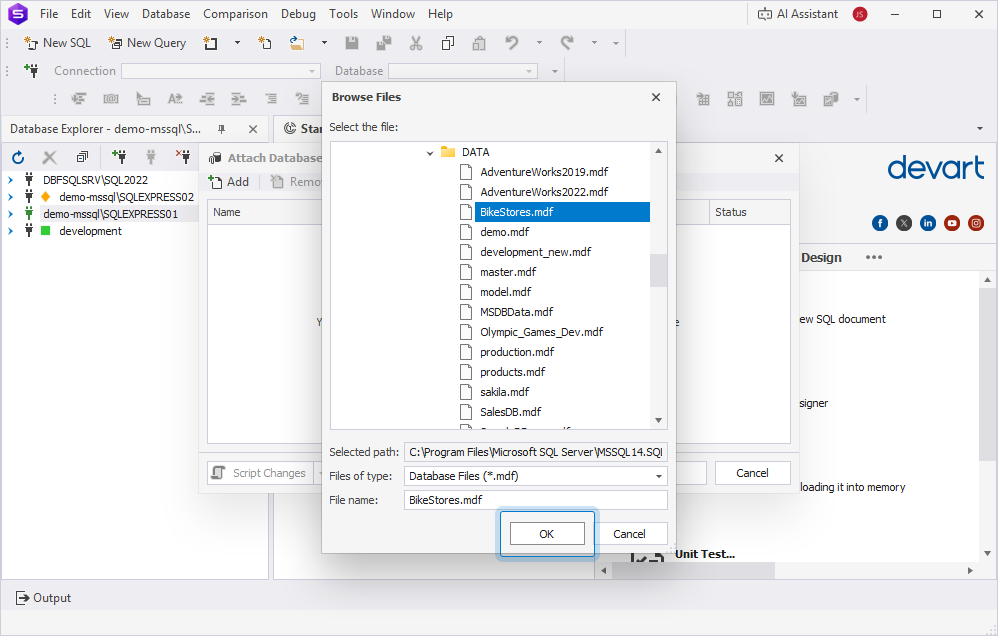
3. In the Browse Files dialog, choose the .mdf file of the required database, then click OK.
Warning
An attempt to select an already-attached database fails. The following error message appears:
CREATE FILE encountered operating system error 5(Access is denied.) while attempting to open or create the physical file 'C:\Program Files\Microsoft SQL Server\MSSQLxx.MSSQLSERVER\MSSQL\DATA\database_name.mdf'.
4. To add multiple .mdf files:
4.1. In the Attach Database dialog, click Add.
4.2. In the Browse Files dialog, select the .mdf file for the database, then click OK.
4.3. Repeat these steps for each file you want to add.
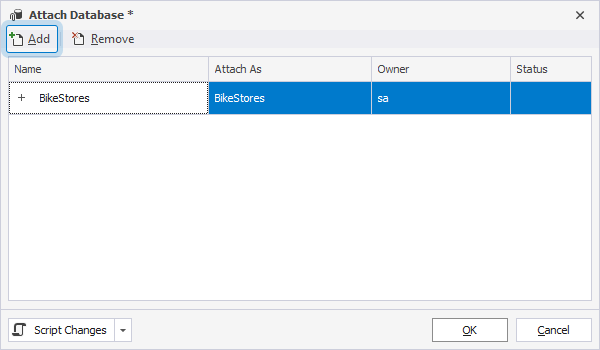
5. To rename the database, double-click its name in Attach As and enter a new name.
Tip
To remove the file from the grid in the Attach Database dialog, select it, then click Remove.
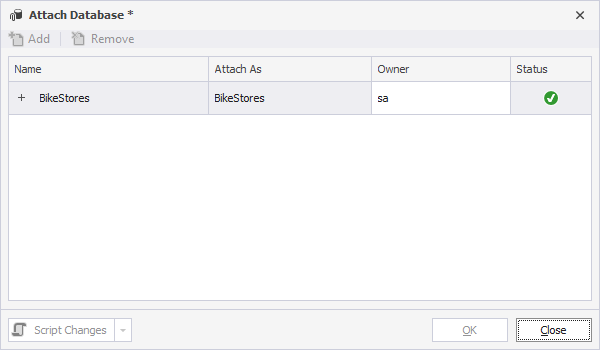
6. Click OK to attach the database.
After the database is attached, it gets the ![]() icon in the Status column.
icon in the Status column.
7. Click Close to close the dialog.
Attach a database using T-SQL
You can attach a database to an instance of SQL Server by using the CREATE DATABASE ... FOR ATTACH statement.
To attach a database by using CREATE DATABASE ... FOR ATTACH:
1. On the SQL toolbar, click New SQL to open a new SQL document.
2. Attach the database. Replace the arguments with your actual database name and file paths.
CREATE DATABASE database_name
ON (FILENAME = 'path_to_file.mdf'),
   (FILENAME = 'path_to_file.ldf')
FOR ATTACH;
where:
database_name– The name of the database you want to attach.'path_to_file.mdf'– The full path to the primary data file (.mdf).'path_to_file.ldf'– The full path to the transaction log file (.ldf).