Commit changes
dbForge Studio for SQL Server lets you update the version control repository by committing database changes using Source Control Manager.
Note
dbForge Studio does not separate commit and push operations. When you commit changes, the tool automatically pushes them to the remote repository.
Commit changes to the version control repository
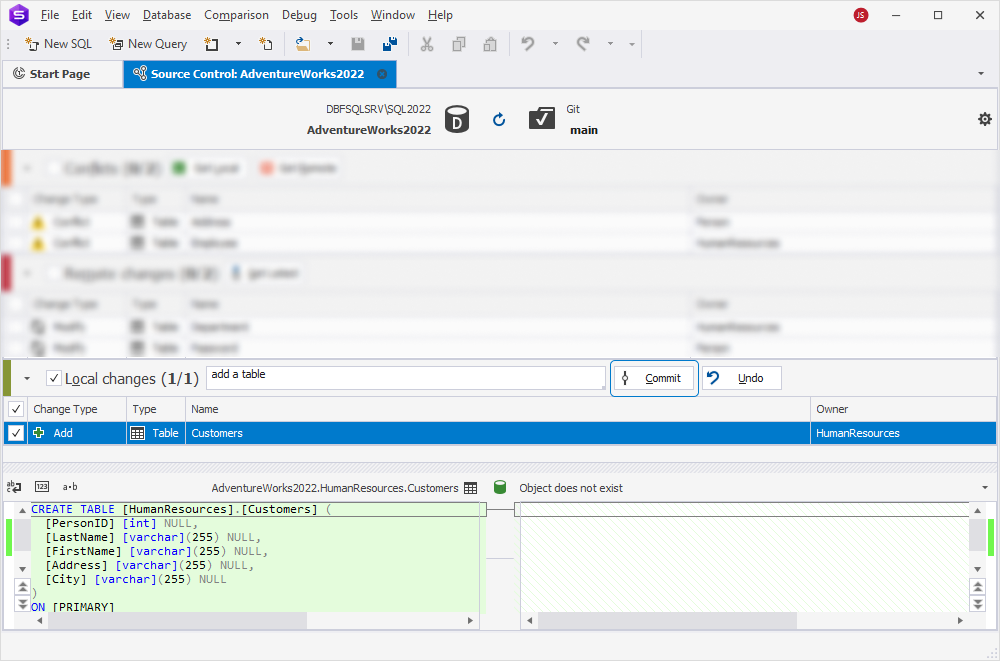
1. In the Local changes section, select the checkboxes next to the objects and/or static data you want to commit.
2. In the Comment box, enter a message describing the changes. The message appears in the change history and helps track the purpose of each commit.
Tip
To commit all changes, select the checkbox next to Local changes.
To commit changes for specific types of objects, in the Type column, click
and select the checkboxes for the corresponding objects.
3. Click Commit.
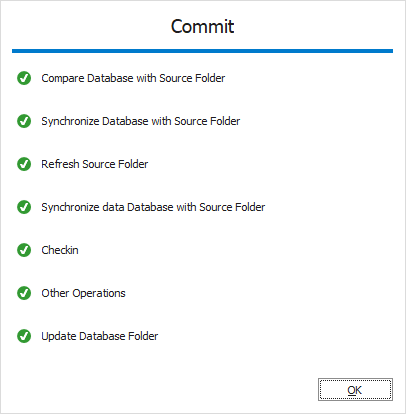
The Commit window appears and displays the progress of the operation.
4. Click OK to close the window.
Note
If the database is linked to a working folder, the Comment box is unavailable.
Commit dependent objects
If you select an object that depends on other uncommitted objects or changes, dbForge Studio prompts you to include the related items in the commit.
For example, if you add a new table and a view that selects from it, committing the view alone will trigger a prompt to include the table.
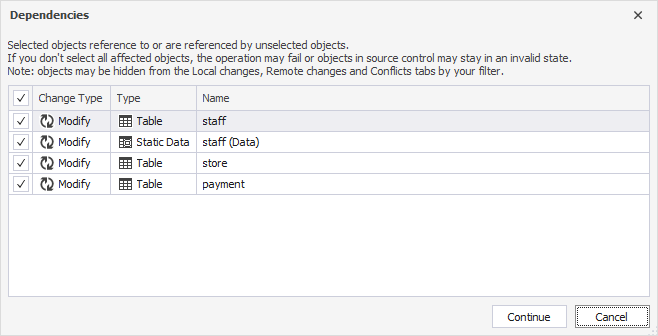
To proceed with the commit, click Continue.
You can exclude any of the related objects from the commit if necessary.
Commit behavior
This case may occur when you add two new database objects, such as a table and a view, which selects data from this new table. So, when you choose to commit only the new view, you will be prompted to commit the table associated with this view. You can also exclude any related object from the commit.
When you commit changes, dbForge Studio generates and runs a deployment script that applies changes to the linked database. The script includes:
CREATE,ALTER, orDROPstatements for schema changes.INSERT,UPDATE, orDELETEstatements for static data.- Statuses for each item (Add, Modify, Remove) as tracked in Source Control Manager.