Link a database to a Perforce repository
This topic describes how to link a database to Perforce (P4).
To link a database to Perforce:
1. In Database Explorer, right-click a database you want to link and select Source Control > Link Database to Source Control.
Alternatively, on the top menu, select Database > Link Database to Source Control.
2. In the Link Database to Source Control dialog, in the Source control repository field, click ![]() .
.
Note
By default, dbForge Studio automatically selects the repository that was previously linked.
3. In the Source Control Repository Properties dialog, enter the required repository settings:
- Set Source control system to Perforce (P4).
- Enter the P4PORT, User name, and Password.
- In the Workspace field, either create a new workspace or select an existing one.
Tip
By default, the repository name is set automatically based on the selected workspace. To use a different name, enter it manually.
Note
dbForge Source Control requires a dedicated workspace for each linked database.
Don’t use the same workspace in other applications.
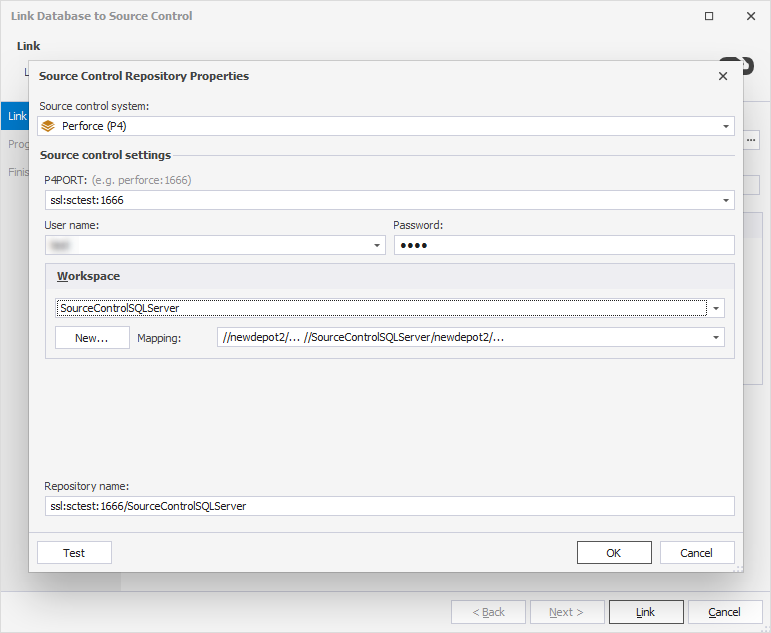
4. Optional: To verify the repository settings, click Test.
5. To save the settings and close the dialog, click OK.
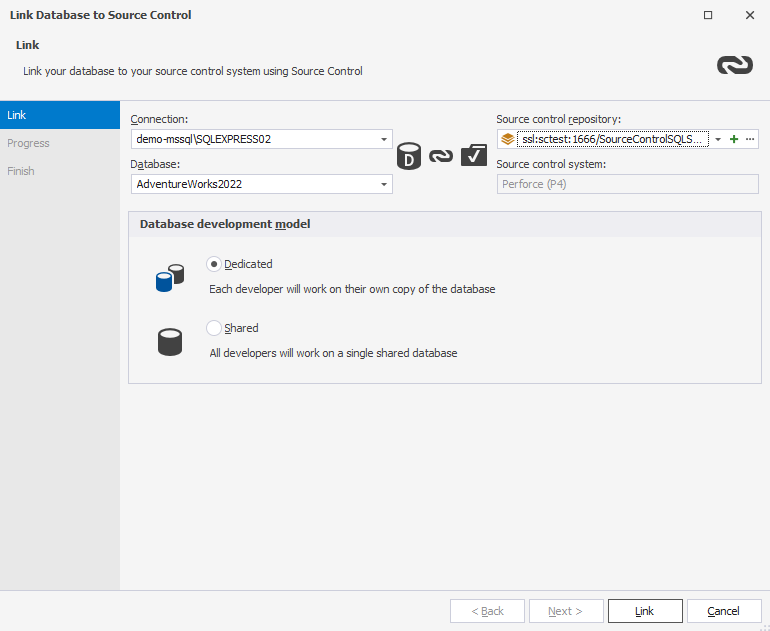
6. Choose a database development model:
- Shared – Developers collaborate on a single shared database.
- Dedicated – Each developer works on a local copy of the database.
7. To connect the database to the repository, click Link.
The Refresh window opens and displays the progress of the refresh operation.
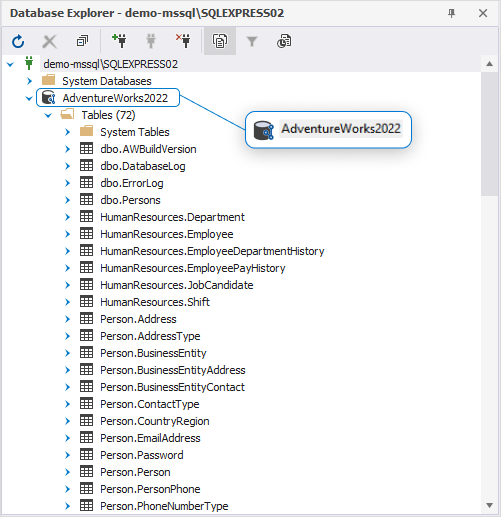
After the database is linked, it appears in Database Explorer with the source control icon:
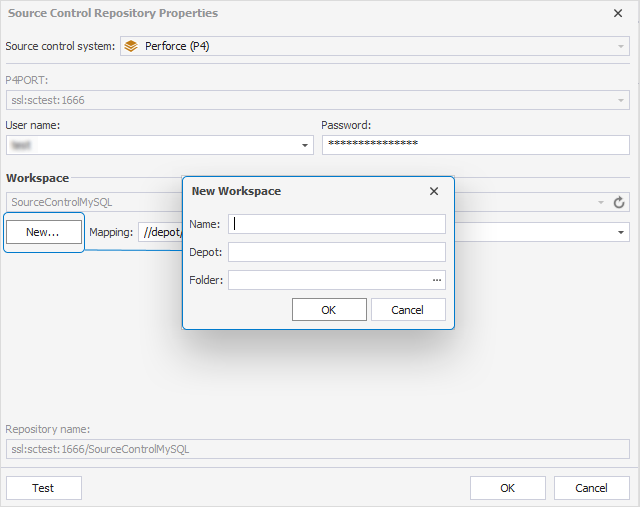
Create a new workspace
1. Under Workspace, select New.
2. In the New Workspace dialog, specify:
- A name of the new workspace.
- An existing Depot.
- A path to the Folder with database scripts.
3. To select or create a folder, click the ellipsis (…).
Warning
dbForge Studio works only with scripts located in the specified folder. If the Folder field is left empty, the entire depot is treated as a database scripts folder. In this case, scripts will be saved to an internal Devart folder.
Select an existing workspace
1. Select an existing workspace from the list.
The workspace also specifies the local folder where dbForge Studio will store the database scripts.
2. Optional: From the Mapping list, select a depot mapping.
Mapping specifies the depot and remote folder that dbForge Studio will use.
Note
Reusing an existing workspace is not recommended. Doing so may cause conflicts with other applications or links.
All team members must use the same settings for P4PORT, Depot, and Folder to ensure dbForge Source Control works correctly.
Set up version control after linking
After linking the database, your next step depends on whether the repository is new or already in use by your team:
- If this is the first time the database is linked:
In the Local changes section of the Source Control Manager, select the objects you want to add to version control, then click Commit.
For instructions, see Commit changes.
- If the database is already under source control:
In the Remote changes section, select the objects you want to retrieve, then click Get Latest.
Note
The Get Latest option is available only in the dedicated development model.
For instructions, see Get the latest version.