Link a database to Plastic SCM and other systems
This guide describes how to link a database to Plastic SCM using a configuration preset, or to another source control system using an editable command-line template.
Prerequisite
Install a Plastic SCM client.
Link the database to Plastic SCM in dbForge Studio
1. In Database Explorer, right-click the database you want to link and select Source Control > Link Database to Source Control.
Alternatively, on the top menu, select Database > Link Database to Source Control.
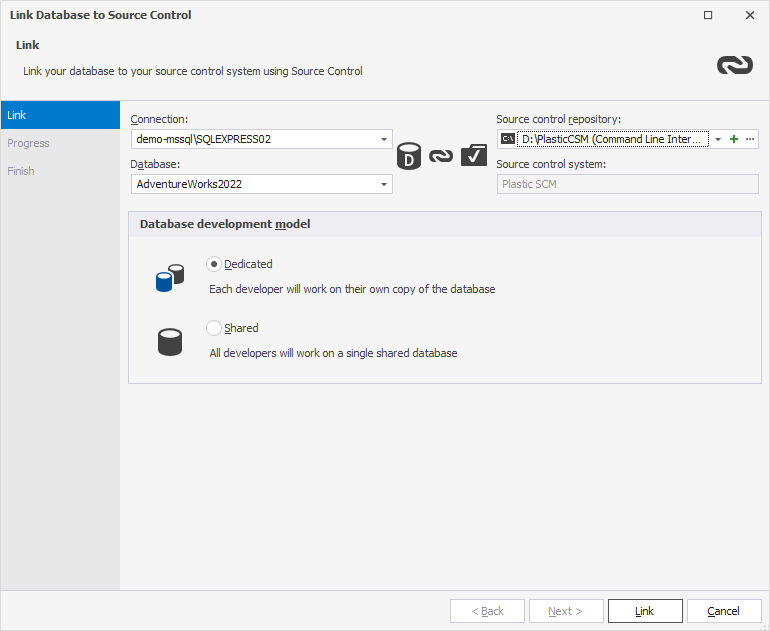
2. In the Link Database to Source Control dialog, in the Source control repository field, click ![]() .
.
Note
By default, dbForge Studio automatically selects the repository that was previously linked.
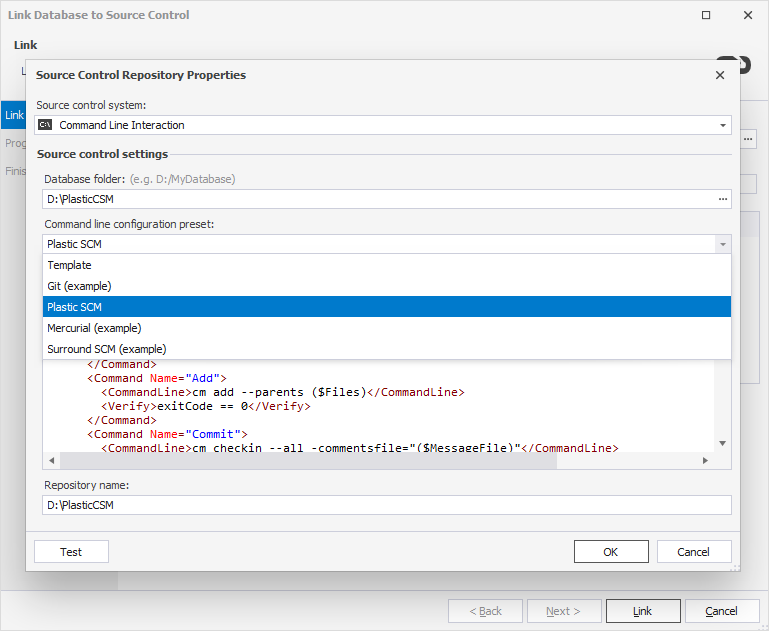
3. In the Source Control Repository Properties dialog, enter the required repository settings:
- Set Source control system to Command Line Interaction.
- Specify a path to the Database folder containing the cloned copy of the repository.
- In the Command line configuration preset list, choose one of the following:
- Template – Links to another system by modifying the configuration manually in the editor.
- Git (example) – Links a database to Git.
- Plastic SCM – Links a database to Plastic SCM.
- Mercurial – Links a database to Mercurial.
- Surround SCM (example) – Links a database to Surround SCM.
- By default, the selected folder name is used as the repository name. To specify a different name, enter it manually.
4. Optional: To verify the repository settings, click Test.
5. To save the settings and close the dialog, click OK.

6. Choose a database development model:
- Shared – Developers collaborate on a single shared database.
- Dedicated – Each developer works on a local copy of the database.
7. To connect the database to the repository, click Link.

The Refresh window opens and displays the progress of the refresh operation.
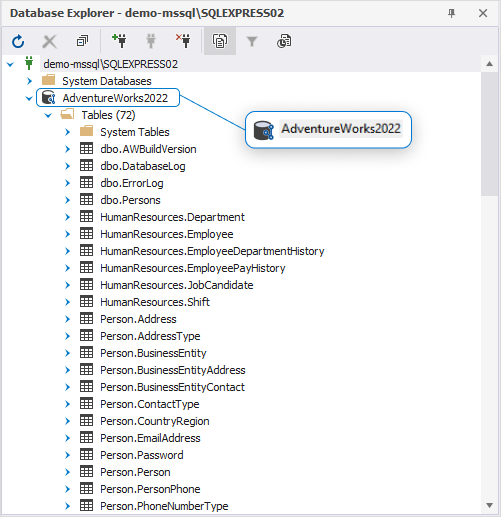
After the database is linked, it appears in Database Explorer with the source control icon:

Create a database folder
If you’re using a system, such as Mercurial that requires a cloned repository folder, follow these steps:
1. Create an empty folder on your local disk to store the cloned repository.
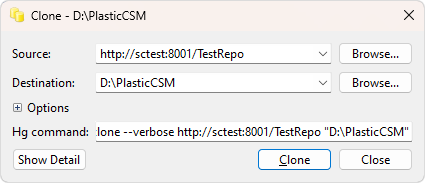
2. Right-click the folder and select TortoiseHg > Clone.
3. In the Clone dialog, specify the source repository, then click Clone.

Set up version control after linking
After linking the database, your next step depends on whether the repository is new or already in use by your team:
- If this is the first time the database is linked:
In the Local changes section of the Source Control Manager, select the objects you want to add to version control, then click Commit.
For instructions, see Commit changes.
- If the database is already under source control:
In the Remote changes section, select the objects you want to retrieve, then click Get Latest.
Note
The Get Latest option is available only in the dedicated development model.
For instructions, see Get the latest version.