Link a database to a Git repository in GitLab
GitLab is a web-based DevOps platform that supports Git-based version control and collaboration. It provides built-in CI/CD pipelines, a container registry, and code review tools. You can use GitLab as a cloud service or host it on-premises to maintain control over your environment.
Prerequisites
- Install Git for Windows on the machine where you plan to use version control.
- Create a repository on GitLab.
- Clone a repository.
Create a repository on GitLab
You can create a repository by creating a project or forking an existing one.
To create a repository on GitLab:
1. Sign in to your GitLab account.
2. On the top menu, select Create new > New project/repository.
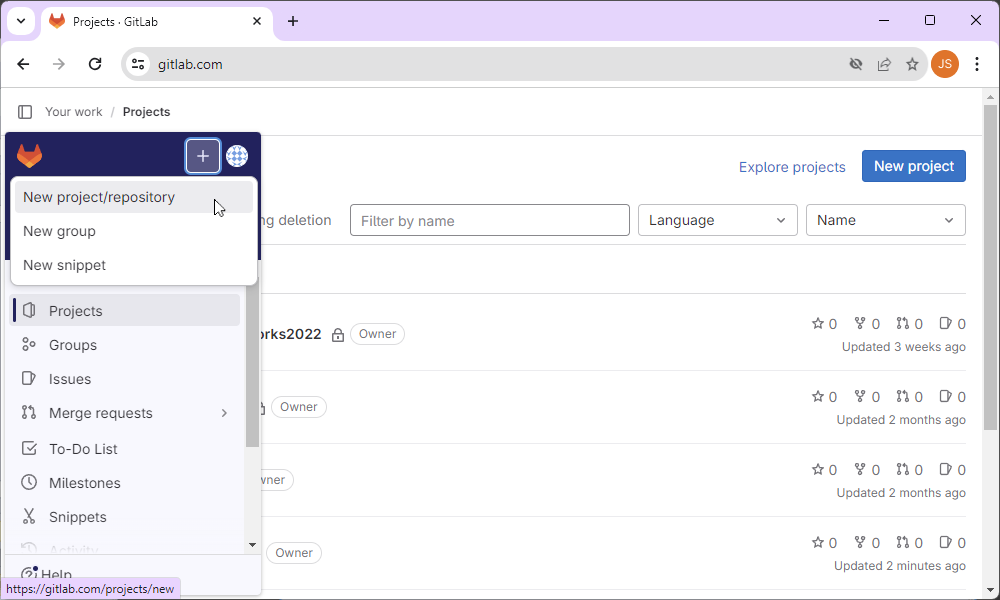
3. Select Create blank project.
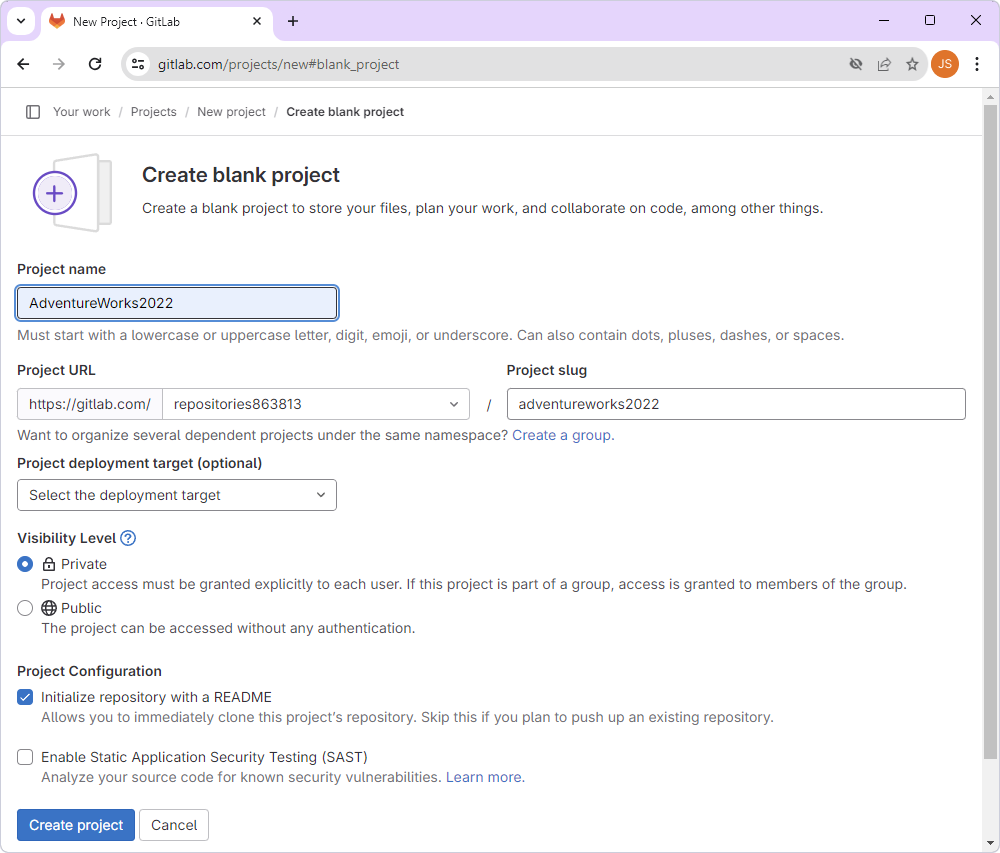
4. On the Create blank repository page, configure the following:
- Project name – Enter the name for your project.
Tip
The name must start with a letter, digit, emoji, or underscore. It may include dots, plus or minus signs, or spaces. Adding the project name automatically creates the project slug.
- Project slug – Specify the URL path to your project.
- Project deployment target – Optionally, select a deployment target.
- Visibility level – Choose one of the following:
- Private (default) – Grants access only to authorized users.
- Public – Makes the repository accessible to everyone.
5. To initialize the repository with a default branch and a README file, select Initialize repository with a README.
Note
To push an existing repository instead, clear the checkbox.
6. Optional: To enable security scanning, select Enable Static Application Security Testing (SAST).
7. Click Create project.
Clone a repository using the command line
To clone the repository from GitLab using the command line:
1. Create an empty folder on your local drive, for example, D:\gitlab.
2. Sign in to your GitLab account.
3. In the sidebar, go to Projects, then select the repository you want to clone.
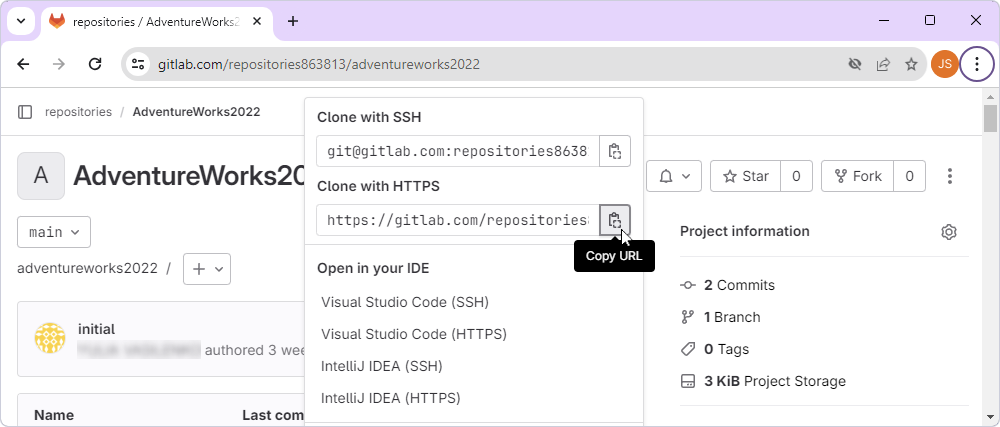
4. In the upper-right corner of the repository page, click Clone.
5. Under Clone with HTTPS or Clone with SSH, click Copy to copy the repository URL.
- HTTPS – Authenticates each operation using your GitLab username and password.
- SSH – Authenticates once using an SSH key pair (a public and a private key).
6. Open Command Prompt (CMD).
7. Navigate to the folder you created.
Tip
Use the
cdcommand to navigate to a specific folder in the command prompt.
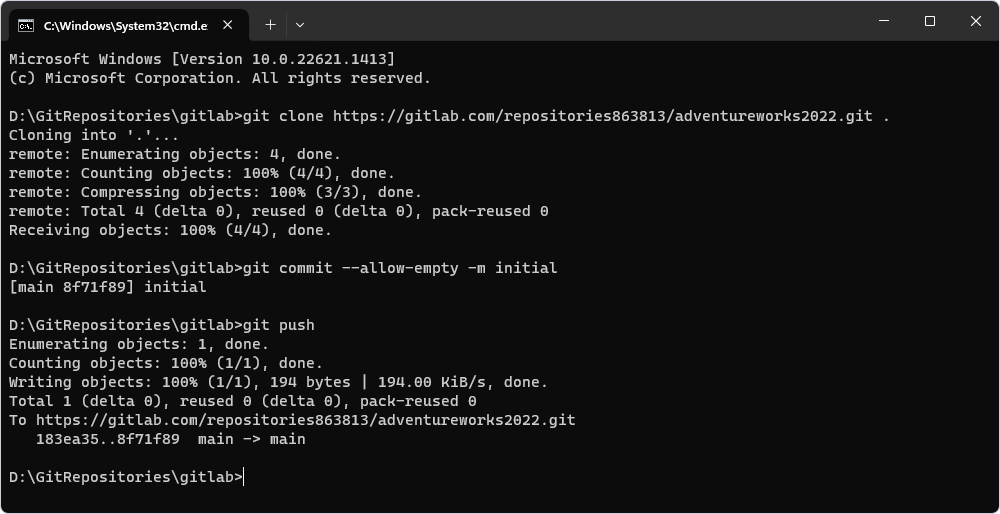
8. Clone the repository by running:
git clone <repository-url> .
where <repository-url> is the URL of the repository you want to clone to your computer.
Tip
Include a period (.) at the end of the command to clone the repository into the current folder.
9. If no files were added during repository creation, run:
git commit --allow-empty -m initial
git push
Link the database to source control in dbForge Studio
1. In Database Explorer, right-click the database you want to link and select Source Control > Link Database to Source Control.
Alternatively, on the top menu, select Database > Link Database to Source Control.
2. In the Link Database to Source Control dialog, click + in the Source control repository field.
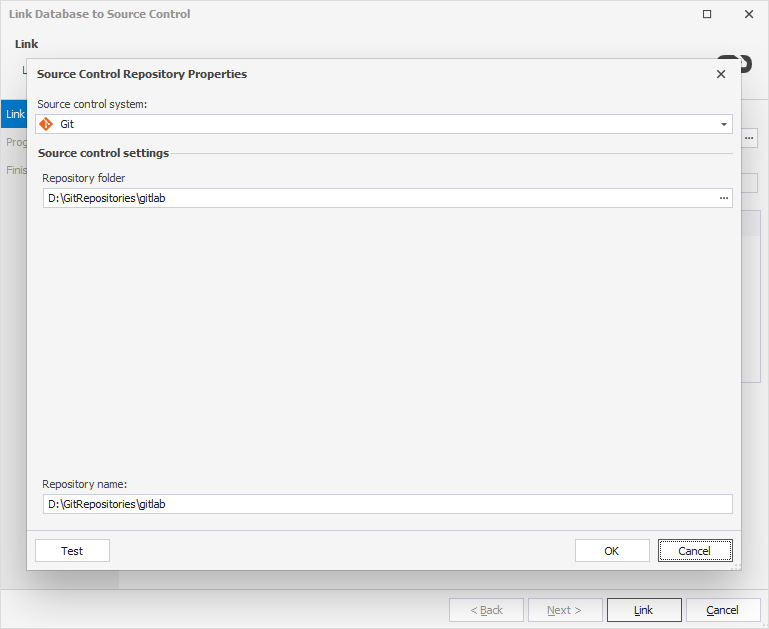
3. In the Source Control Repository Properties dialog, enter the required repository settings:
- Set Source control system to Git.
- In the Repository folder field, enter the full path to the local clone of your GitLab repository, or click the ellipsis (…) and browse for the folder.
Warning
The Repository folder must point to a local folder. Do not enter a remote URL.
-
By default, the selected folder name is used as the repository name. To specify a different name, enter it manually.
- Optional: To verify the repository settings, click Test.
- To save the settings and close the dialog, click OK.
4. Choose a database development model:
- Shared – Developers collaborate on a single shared database.
- Dedicated – Each developer works on a local copy of the database.
5. To connect the database to the repository, click Link.

The Refresh window opens and displays the progress of the refresh operation.
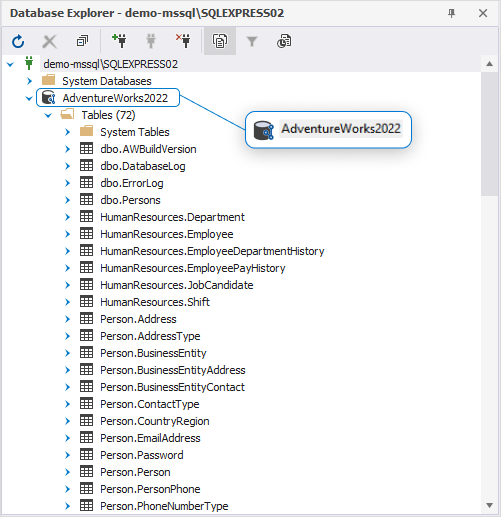
After the database is linked, it appears in Database Explorer with the source control icon:
Set up version control after linking
After linking the database, your next step depends on whether the repository is new or already in use by your team:
- If this is the first time the database is linked:
In the Local changes section of the Source Control Manager, select the objects you want to add to version control, then click Commit.
For instructions, see Commit changes.
- If the database is already under source control:
In the Remote changes section, select the objects you want to retrieve, then click Get Latest.
Note
The Get Latest option is available only in the dedicated development model.
For instructions, see Get the latest version.