Link a database to a Git repository
dbForge Studio for SQL Server allows you to link a database to Git, a distributed version control system, to manage schema and data changes, commit or roll back changes, resolve conflicts in static data, and maintain database integrity.
Note
Starting with version 6.0, dbForge Studio for SQL Server uses Git for Windows as its Git client. This enables support for all connection and authentication types, as they are managed by the Git client.
Before linking a database to Git, ensure Git for Windows is installed on your system.
For instructions on linking a database to a Git repository, see the following how-to topics:
- Link a SQL Server database to a Git repository in GitHub
- Link a database to a Git repository in Azure DevOps
- Link a database to a Git repository in Bitbucket
- Link a database to a Git repository in GitLab
Is the connection secure when dbForge Studio connects to a Git repository?
Yes. dbForge Studio connects to Git using Git for Windows, which supports modern security protocols, including TLS 1.2. A secure connection is established if the repository server requires it. For example, if a repository URL uses HTTPS and the server enforces TLS, the connection will comply. The security protocol used depends on the repository server configuration – not on dbForge Studio settings.
Work with a local Git repository
dbForge Studio doesn’t work directly with local or remote Git repositories; it works through a clone. To connect a database to a local Git repository, you must first create the repository and then clone it.
Create and clone a local Git repository
1. Create two empty folders on your computer:
- One for the bare repository (the main Git repository)
- One for the cloned working directory
2. Open the Command Prompt (CMD).
Tip
Use the
cdcommand to navigate to the folder where the main repository will be created.
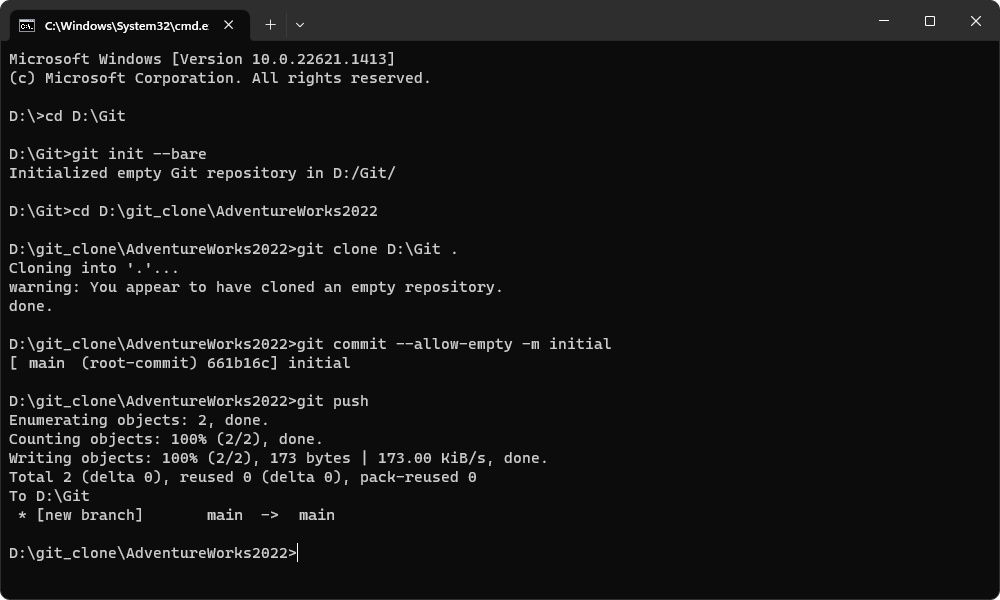
3. Initialize a bare repository by running the following command.
git init --bare
4. Navigate to the second folder (your working directory), and run:
git clone <pathToMainRepo> .
where <pathToMainRepo> is the path to the main repository you created when executing the git init --bare command.
Tip
Include a period (.) at the end of the command to clone the repository into the current folder.
This command clones the local repository you have just created.
5. Make an initial commit and push it:
git commit --allow-empty -m initial
git push
6. In dbForge Studio, link the database to the folder containing the cloned repository.
Automate the cloning of a Git local repository from the command line
You can automate the process of creating and cloning a Git repository by using a .bat file. The script initializes a bare Git repository, creates a clone, makes an initial commit, and pushes the changes – all from the command line.
To automate the cloning process:
1. Open a text editor and enter the following script.
Replace DatabaseName with the actual name of your database. This name will also be used as the folder name for the cloned repository.
The script creates a .bat file to clone the repository.
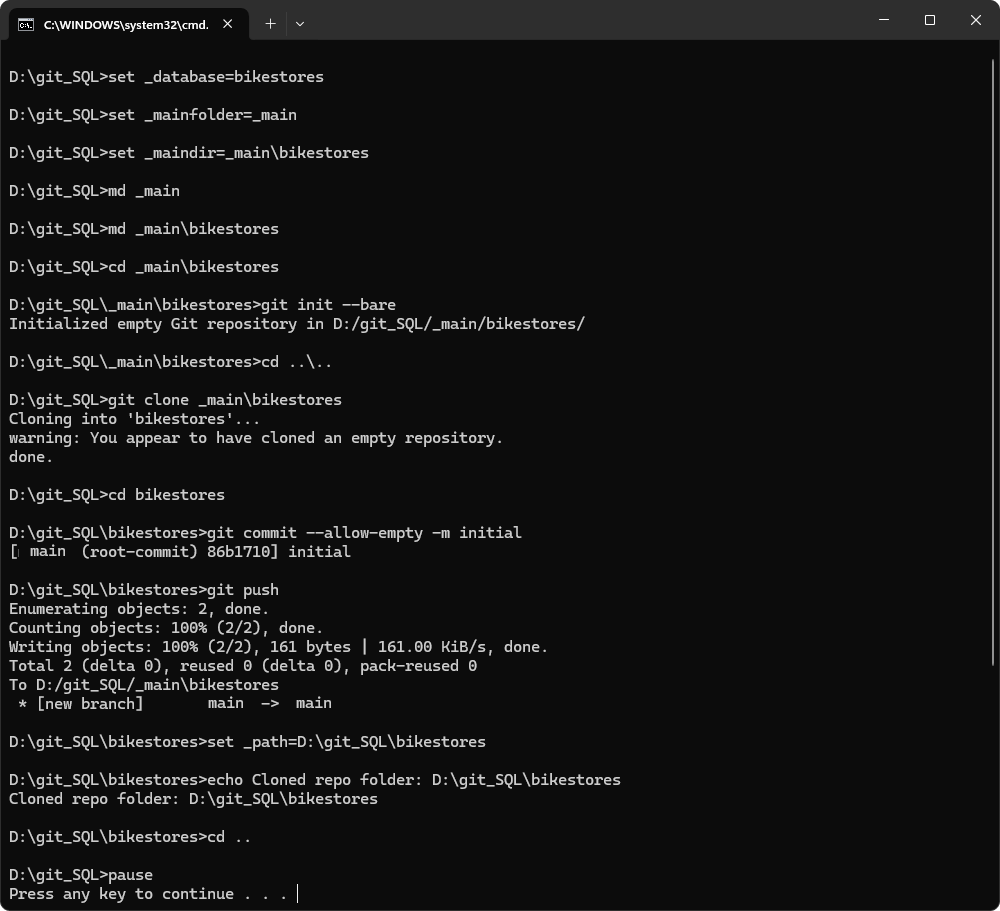
:: Change DatabaseName to your database name; it will be the repository folder name.
set _database=DatabaseName
:: Change _main if desired; it will be the folder for the main repository.
set _mainfolder=_main
:: Please do not change the following variables and commands.
set _maindir=%_mainfolder%\%_database%

:: Create the main folder to store the main repository.
md %_mainfolder%
:: Create a subfolder under the main folder with the name of the database.
md %_maindir%
:: Navigate to the subfolder.
cd %_maindir%
:: Initialize the main repository (it will be empty).
git init --bare

:: Go back to the root directory.
cd ..\..
:: Clone the main repository, creating a folder with the name of the database.
git clone %_maindir%
:: Navigate to the cloned folder.
cd %_database%
:: Run git commands in the cloned folder.
git commit --allow-empty -m initial
git push
set _path=%cd%
:: Print the repository folder for reference.
echo Cloned repo folder: %_path%
cd ..

pause
2. Optional: To change the folder name used for the main repository, modify the _mainfolder variable.
Note
Do not modify the
%_mainfolder%and%_database%variables or the commands that rely on them.
3. Save the file with a .bat extension (for example, clone-git-repo-sql.bat) in the directory where you want to manage your repositories.
4. Double-click the .bat file or run it from the command line to execute the script.
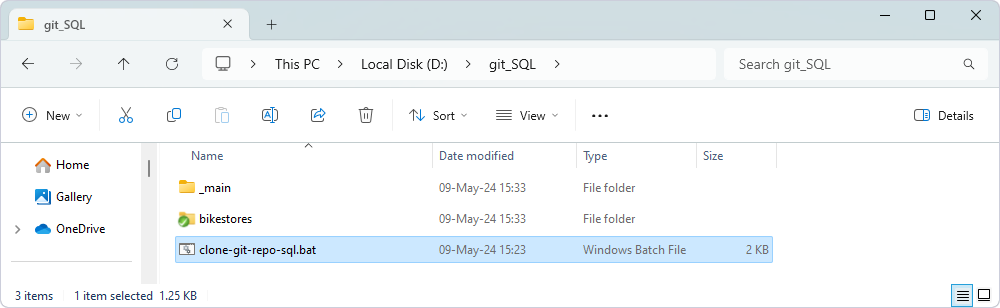
After running the script, the directory will contain the following:
_main– The folder that contains the bare Git repository.DatabaseName– The cloned working copy of the repository.clone-git-repo-sql.bat-The batch file used to automate the cloning process.
Link a database to the source control in dbForge Studio
After cloning the repository, you can link your database to the local repository folder.
To link a database to the repository:
1. In Database Explorer, right-click the database you want to link and select Source Control > Link Database to Source Control.
Alternatively, on the top menu, select Database > Link Database to Source Control.
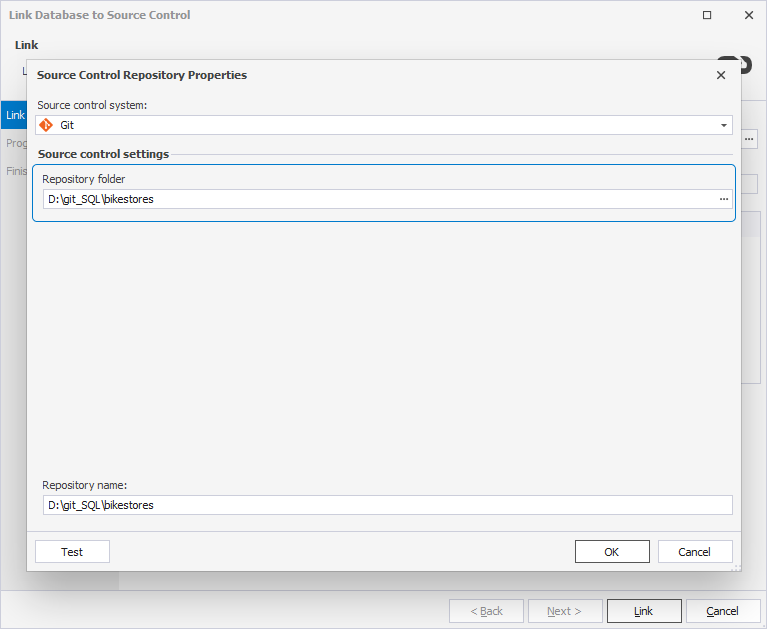
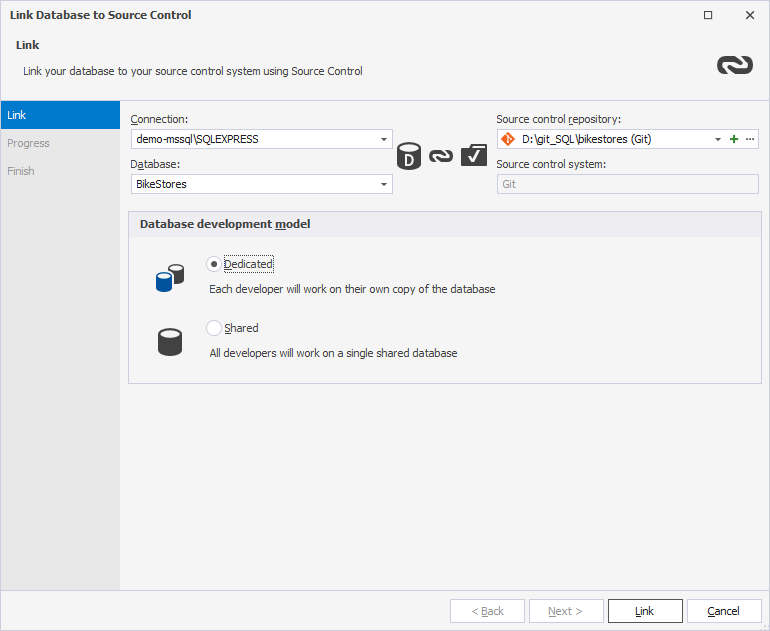
2. In the Source Control Repository Properties dialog, enter the required repository settings:
- From the Source control system list, select Git.
- In the Repository folder field, enter the full path to the repository folder or select it, clicking the ellipsis (…).
- By default, the selected folder name is used as the repository name. To specify a different name, enter it manually.
-
Optional: To verify the connection settings, click Test.
-
To save the settings and close the dialog, click OK.
3. Choose the database development model:
- Shared – Developers collaborate on a single shared database.
- Dedicated – Each developer works on a local copy of the database.
4. To connect the database to the repository, click Link.
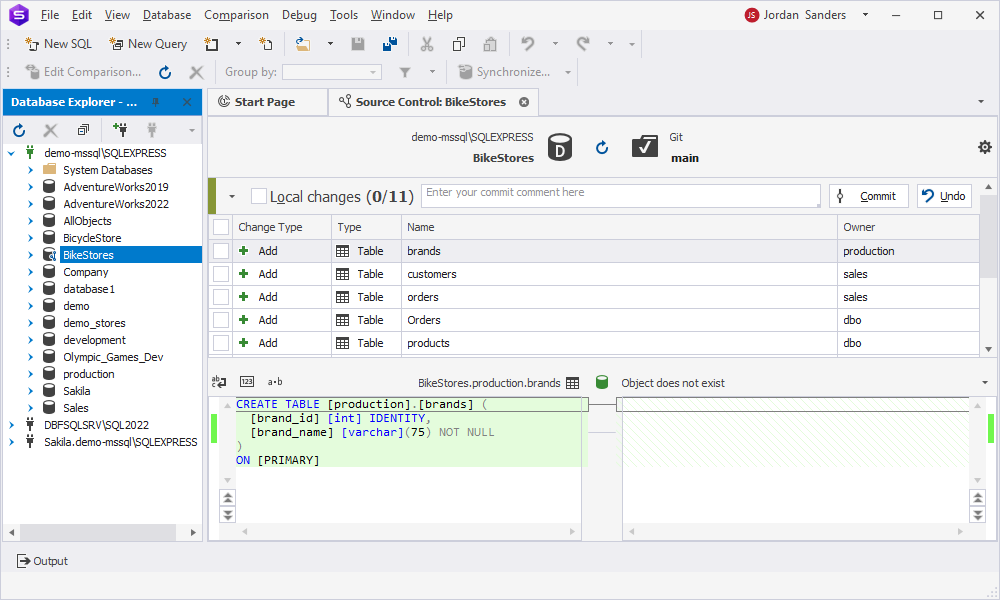
After linking, Source Control Manager opens and displays local changes. You can review and commit them to the repository.
Watch the instructional video for a step-by-step guide on creating a local Git repository and linking it to your database using dbForge Studio.
Set up version control after linking
After linking the database, your next step depends on whether the repository is new or already in use by your team:
- If this is the first time the database is linked:
In the Local changes section of the Source Control Manager, select the objects you want to add to version control, then click Commit.
For instructions, see Commit changes.
- If the database is already under source control:
In the Remote changes section, select the objects you want to retrieve, then click Get Latest.
Note
The Get Latest option is available only in the dedicated development model.
For instructions, see Get the latest version.