Compare and synchronize backup files
dbForge Studio for SQL Server lets you compare a backup file with another backup file, a database, or a scripts folder. This feature is useful when you need to retrieve and validate data from a backup without restoring it or copying the file from a remote location.
With dbForge Studio, you can also:
- Create a synchronization script from a backup.
- Update the database from which the backup was created.
- Recover individual rows from a backup.
Note
Backup files are read-only and cannot be modified directly.
When you select a backup as the target, dbForge Studio creates a script to update the database from which the backup was created. You can then open the generated script in the internal editor or save it to a file.
Supported backup types
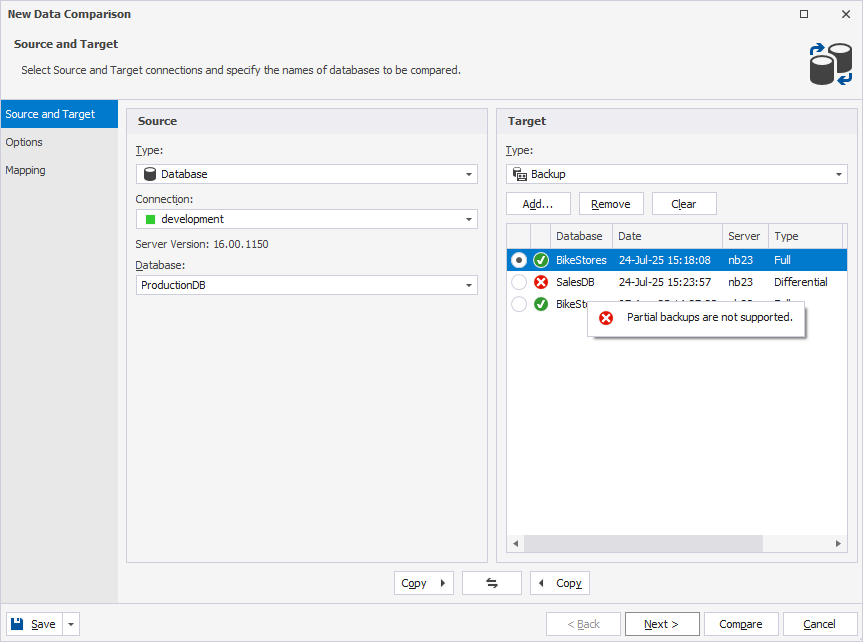
- Native SQL Server backups
- Differential backups
Supported database objects
- Tables with a primary key, unique index, or unique constraint
- Persisted computed columns
- Binary representations of CLR types
Unsupported database objects
- Tables without a primary key, unique index, or unique constraint
- Views
- Non-persisted computed columns
- String representations of CLR types
Feature limitations when comparing from backups
- Custom comparison keys (however, you can select an alternative unique index or unique constraint)
- Row filtering using SQL Filter Editor (available only when comparing live databases)
Differential backups
dbForge Studio can retrieve the data from both full and differential backups. When you use differential backups, only the changes made up to the point of that specific backup are included. Any changes made after the differential backup will be excluded and may not appear in the Data Comparison results grid.
Compare and synchronize backups
1. Open the New Data Comparison wizard in one of these ways:
- In the top menu, select Comparison > New Data Comparison.
- On the Start Page, select Database Sync > New Data Comparison.
2. Under Source, select Backup as the source type, then click Add to add backup files.
3. Under Target, select the data source to compare with the backup, then configure the data source settings.
4. Optional: On the Options page, configure the comparison settings.
5. On the Mapping page, map objects.
Note
The database objects with the same names are mapped automatically.
6. Click Compare.
The comparison results appear in the Data Comparison document.
By default, all objects are selected for synchronization. To exclude any objects from synchronization, clear the checkboxes for the corresponding objects.
7. At the top of the document, click  to open the Data Synchronization Wizard.
8. Select an output option to generate a synchronization script, and optionally configure the synchronization settings.
9. Click Synchronize.