View and manage comparison results
After you run a data comparison, the comparison results appear in the Data Comparison document.
The Data Comparison document includes the following panes:
- Synchronization direction – Shows the synchronization direction: from source to target or from target to source.
- Data Comparison results grid – Shows objects for synchronization.
- Row Differences grid – Displays the records of the database object selected in the Data Comparison results grid.
Synchronization direction
The Synchronization direction pane displays:
- The source and target data sources
- The servers where the data sources reside
- The number of database objects selected for synchronization
- The total number of database objects in the comparison
- A search box to find objects by name
Tip
You can reverse the synchronization direction to update data from the opposite source.
Data comparison results grid
The results grid displays:
- All database objects selected for synchronization by default
- Objects grouped by type of difference - Different and Identical
- Checkboxes to include or exclude objects from the synchronization script
Note
When you run the comparison for the first time, the objects in the grid are grouped by type of difference.
The Data Comparison grid includes the following columns:
| Name | Description |
|---|---|
| Checkbox | Checkbox to include the object in or exclude it from the synchronization. |
| Source Owner | Schema to which the object belongs in the source database. |
| Source Object | Name of the object in the source schema. |
| Only in Source | Number of records that exist only in the source database for the selected object. |
| Different | Number of records where the source and target differ. |
| Identical | Number of records that match exactly in both databases. |
| Only in Target | Number of records that exist only in the target database. |
| Target Object | Name of the object in the target database. |
| Target Owner | Schema to which the object belongs in the target database. |
Note
The objects that haven’t been mapped or were unmapped are not displayed in the Data Comparison grid.
Tip
You can also view how individual rows differ between the source and target datasets in the Data Viewer dialog.
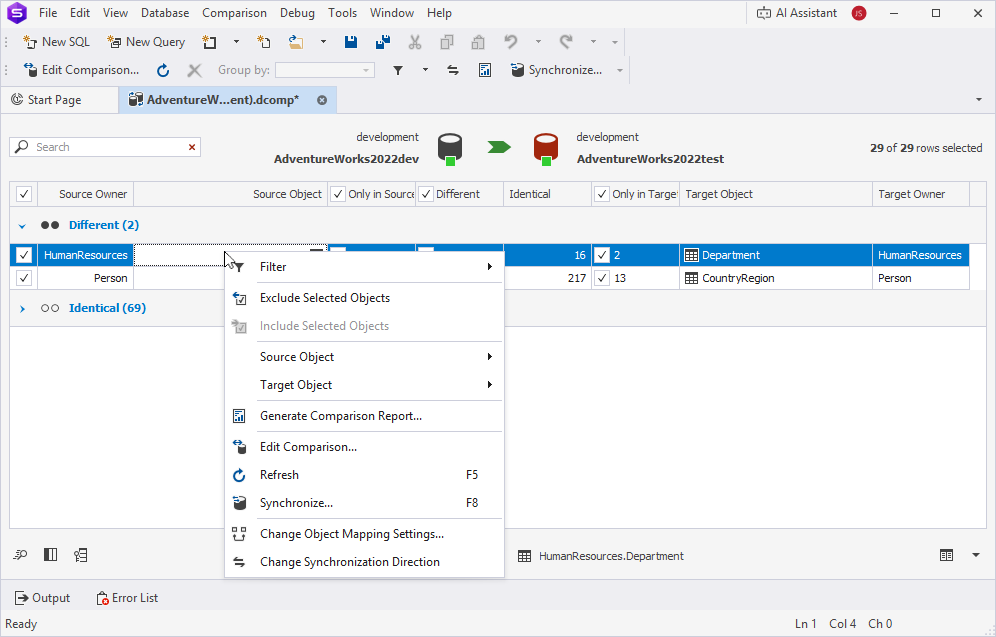
Refresh the comparison results
You can update the comparison results in one of these ways:
-
On the Comparison toolbar, click
 .
. -
Right-click the grid and select Refresh.
-
Press F5.
Expand or collapse object groups
Click the arrow to expand or collapse the group.

Include or exclude objects for synchronization
By default, all objects are selected for synchronization.
Exclude an object
Clear the checkbox for the object you want to exclude from synchronization.
Include or exclude records that exist only in the source database
- To include these records, select the checkbox in the Only in Source column header.
- To exclude them, clear this checkbox.
Include or exclude records that exist only in the target database
- To include these records, select the checkbox in the Only in Target column header.
- To exclude them, clear this checkbox.
Include or exclude records that differ between the source and target databases
- To include different records, select the checkbox in the Different column header.
- To exclude them, clear this checkbox.
Include or exclude specific records
- To include the selected records, right-click the grid and select Include Selected Records.
- To exclude the selected records, right-click the grid and select Exclude Selected Records.
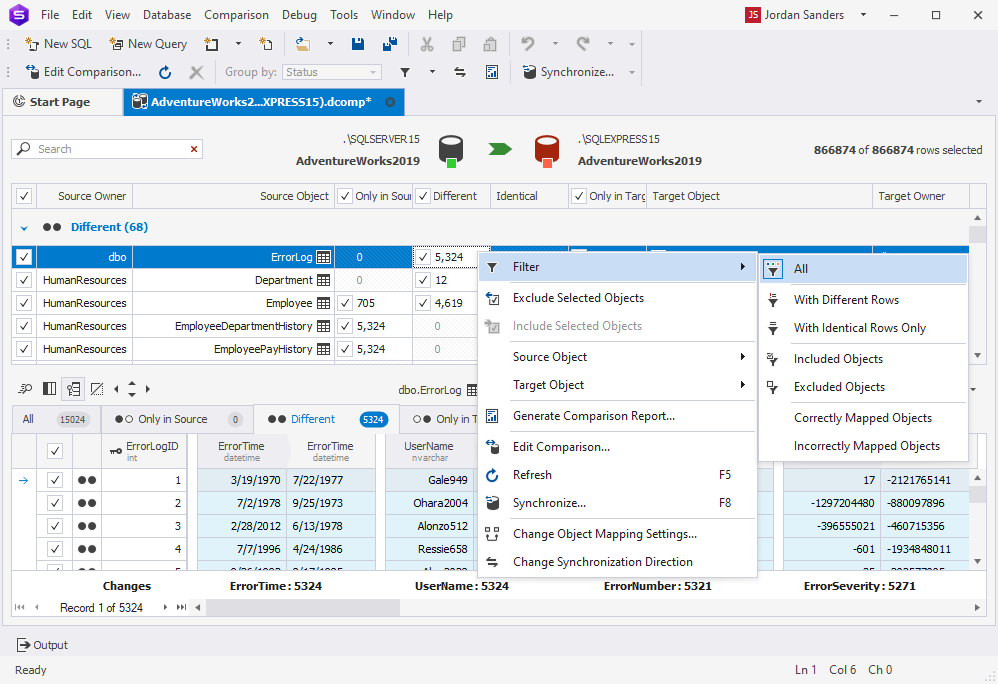
Filter object comparison results
To filter objects, do one of the following:
- Right-click the grid and select Filter, then choose the filtering option.
- All – All compared objects, regardless of their state.
- With Different Rows – Objects with at least one row that differs between the source and target.
- With Identical Rows Only – Objects that are completely identical between source and target (no differences).
- Included Objects – Objects you have selected for synchronization.
- Excluded Objects – Objects you have excluded from synchronization.
- On the Comparison toolbar, click
 and select the required option from the list.
Tip
You can select multiple options at a time.
Note
Tables with both different and identical records are always displayed, regardless of whether you select Different or Identical.
To clear filtering, on the Comparison toolbar, click and select All.
Change the comparison settings
You can change the comparison settings in one of these ways:
-
On the Comparison toolbar, click
 .
. -
Right-click the grid and select Edit Comparison.
Then, change the settings and click Compare.
Search for objects
To search for objects, type a search query in the search box.
Search behavior:
- Matching text is highlighted in yellow.
- The number of matches appears in the search box.
- The search is case-insensitive. For example, searching for pro matches both Pro, pro, and PRO.
-
If the query contains multiple words, each word is matched separately and all matches are highlighted.
- To clear the search results, click
 in the search box.
Use keyboard shortcuts
The table displays the keyboard shortcuts you can use in the search box.
| Shortcut | Description |
|---|---|
| Ctrl+A | Selects all. |
| Ctrl+Left Arrow (←) | Moves the caret to the beginning of the previous word. |
| Ctrl+Right Arrow (→) | Moves the caret to the end of the next word. |
| Ctrl+Shift+Left Arrow (←) | Selects text from the current caret position to the beginning of the current word, and moves the caret there. |
| Ctrl+Shift+Right Arrow (→) | Selects text from the current caret position to the end of the current word, and moves the caret there. |
| Ctrl+Backspace | Deletes the word to the left of the caret. |
Shortcut menu options
Right-click the Data Comparison results grid to access shortcut menu options.
Save comparison settings
You can save the comparison settings in one of these ways:
-
On the standard toolbar, click
 or
or  .
. -
In the top menu, select File > Save .dcomp or Save All.
-
Press Ctrl+S or Ctrl+Shift+S.
Note
If you save the .dcomp file before configuring the synchronization settings, it will contain the default synchronization settings.