Select data sources for comparison
dbForge Studio for SQL Server enables you to compare and synchronize different data sources, including databases, backups, and scripts folders. To start a new data comparison project, specify two data sources in the New Data Comparison wizard.
Note
You can compare any combination of data sources within your project, even if they are of different types.
Open the New Data Comparison wizard
Open the New Data Comparison wizard in one of these ways:
- In the top menu, select Comparison > New Data Comparison.
- On the Start Page, select Database Sync > New Data Comparison.
- In Database Explorer, right-click the server connection or database and select Tasks > New Data Comparison.
Tip
When you select two databases in Database Explorer for data comparison, dbForge Studio automatically assigns one as the source and the other as the target in the New Data Comparison wizard. You can swap the source and target if required.
Select source and target data sources
On the Source and Target page, select the source and target data sources you want to compare.
Note
After comparison, neither Source nor Target changes.
During synchronization, the Source remains unchanged. The Target is updated to match the Source unless the synchronization direction is reversed.
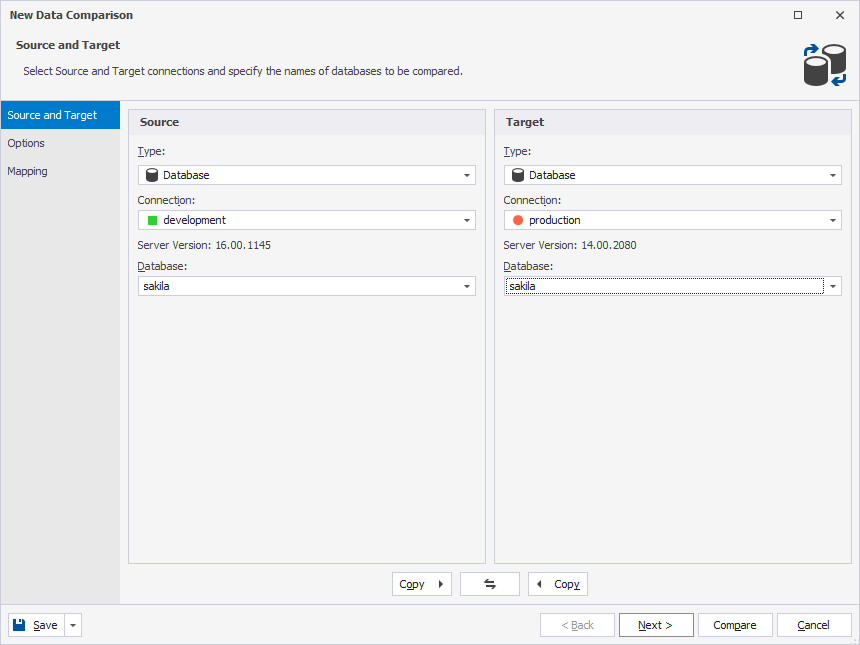
Database
1. In Type, select Database as the source, target, or both.
2. In Connection, select the server connections or create a new one.
To create a connection, in Connection, click Manage. In the Connection Manager dialog, click New, then follow the steps from Create a database connection.
3. In Database, select the databases you want to compare.
Tip
To refresh the list of databases, in Database, click Refresh.
Backup
dbForge Studio supports both full and differential backups. When you select a differential backup that is part of a backup set, the tool compares all changes recorded up to that backup, including modifications from earlier backups, but excluding changes from later backups.
Warning
Partial, filegroup, or transaction log backups are not supported. If you use a differential backup, you must also add the associated full backup.
To set a backup as a data source:
1. In Type, select Backup as the source, target, or both.
2. Click Add and select the backup file.
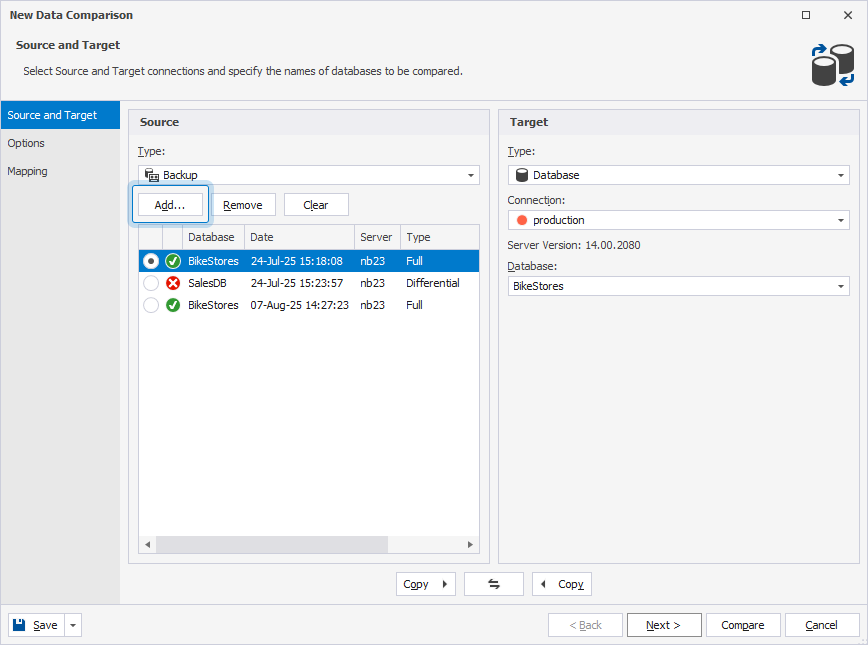
You can add multiple backup files. Each file is marked with one of the following icons:
-
 : The backup set is valid and complete.
 -
 : The backup set can’t be used as a data source.
To remove a backup file, click Remove, then click Yes to confirm the deletion operation. The associated files from the set will also be removed.
To remove all backup files, click Clear.
3. Configure the backup options.
Scripts folder
To set a scripts folder as a data source:
1. In Type, select Scripts Folder as the source, target, or both.
2. In Database scripts folder, use one of the following options:
-
Select a scripts folder from the list.
-
Click
 to create a scripts folder and add it as a data source.
 -
Click the ellipsis (…) to browse for and select the existing folder.
3. To apply the properties of the target database to the source, select Use target database properties.
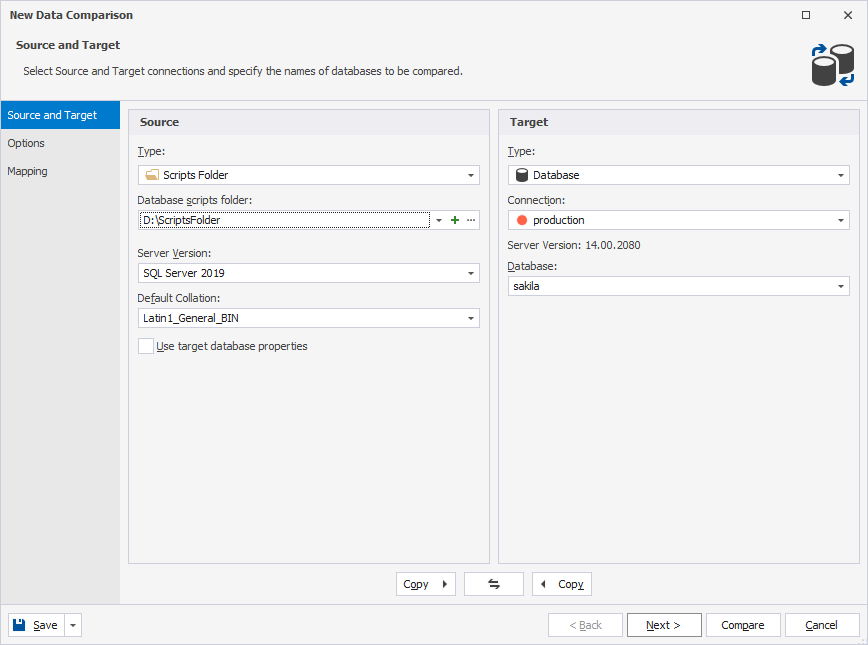
4. Configure the scripts folder options.
Swap source and target settings
To swap source and target settings, click ![]() .
.
Copy source and target settings
To copy source settings to the target, click ![]() .
.
To copy target settings to the source, click ![]() .
.
Save command-line settings to a file
You can save command-line settings to a .bat or a .dcomp file to automate or schedule data comparison tasks.
Note
You can save command-line settings on any page of the New Data Comparison wizard.
Save command-line settings to a .bat file
1. In the New Data Comparison wizard, select source and target data sources you want to compare.
2. Optional: Configure data comparison options.
3. In the lower-left corner of the wizard, click Save > Save Command Line.
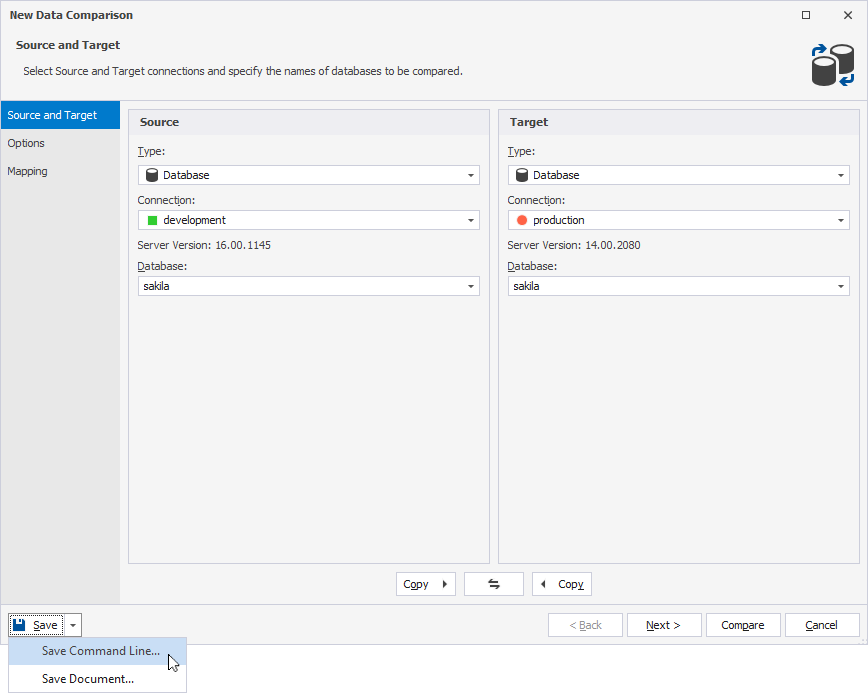
4. In the Command line execution settings dialog, configure the command-line settings.
5. To verify the settings, click Validate.
6. Click Save to save the file.
7. In the Save As dialog, specify the file name and path to store the .bat file, then click Save.
Save command-line settings to a .dcomp file
1. In the New Data Comparison wizard, select source and target data sources you want to compare.
2. Optional: Configure data comparison options.
3. In the lower-left corner of the wizard, click Save > Save Document.
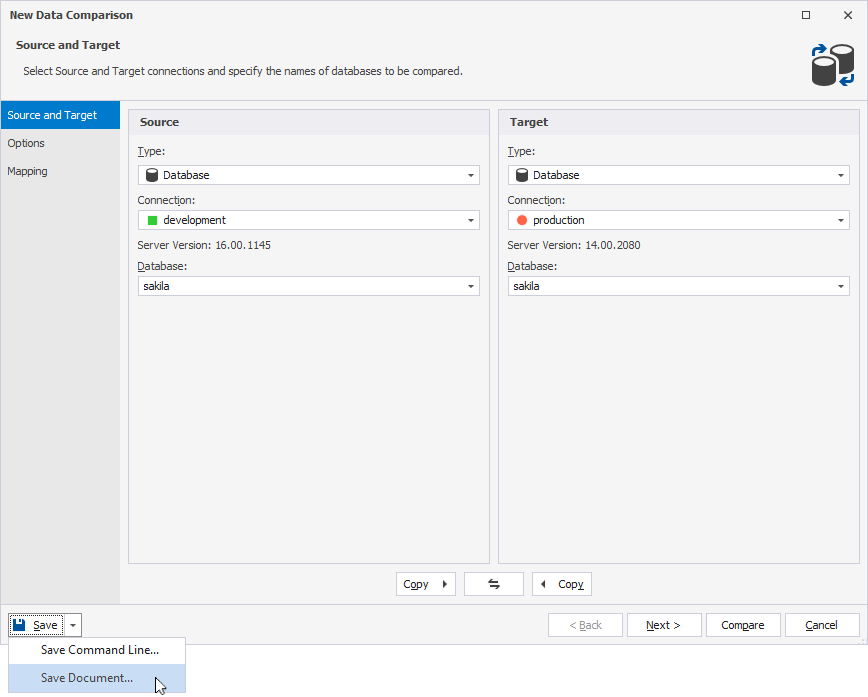
4. In the Save File As dialog, specify the file name and path to store the .dcomp file, then click Save.
Compare data
After you select data sources and configure data comparison options (optional), or map schemas, tables, or columns, click Compare to start a data comparison process.
Note
You can start the data comparison process from any page of the wizard.