Creating a report with the table of contents
A report with a table of contents is a structured document that presents detailed information on a specific topic or subject, organized into sections and subsections. The table of contents is a list at the beginning of the document that shows the titles of these sections and the page numbers where you can find them, making it easy for readers to quickly find what they are looking for and navigate the report through multiple topics.
Prerequisites
We’ll use the following SELECT statement as the data set to illustrate the generation of the report with the table of contents. The sample database is AdventureWorks2022.
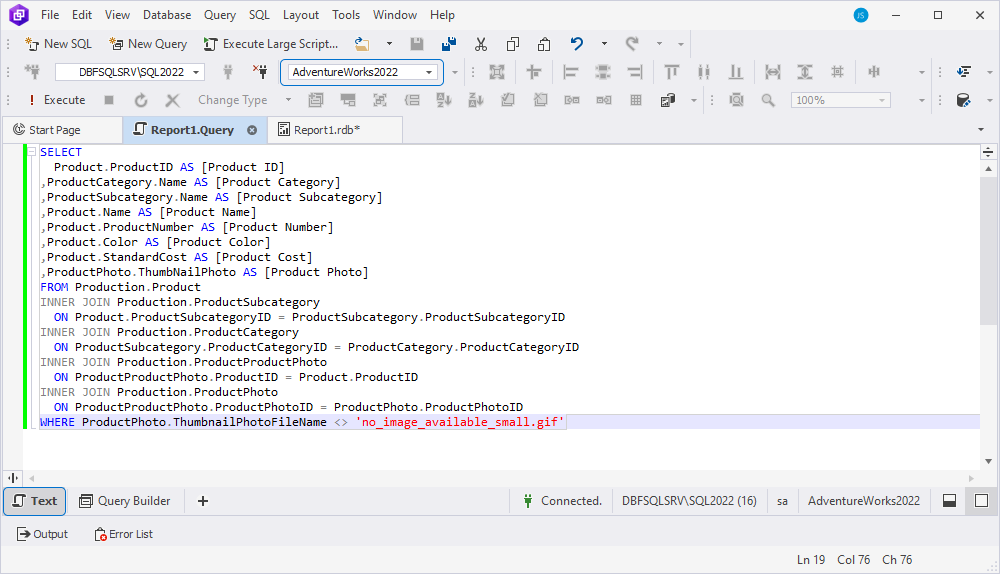
SELECT
 Product.ProductID AS [Product ID]
,ProductCategory.Name AS [Product Category]
,ProductSubcategory.Name AS [Product Subcategory]
,Product.Name AS [Product Name]
,Product.ProductNumber AS [Product Number]
,Product.Color AS [Product Color]
,Product.StandardCost AS [Product Cost]
,ProductPhoto.ThumbNailPhoto AS [Product Photo]
FROM Production.Product
INNER JOIN Production.ProductSubcategory
  ON Product.ProductSubcategoryID = ProductSubcategory.ProductSubcategoryID
INNER JOIN Production.ProductCategory
  ON ProductSubcategory.ProductCategoryID = ProductCategory.ProductCategoryID
INNER JOIN Production.ProductProductPhoto
  ON ProductProductPhoto.ProductID = Product.ProductID
INNER JOIN Production.ProductPhoto
  ON ProductProductPhoto.ProductPhotoID = ProductPhoto.ProductPhotoID
WHERE ProductPhoto.ThumbnailPhotoFileName <> 'no_image_available_small.gif'
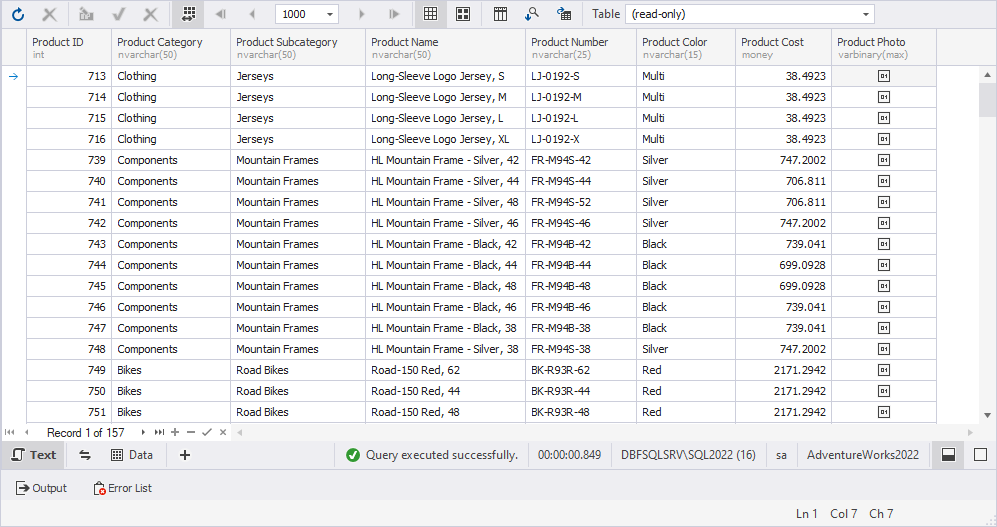
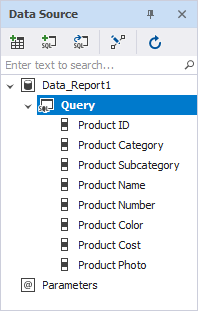
The query returns flat information about products, including product IDs, names, numbers, colors, costs, categories, subcategories, and thumbnail photos from multiple related tables.
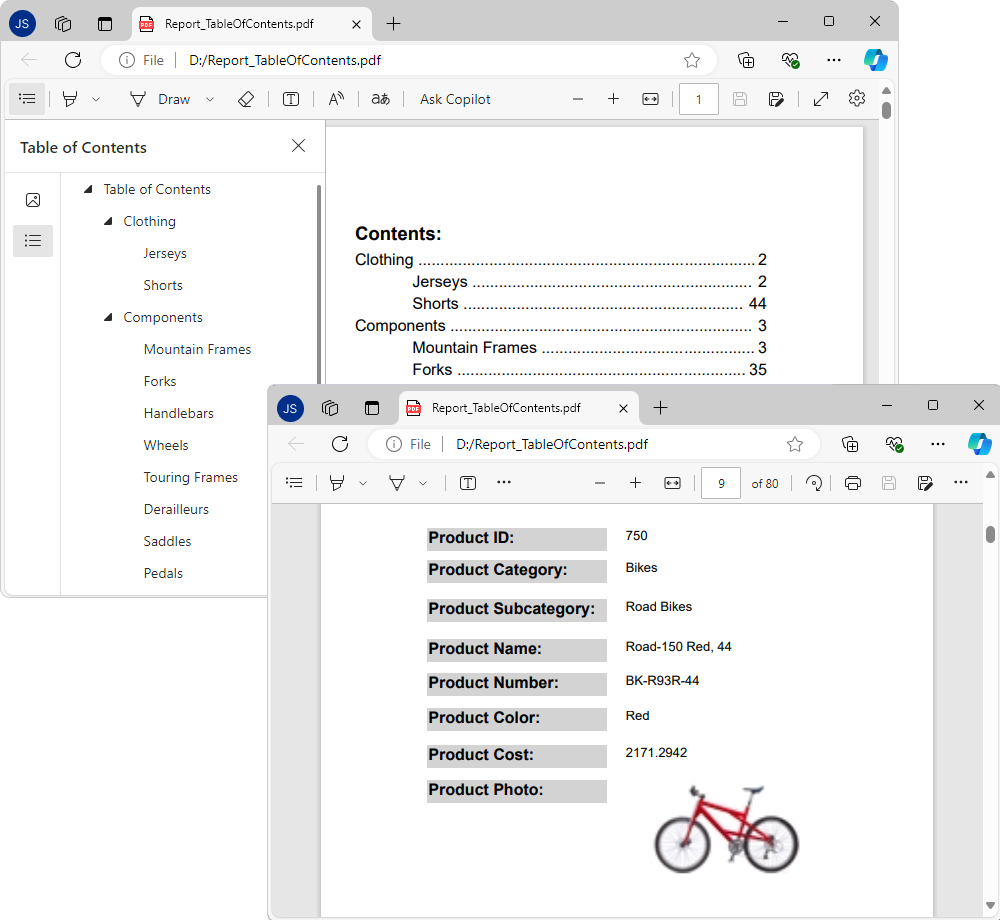
To speed up the navigation through complex reports, we’ll create a report with a table of contents grouped by product categories. Clicking the item in the contents will navigate to the section containing the associated element.
Create a report with the table of contents
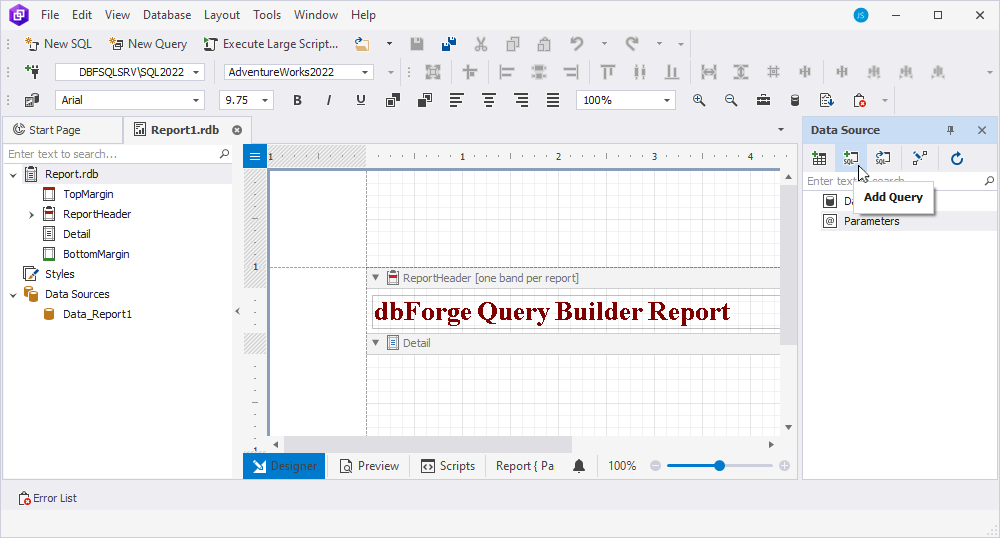
1. Go to File and select New > Blank Data Report to open the Report Designer.
2. Add the query to the report based on which the data will be retrieved:
- On the Data Source toolbar, click
 Add Query.
In the Report1.Query document that opens, select the database for which you create the report, switch to the Text view at the bottom of the document, insert a SQL query, and save the report.query document.
- Go back to the Report Designer document > Data Source. It now displays the query with the fields.
3. On the Report Designer toolbar, select ![]() Toolbox and drag the Table of Contents control to the ReportHeader band of the blank report. If needed, expand the ReportHeader band by moving its resize handles.
Toolbox and drag the Table of Contents control to the ReportHeader band of the blank report. If needed, expand the ReportHeader band by moving its resize handles.
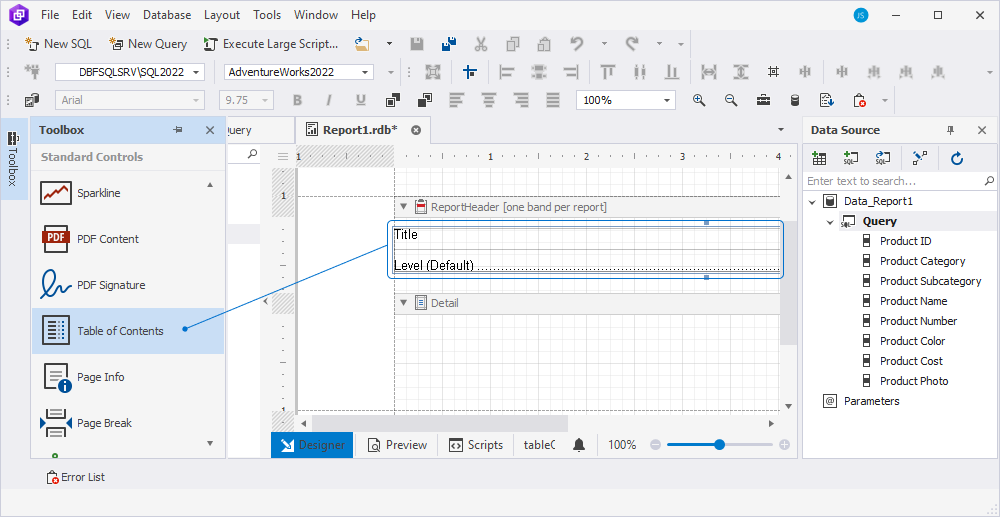
The Table of Contents control contains the following elements:
- Title: Determines a heading of a specific section or subsection in the report.
- Level (default): Indicates the hierarchy or position of a section within the overall structure of the report. It defines whether a section is a main section or a subsection within another section. For example, Level1 represents main sections, Level2 represents subsections under the main section, Level3 represents even more detailed subdivisions, etc.
4. Change the default text of the title to the required one. In our example, it is Contents:.
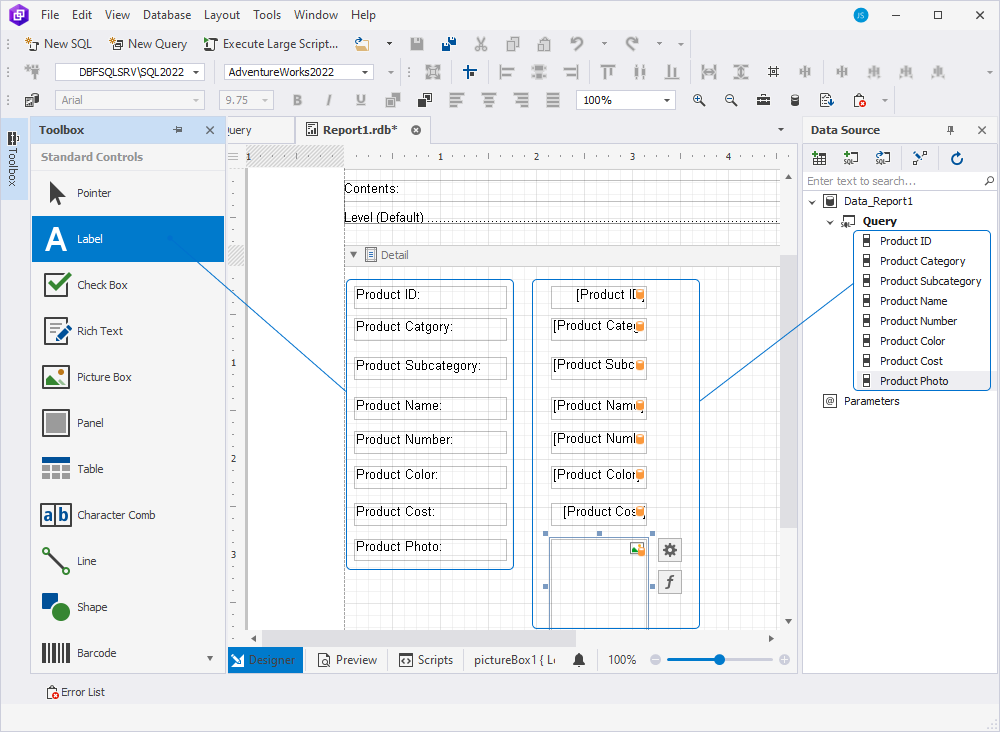
5. Create labels per field and then bind them to the fields.
To create the label, drag Label from Toolbox to the Detail band - add one label for each field you want to display. Then, double-click the default text in the Label control to change it. In our example, the new text will be Product ID:, Product Category:, Product Subcategory:, Product Name:, Product Number:, Product Color:, Product Cost:, and Product Photo:.
To bind the labels to the data fields, drag the required data fields from the Data Source tree to the report’s Detail band next to the required labels.
6. Add bookmarks to the report element to map the report elements’ hierarchy to the Document Map.
Note
Report bookmarks must be set to build a table of contents. Otherwise, the following error may occur: No bookmarks were found in the report. To create a table of contents, specify a bookmark for at least one report element.
For the multilevel table of contents, the bookmark must be specified for each included element.
7. Switch to the Detail band.
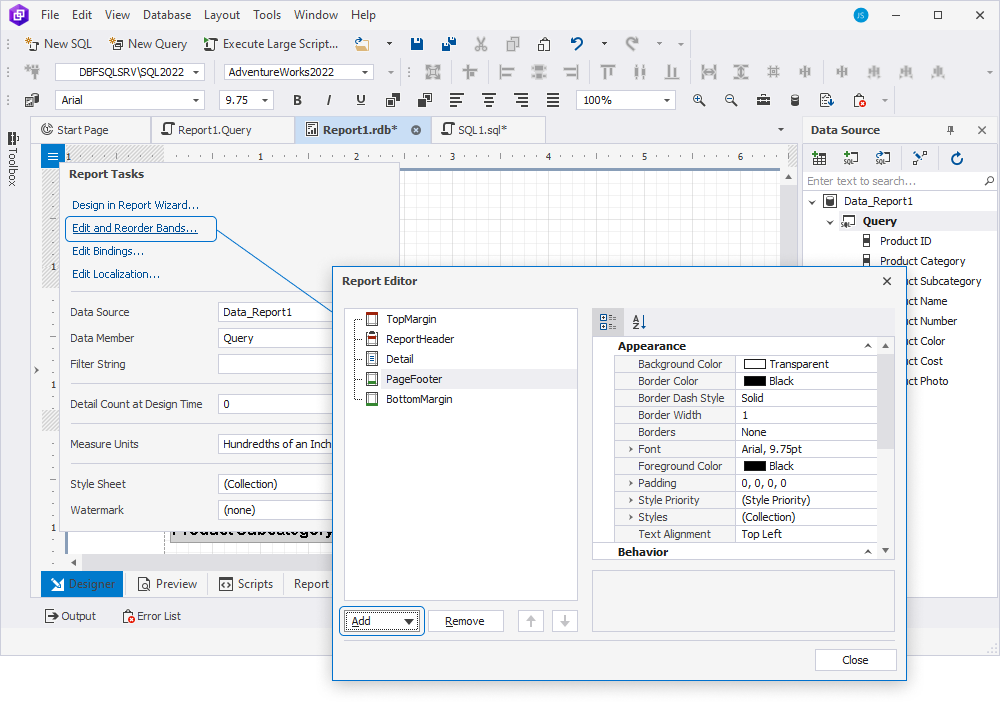
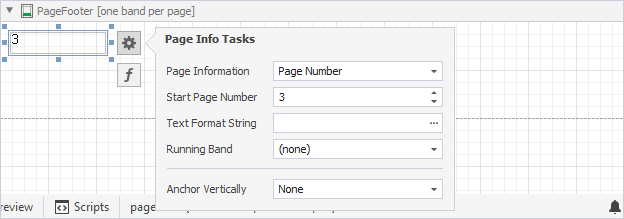
8. Add page numbers to the bottom of each page in the report:
- Click the top-left corner of the Report Designer and select Edit and Reorder Bands to open the Report Editor.
- Click the Add menu and select Band > PageFooter.
- Select Close to save the changes.
In Report Designer, select the added PageFooter band. Then, drag the PageInfo control from Toolbox to the PageFooter band. To change the format of page numbers shown in the report, click the settings icon and set the page parameters in the Page Info Tasks editor.
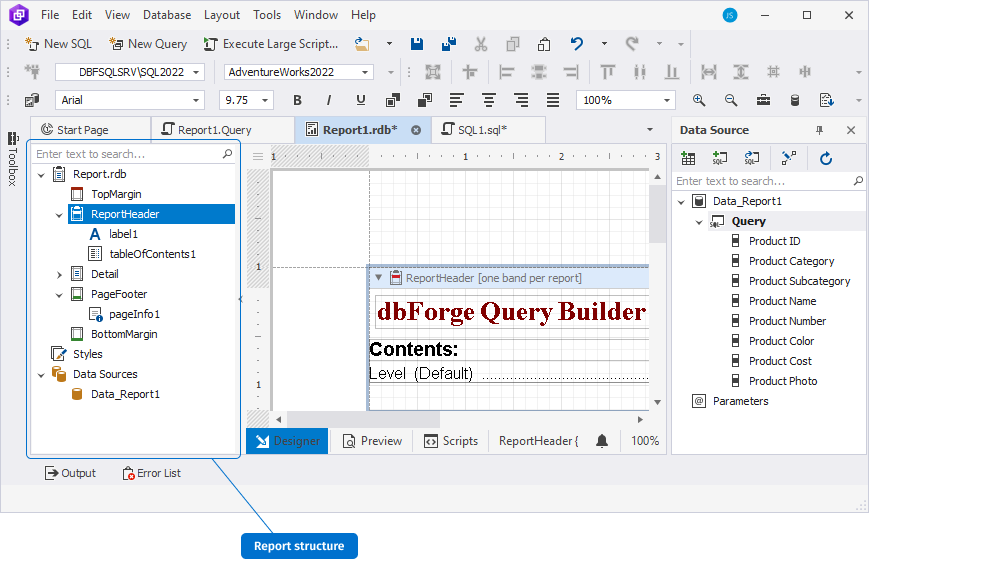
The report structure is shown on the left side of the report document. Note that bound controls are marked with yellow database icons.
Now, we’ll customize the appearance of the report.
Customize the report appearance
Use the Properties pane to customize the appearance of bands and labels on the report, such as background color, font, text alignment, and other settings. To open it, select View > Properties on the ribbon or press F4.
Note
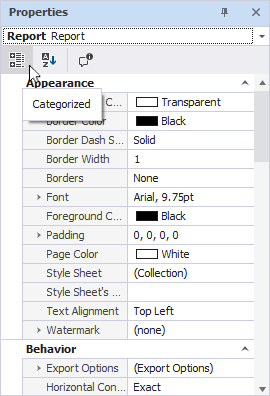
For easier navigation, select Categorized on the Properties toolbar.
Add bookmarks to the report
In our example, we build a parent-child structure for the Table of Contents, where the parent bookmark represents Product Category and the child one represents Product Subcategory.
To add a bookmark
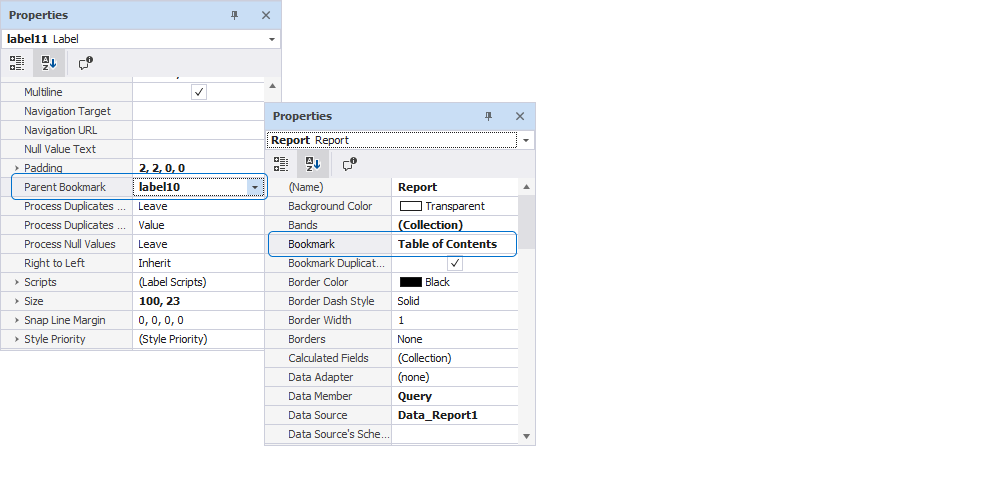
1. In the Detail band, select Product Category and then select the function icon. In the Expression Editor, select Bookmark in the left-side menu. Under Query, double-click Product Category and select Apply > OK to save the changes.

2. In the same way, select Product Subcategory in the Detail band and bind the bookmark property to the Product Subcategory data field.
3. To make the parent-child hierarchy of the table of contents, open the Properties window by selecting View > Properties on the ribbon.
4. From the Properties menu, select the child label for which you set the parent bookmark. Then, navigate to the Parent Bookmark property and choose the label you want to define as parent. In our example, we select label10 (which corresponds to Product Category) as the parent bookmark for label11 (which corresponds to Product Subcategory).
Note
To prevent cyclic bookmarks, avoid setting two bookmarks as parents of each other. Otherwise, an exception occurs when you try to generate the report document.
Then, select the report element in the Properties menu and specify the main heading for the Document Map in the bookmark property. In our example, the main heading is Table of Contents.
Note
The dbForge tool will display the default report name if you do not specify the root bookmark.
In addition, the tool automatically prevents duplicate bookmarks to avoid having multiple bookmarks with the same name in the final document. However, you can enable duplicate bookmarks by selecting the checkbox next to the Duplicate Bookmark property in the Properties window.
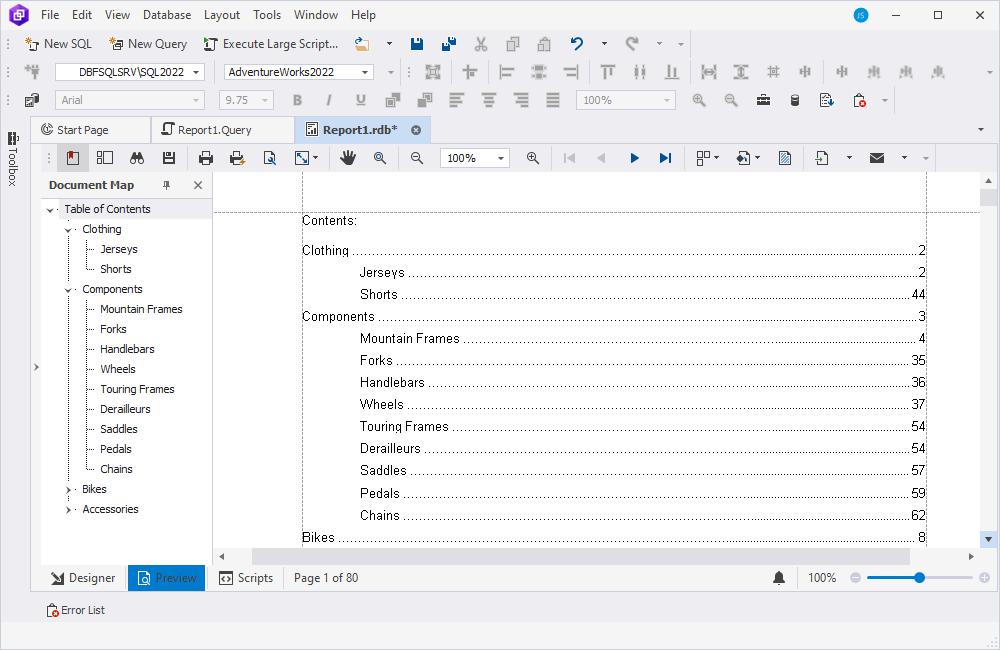
5. Switch to the Preview view to see how the table of contents looks like. You can easily navigate the report by selecting the required element in the Document Map.
Export a report to a PDF file
You can save the report or export it to the required file format.
To export the report
1. Switch to the Preview view and select Export Document > PDF on the toolbar.
2. In the PDF Export Options dialog that opens, specify the file parameters and select OK.
3. In the Save As window that opens, specify the file name and path to store the file and select OK to save the file.
The following image illustrates the report with the hierarchical Document Map. Clicking any bookmark will navigate directly to the corresponding section of the document.