How to group and sort data in a report
The tutorial describes how to group and sort data in a report.
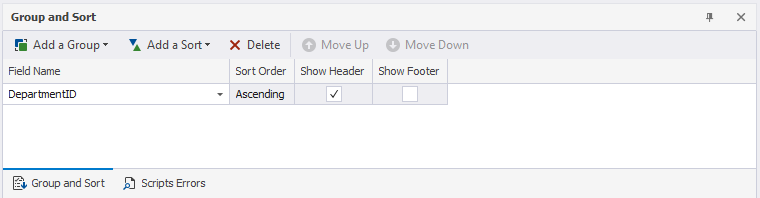
To access the Group and Sort window, click ![]() on the Report Designer toolbar.
on the Report Designer toolbar.
Note
Grouping and sorting can be applied to a data-bound report.
The Group and Sort window enables you to apply data sorting and grouping:
- Group or sort data by a column or a calculated field
- Sort columns in an ascending or descending order
- Delete data grouping or sorting
- Move up or down data grouping or sorting
To group and sort data
1. In the Group and Sort window, click Add a Group and select the data field by which you want to group data.
This creates an empty group header with a corresponding group field and adds it to the Group Field collection.
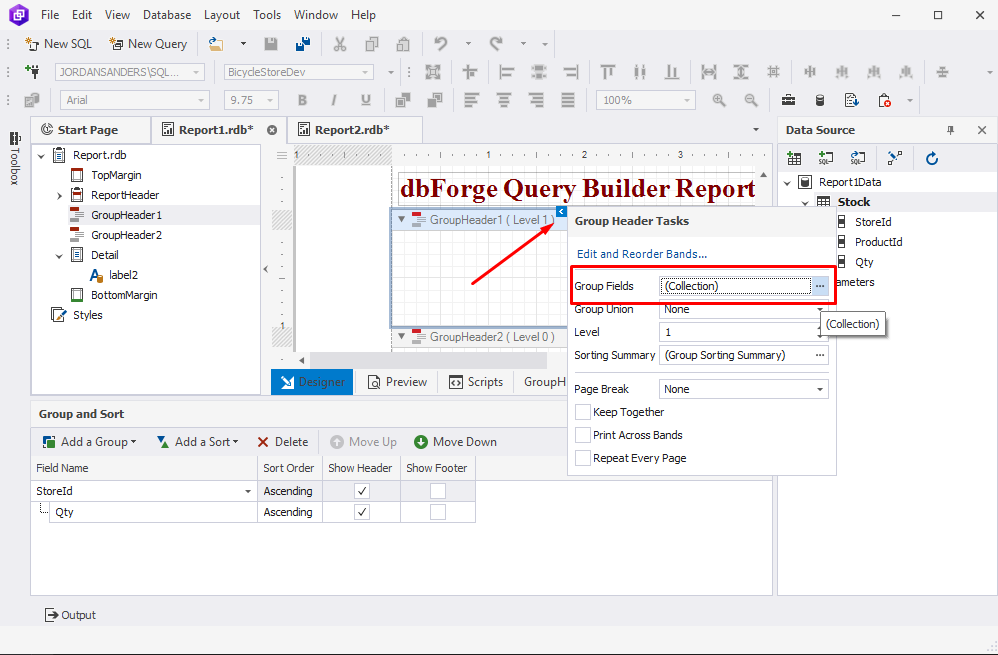
2. You can assign this group in the Group Field Collection Editor.
3. To open the editor, in the GroupHeader band, click the group header’s smart tag. Then, click ![]() More Options in the Group Fields box.
More Options in the Group Fields box.
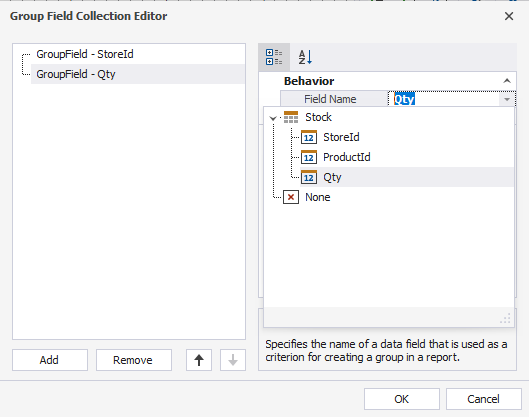
4. In the Group Field Collection Editor dialog that opens, you can do the following:
- Add a new group and set up a grouping criterion
- Remove a group
- Use the up and down arrows to set the order of the created group criteria based on which report data will be arranged
- Arrange the order for sorting
Once done, click OK.
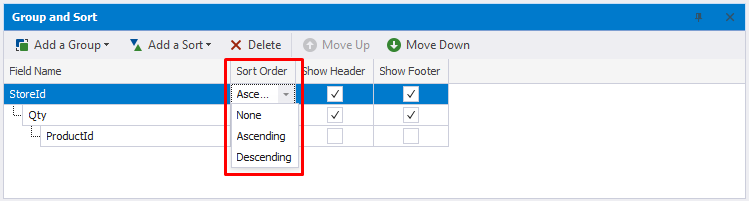
5. Optional: In the Group and Sort window, set the sorting order for the group - either ascending or descending.
If you have already arranged the group order in the data source and you do not want to sort groups in the report, select None.
6. Select the Show Header and/or Show Footer checkboxes to display an empty header/footer for the group.
7. (for multiple groups) Use Move Up and Move Down to change the order of groups applied.
Manage group settings
With the help of the smart tag of the group band, you can customize group settings.
1. In the GroupHeader band, click the group header’s smart tag.
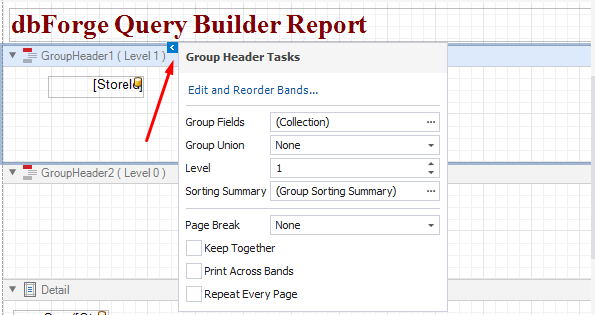
2. In the Group Header Tasks that opens, customize the following options:
- Group Fields: Add, remove, and manage groups.
- Group Union: Manage the group printing.
- None: Group content is located on several pages if the whole group cannot be printed on a single page.
- Whole Page: Group content is printed on a single page. If the content cannot be located on a single page due to its volume, it will be printed on the following page.
- With First Detail: Group header is printed in the first detail row of each group.
- Page Break: Add a page break when printing a report.
- Keep Together: Print the group header and footer along with the group content on the same page.
- Print Across Bands: Print the group content as a background layer across all other bands of the same group.
- Repeat Every Page: Print the group on each page of the report.