How to use report parameters
A parameterized query enables you to declare a parameter in a SQL query instead of the value. Parameters are used to filter data in reports in a dynamic (when loading a parameter from data source) or static (when selecting a parameter from the predefined list) way. The dbForge tool lets you add, edit, or delete parameters to or from queries in data reports.
For demo purposes, we are going to filter data in the HumanResources.Department table of the AdventureWorks2019 database based on the value added to the parameter.
Create a parameter in a SQL query
1. On the Database menu, click Report Designer.
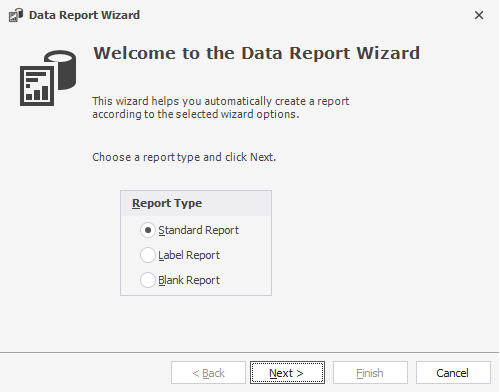
2. In the Data Report Wizard that opens, select the type of the report and click Next. In our case, it is a Standard Report.
3. Choose a database connection, a Custom Query data type, and click Next.
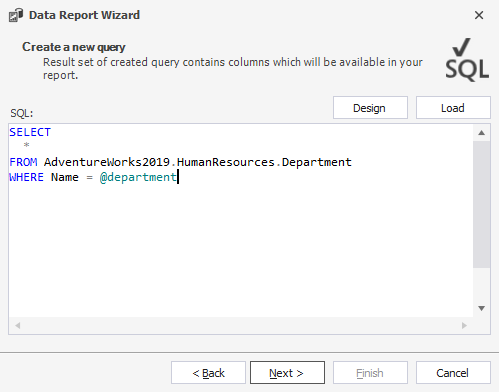
4. On the Create a new query page, enter a query and declare a parameter. Then, click Next.
5. Select the columns to be displayed in the report and click Finish.
6. In the Data Source pane, right-click Query and select Edit Parameters.
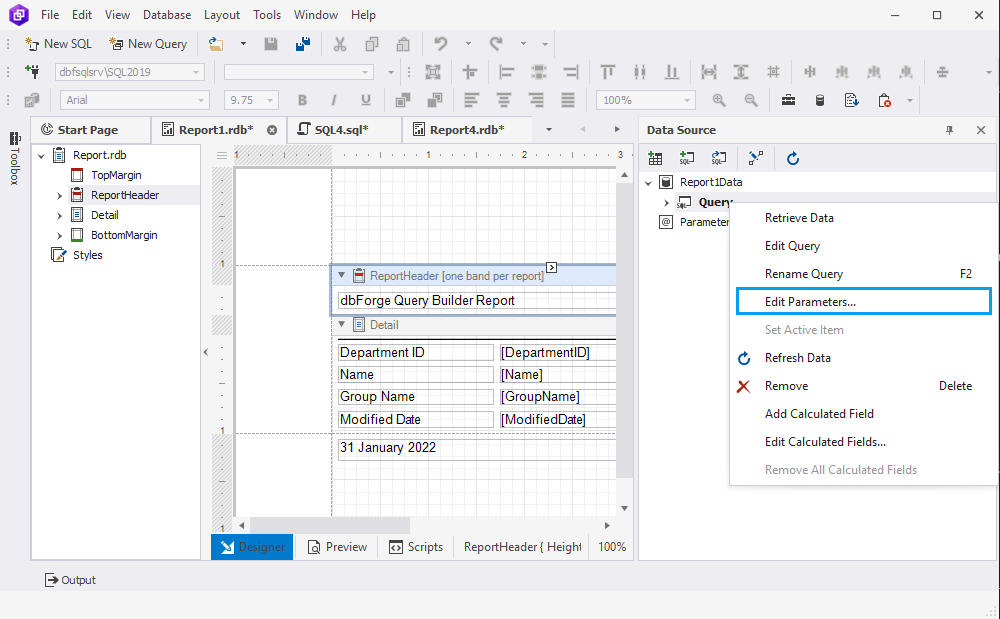
The Edit Parameters dialog opens.
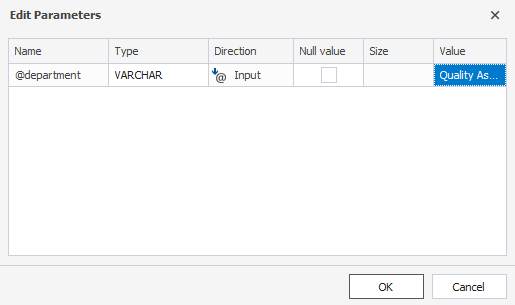
7. In the Value column, enter the value for the @department parameter by which data will be filtered and click OK.
8. Switch to the Preview view to see the result.
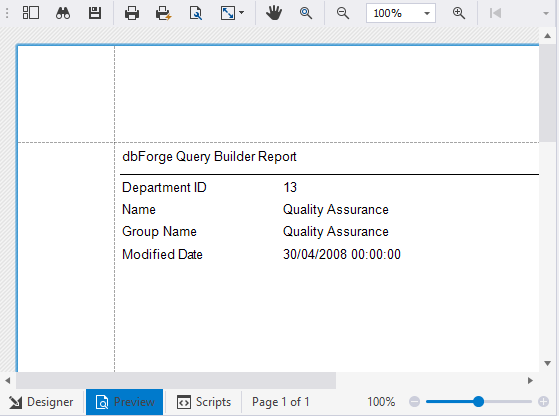
Add a parameter manually
Prerequisites: We created a report for the HumanResources.Department table of the AdventureWorks2019 database. For more information about how to create a data report, see Creating a simple data-aware report.
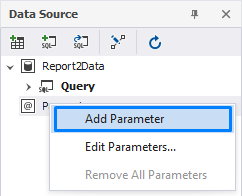
1. In the Data Source window, right-click Parameters and select Add Parameter.
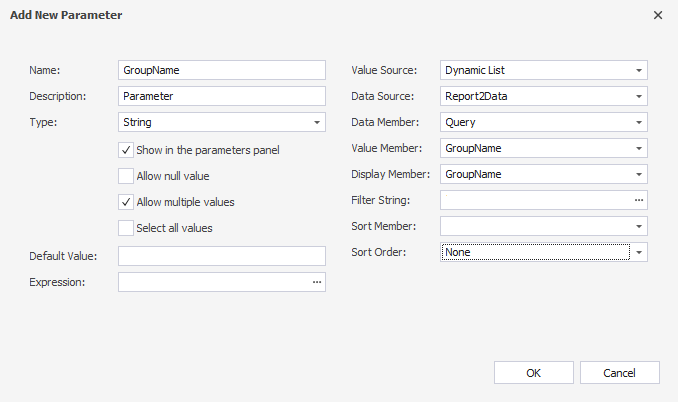
2. In the Add New Parameter dialog that opens, specify the following details:
- Name: Enter a name of the parameter.
- Description: Add a description of the parameter.
- Type: Select a parameter type from the drop-down list. The types include string, date, number, boolean, and guid.
- Select the Show in the parameters panel checkbox.
- Value Source: Select the value source. They include dynamic or static list.
Note
If you enter the value for the Default Value field, it will be selected in the list of applied parameter values by default when you switch to the Preview view.
3. Under the Dynamic List value source, do the following:
- Data Source: Select the data source for the parameter value.
- Data Member: Select the query for the parameter value.
- Value Member: Select the data field that provides values for the parameter.
- Display Member: Select the data field that display the value name.
- Optional: Sort Member: Specify the value by which data will be sorted.
- Optional: Sort Order: Select the order: either ascending or descending.
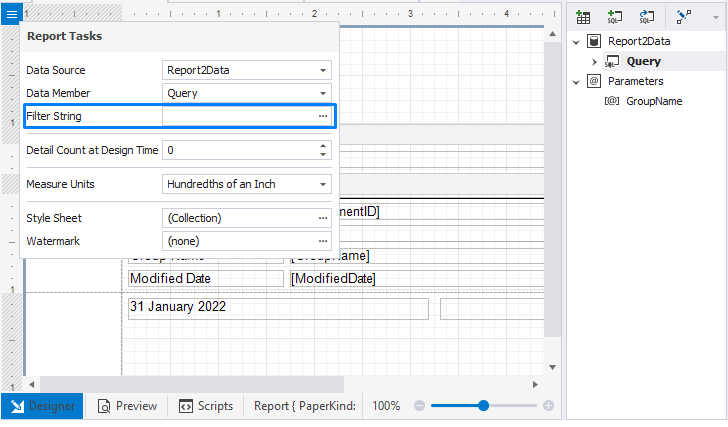
4. Click OK to save the changes. The created parameter is now displayed under the Parameters node in the Data Source pane.
5. After the parameter has been created, apply the parameter to the report. To do so, click ![]() Smart Tag.
Smart Tag.
6. In the Report Tasks > Filter String field, click ![]() More options to add a filter.
More options to add a filter.
7. In the FilterString Editor that opens, enter the condition based on which data will be filtered and then click OK.
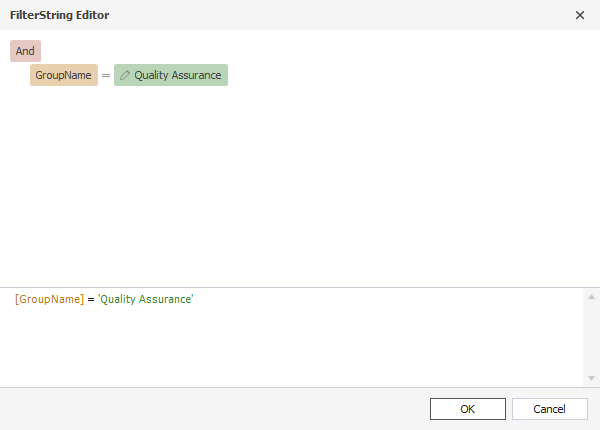
8. Switch to the Preview view. Under Parameters > Value Member, select the filtering parameter you have created, click OK, and then click Submit.
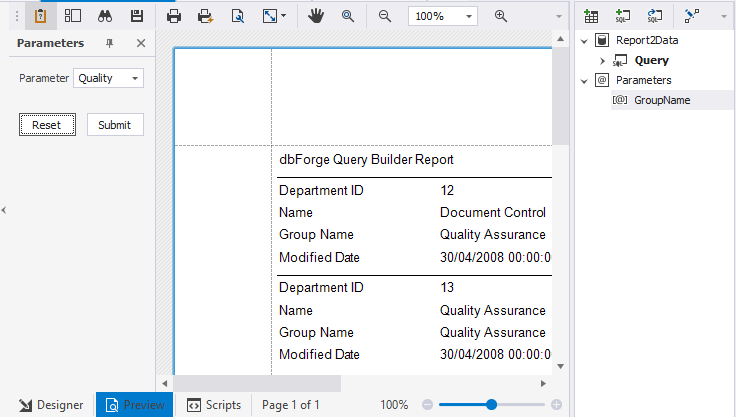
As you can see, the retrieved data matches the filtering condition.
Edit a parameter
1. In the Data Source window, right-click Parameters and select Edit Parameter.
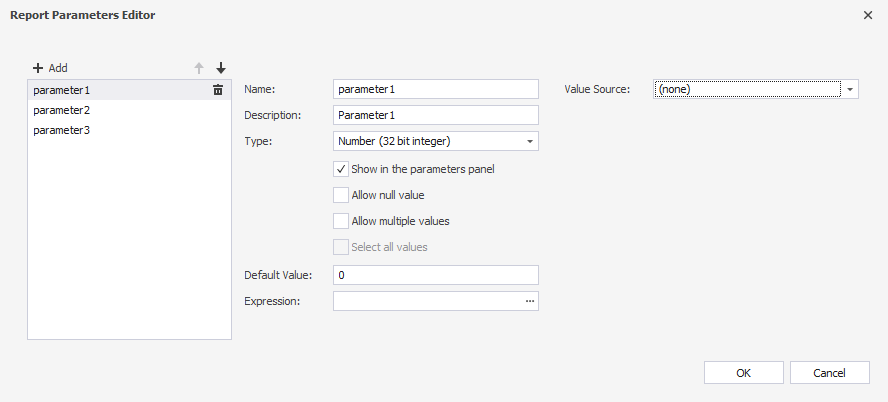
2. In the Report Parameters Editor dialog that opens, you can update the following parameter details and click OK.
- (for multiple parameters) Change the order of parameters
- Add a new parameter by clicking Add
- Remove a parameter by clicking
 next to the selected parameter
 - Edit the name and description of the selected parameter
- Change the parameter type, default value, and value source
- Define a new expression or edit an existing one
- Hide/display a parameter in the Parameters panel by clearing/selecting the Show in the parameters panel checkbox
- Allow or disallow null and multiple values by selecting or clearing the corresponding checkboxes
Remove a parameter
To remove a parameter from the query, in the Data Source window, right-click Parameters and select Remove Parameter. If you want to delete all parameters, select Remove All Parameters on the shortcut menu.