Tables
A table is a database object that stores data in rows and columns.
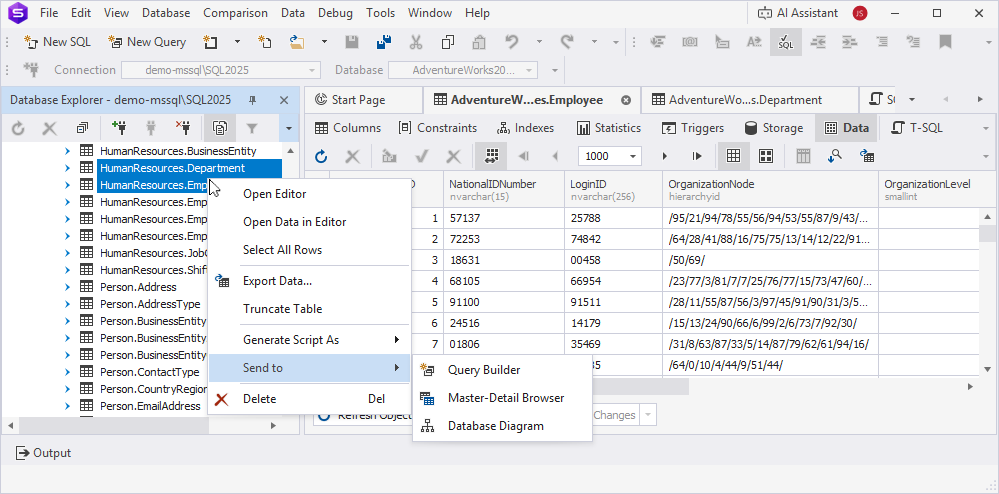
In Database Explorer, you can perform operations on tables by using the shortcut menu. Right-click a table in Database Explorer to access options for specific tasks, such as creating, editing, or dropping a table, viewing and managing table data, or exporting or importing data.
Create a table
1. In Database Explorer, right-click a table or Tables node and select New Table.
2. In Table Editor, configure the table settings.
3. At the bottom of Table Editor, click Apply Changes.
Edit a table
1. In Database Explorer, right-click the table you want to edit and select Open Editor.
2. In Table Editor, update the table settings.
Note
In the visual Table Editor, changing the table schema is not supported. This action requires moving the table to a different schema, rather than modifying its structure.
3. At the bottom of Table Editor, click Apply Changes to save and apply the changes made to the table.
Delete a table
1. In Database Explorer, right-click the table you want to delete and select Delete, or press Delete.
2. Click Yes to confirm the deletion of the table.
Note
You cannot undo the drop table operation, as this action permanently deletes all its data and the table structure. It is recommended that you back up the database before deleting it.
View and manage table data
1. In Database Explorer, right-click the table whose data you want to view and manage and select Open Data in Editor.
Alternatively, select Open Editor and switch to the Data tab.
2. On the Data tab of Table Editor, view the data in the grid.
3. To perform any action on the data, right-click the selected row and select the required command from the shortcut menu.
For more information, see Work with data in Data Editor.
Retrieve data
To retrieve data from the selected table, in Database Explorer, right-click it and select Select All Rows.
Truncate a table
1. In Database Explorer, right-click the table from which you want to delete all data and select Truncate Table.
2. Click Yes to confirm truncating the table.
Note
You cannot undo the truncate table operation, as this action permanently deletes all data. To avoid data loss, back up the database before deleting the table.
Rename a table
1. In Database Explorer, right-click the selected table and select Rename.
2. Specify the new table name, then press Enter.
3. Click Yes to confirm the renaming of the table.
Duplicate a table
1. In Database Explorer, right-click a required table and select Duplicate Object.
2. In the Duplicate Object dialog, configure the object settings:
- In Destination connection, select the target server.
- In Destination database, select the target database.
- In Destination schema, select the target schema.
- In New object name, specify the object name.
- Select Copy data to copy the table with the data.
- Select Drop destination object to drop the destination object if it already exists. The table data will be lost.
- Optional: Select Script Changes, then select To New SQL Window to open the generated script in a new SQL document, or To Clipboard to copy it to the clipboard.
3. Click OK.
Find an object
1. In Database Explorer, right-click the database where you want to search for an object and select Find Object, or press Ctrl+D, F.
2. In the Search window, switch to the Search objects by name and DDL mode and enter the search string.
3. Follow the steps in How to search for database objects.
Refresh the table
To update the table to reflect the latest changes, in Database Explorer, right-click the table or Tables node and select Refresh, or press F5.
Open the Properties window
To open the Properties window, in Database Explorer, right-click the table and select Properties, or press F4.
Filter tables
1. In Database Explorer, right-click the Tables node and select Filter.
2. In the Filter Settings dialog, configure the filter parameters.
3. Click OK to apply the filter.
Note
When you open the Tables node, the number of objects it contains appears in parentheses next to the node name. This number changes based on your filter settings.
Shortcut menu options for a table
The following table describes the shortcut menu commands available for the Tables node in Database Explorer.
| Name | Description |
|---|---|
| New Table | Opens Table Editor to create a table. |
| Open Editor | Opens Table Editor to create or edit a table. |
| Open Data in Editor | Opens the Data tab of Table Editor to view and manage table data. |
| Select All Rows | Retrieves data from the selected table. |
| Manage Index Fragmentation | Opens the Index Manager document to analyze SQL indexes by collecting index fragmentation statistics and detecting databases that require maintenance. |
| Source Control > Source Control Manager | Opens Source Control Manager, where you can track and manage changes to database schema and static data. When Source Control Manager is already open, this option refreshes it. |
| Source Control > Commit | Opens Source Control Manager with all local changes (if any) selected and ready to commit. When Source Control Manager is already open, this option refreshes it and selects all local database changes. |
| Source Control > Get Latest | Opens Source Control Manager with all remote changes (if any) selected, ready to pull using Get Latest. When Source Control Manager is already open, this option refreshes it and selects all remote database changes. |
| Source Control > Link/Unlink Static Data | Opes the Source Control Link Static Data dialog that displays the tables whose data you want to link. |
| Export Data | Opens the Data Export wizard to export data to a file with the supported file extension. |
| Import Data | Opens the Data Import wizard to import data. |
| Truncate Table | Permanently deletes all data from the selected table. |
| Duplicate Object | Opens the Duplicate Object dialog to copy object structure and/or data. |
| Generate Script As | Generates a script of the selected object using the CREATE, DROP, DROP and CREATE, SELECT, INSERT, UPDATE, DELETE, INSERT/UPDATE STORED PROCEDURE, or CRUD statements. The script can be saved to a new SQL document or a file, or copied to the clipboard. |
| Send to > Query Builder | Adds the selected table to the Query Builder diagram. |
| Send to > Master Detail Browser | Adds the selected table to the Master Detail Browser document. |
| Send to > Database Diagram | Adds the selected table to a database diagram. |
| Send to > Data Report | Adds the selected table to a simple data report. |
| Send to > Chart Designer | Opens Chart Designer to create a chart. |
| Send to > Pivot Table | Opens the query document to create a pivot table. |
| Show Details | Opens Object Viewer that displays object details. |
| Rename | Lets you enter a new name for the selected table. Shortcut: F2 |
| Delete | Drops the selected table from the database. Shortcut: Delete |
| Refresh | Updates the object to reflect the latest changes. Shortcut: F5 |
| Properties | Opens the Properties pane that displays the object information. Shortcut: F4 |
Note
After opening the Tables node, the number of objects it contains appears in parentheses next to the node name. This number changes based on your filter settings.
Bulk operations
In Database Explorer, hold down Ctrl and select multiple tables. Then right-click the selection and select the required option.
The following table describes the shortcut menu options available for multiple tables.
| Name | Description |
|---|---|
| Open Editor | Opens Table Editors for each selected table. |
| Open Data in Editor | Opens the Data tab of Table Editors for each selected table. |
| Select All Rows | Retrieves data from the selected tables. |
| Source Control > Source Control Manager | Opens Source Control Manager, where you can track and manage changes to database schema and static data. When Source Control Manager is already open, this option refreshes it. |
| Source Control > Commit | Opens Source Control Manager with all local changes (if any) selected and ready to commit. When Source Control Manager is already open, this option refreshes it and selects all local database changes. |
| Source Control > Get Latest | Opens Source Control Manager with all remote changes (if any) selected, ready to pull using Get Latest. When Source Control Manager is already open, this option refreshes it and selects all remote database changes. |
| Source Control > View Changes History | Opens the Changes History document that displays all revisions, including committed changes. |
| Source Control > Link/Unlink Static Data | Opes the Source Control Link Static Data dialog that displays the tables whose data you want to link. |
| Export Data | Opens the Data Export wizard to export data from the selected tables. This option is available only for the tables located on the same server. |
| Truncate Table | Permanently deletes all data from the selected tables. |
| Generate Script As | Generates a script of the selected objects using the CREATE, DROP, DROP and CREATE, SELECT, INSERT, UPDATE, DELETE, INSERT/UPDATE STORED PROCEDURE, or CRUD statements. The script can be generated to a new SQL document or a file, or copied to the clipboard.If you select tables from different servers, you can generate only the CRUD statements. |
| Send to > Query Builder | Adds the selected tables to the Query Builder diagram. |
| Send to > Master Detail Browser | Adds the selected tables to the Master Detail Browser document. |
| Send to > Database Diagram | Adds the selected tables to a database diagram. |
| Delete | Drops the selected tables from the database. Shortcut: Delete |