Use the Filter Settings window
The Filter Settings window lets you control which database objects appear in Database Explorer. You can apply filters to limit results for a specific object node or focus on a particular object.
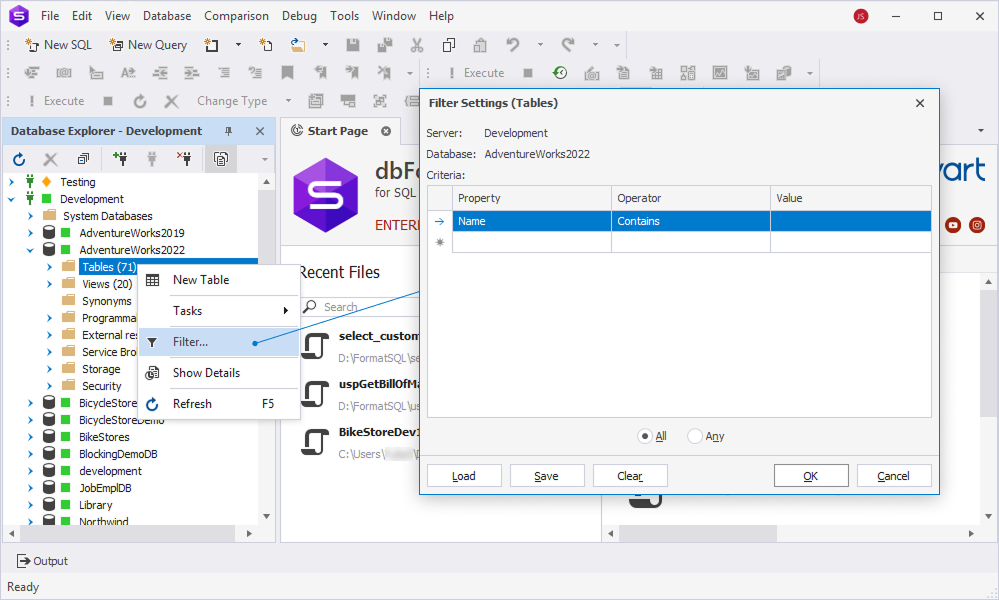
Open the Filter Settings window
In Database Explorer, right-click the object node (for example, Tables) you want to filter and select Filter.
Create a filter
1. In the Filter Settings (object_node) window, configure the filter parameters:
- In the Property column, select the property from the list to filter by: Name (default), Schema, Owner, or Creation Date.
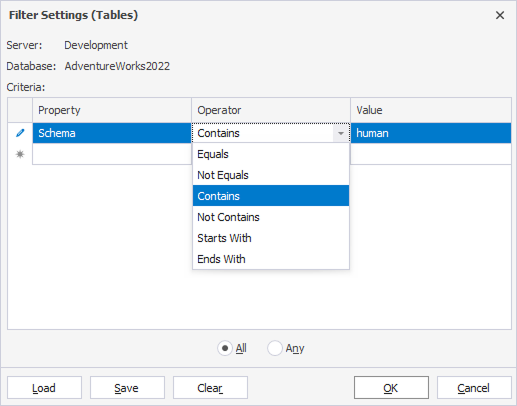
- In the Operator column, select how the filter is applied to the property.
- For Name, Schema, and Owner, the available operators include Equals, Not Equals, Contains (default), Not Contains, Starts With, and Ends With.
- For Creation Date, the available operators include Equals (default), Less Than, Less Than or Equal, Greater Than, Greater Than or Equal, Between, and Not Between.
- In the Value column, enter the value for filtering objects.
2. Select All to display objects that meet all criteria, or select Any to display objects that meet at least one criterion.
3. Select OK to apply the filter.
Note
The Filter Settings window also shows the server and database names on which the filter will be applied.
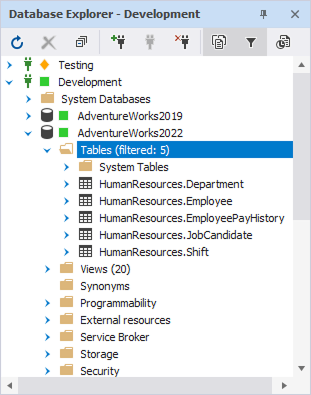
In Database Explorer, the object node will be labeled as (filtered: number of matching objects).
Load a filter
You can apply previously saved filter settings by loading the file with a .filter extension.
To load the filter settings file:
1. In the Filter Settings (object_node) window, select Load.
2. In the Open window that opens, choose the file with a .filter extension and select Open.
3. The filter settings will be loaded into the Filter Settings (object_node) window.
4. Select OK to apply the filter.
Save a filter
You can save a filter for future use.
To save the filter:
1. In the Filter Settings (object_node) window, configure the filter settings and select Save.
2. In the Save As window that opens, select the directory to store the file and enter the file name.
3. Select Save. The file is saved with a .filter extension.
Remove a filter
You can remove a filter in the Filter Settings (object_node) window or in Database Explorer.
In the Filter Settings (object_node) window
To remove the filter:
1. Select the filter you want to remove.
2. Select Clear to remove the filter.
To discard changes without removing the filter, select Cancel.
In Database Explorer
1. Right-click the database object node.
2. Select Clear Filter. The filter is removed, and the full list of objects is restored.