Work with containers on a diagram
When creating a complex diagram with numerous shapes or tables from different schemas, you can use containers to organize them effectively. Containers can help group related database objects or separate different types of objects for clarity.
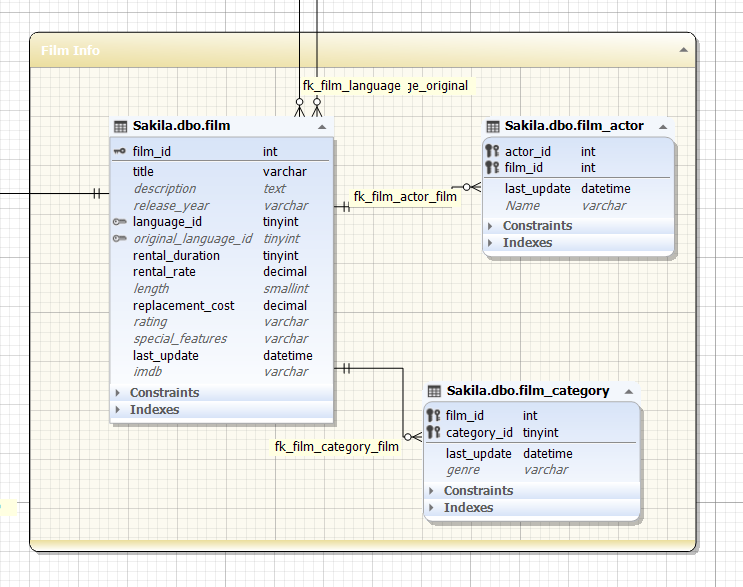
A container is a resizable, colored box with a caption designed to hold other diagram shapes. You can place any diagram object inside a container, including other containers. Table relationships remain intact even when tables are placed in different containers. You can customize a container color and caption, creating multiple containers, each with a unique name and color. For example, when working with tables from multiple schemas, you can create a container for each schema, label them accordingly, and organize objects within their respective containers.
Containers have their internal grid for positioning shapes. If there isn’t enough space, scroll bars appear, enabling you to navigate within the container. Like other shapes, containers can be collapsed by selecting Collapse.
Create a container
To create a container, do one of the following:
- Right-click a diagram and select New > Container.
- On the Database Diagram toolbar, select New Container and indicate a place on the diagram.
Add objects to a container
To add objects to the container, do one of the following:
- Drag the objects to the container.
- Right-click the container and select New > required object.
Note
When dragging a shape, if the mouse pointer hovers over a container, the shape will be placed inside the container upon release, even if most of the dragged selection was outside the container. The same behavior is applied when dragging shapes out of a container.
Assign a color to a container
By default, the container is colored with yellow.
To change the color, right-click the container and select Color > required color.
When selecting Color > Custom, the Color window opens, where you can choose a color and select OK to save the changes.
Change container opacity
To change container opacity, right-click the container and select Opacity > value in %.
Adjust container shapes
To adjust container shapes, right-click the container, select Shapes, and then select one of the following options:
- Collapse to hide all the shapes inside the container. Only the container caption is visible. Alternatively, double-click the container caption or select the collapsible arrow in the upper right corner of the container.
- Expand to display all the collapsed shapes in the container.
- Bring to Front to move the container above other overlapping objects.
- Send to Back to move the container behind other overlapping objects.
- Align to Grid to align objects to the grid for a structured layout.
- Best Fit to automatically adjust the zoom level to ensure that all objects fit within the container.
Select all relations in a container
To select all relations between objects in the container, right-click the container and select Select All Relations.
Alternatively, press Ctrl+Shift+A.
Synchronize with Document Outline
To display the container in Document Outline, right-click the container and select Synchronize with Document Outline.
Rename a container
To rename the container, right-click it and select Rename.
Alternatively, select the container and press F2.
Remove a container from the diagram
To remove the container from the diagram, right-click it and select Remove from Diagram.
Alternatively, select it and press the Delete keyboard shortcut.
Note
When you remove a container from the diagram, all shapes within it are also removed. However, the corresponding database objects remain intact in the database and have not been deleted.
Synchronize with Document Outline
To display the container in Document Outline, right-click it and select Synchronize with Document Outline.