Set diagram options
You can set diagram options globally to apply to all database diagrams using the Options dialog, or configure them for the current diagram.
To set diagram options:
1. Right-click an empty area of the diagram and select Options.
The Diagram Options dialog opens, where you can configure diagram options.
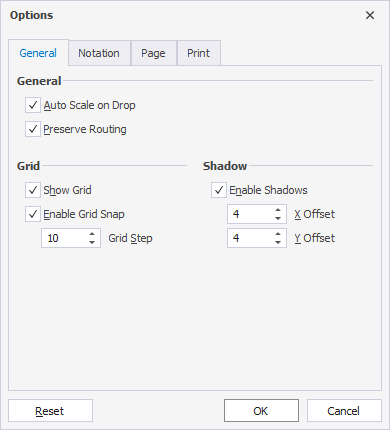
2. On the General tab, configure diagram display options such as auto-scaling, grid alignment, shadow effects, and relationship line routing behavior:
- Auto Scale on Drop – Adjusts the size of shapes automatically when shapes are placed on the diagram to fit their content.
- Preserve Routing – Preserves the routing and bends of relationship lines when shapes are moved or resized.
- Show Grid – Displays grid lines in the diagram background to help align and position objects.
- Enable Grid Snap – Aligns shapes to the grid automatically when shapes are moved or placed on the diagram.
- Grid Step – Specifies the spacing between grid lines in pixels. The default value is 10 pixels.
- Shadow – Adds a drop shadow to shapes.
- X Offset – Specifies the horizontal offset of the shadow from the shape in pixels.
- Y Offset – Specifies the vertical offset of the shadow from the shape in pixels.
Note
By default, all checkboxes are selected.
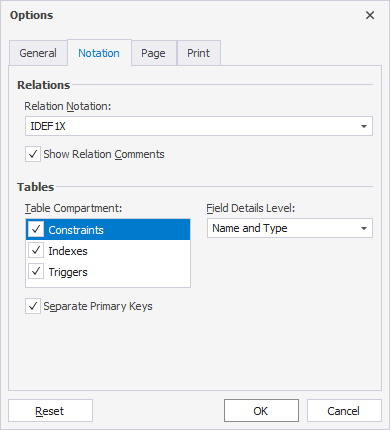
3. On the Notation tab, customize the appearance of relationships:
- Relation Notation – Specifies the notation used to display relationships. Available options are IE and IDEF1X.
- Show Relation Comments – Displays comments for relationships automatically.
- Table Compartment – Displays the selected compartments as separate sections within each table. Available options are Constraints, Indexes, and Triggers.
- Separate Primary Keys – Displays primary key columns in a separate section above other columns within each table.
- Field Details Level – Specifies the information displayed for each column. Available options are Name, Name and Type, and Name and Full Type.
Note
Notation settings don’t apply to stored routines.
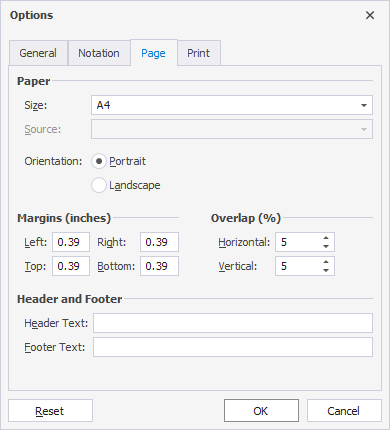
4. On the Page tab, configure page options:
- Specify the paper size and orientation.
- Specify margins (in inches) and overlapping capacity (in %).
- Enter the header and footer text you want to display on the diagram.
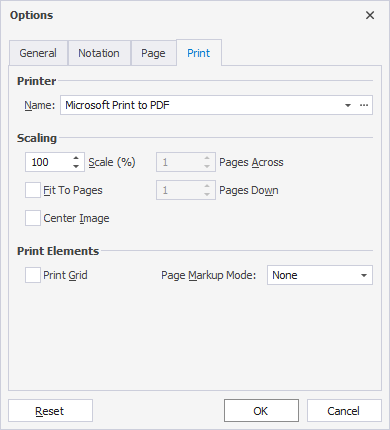
5. On the Print tab, configure print options:
- Name – Specifies the printer used for printing. You can choose from installed printers or use a virtual printer.
- Scale (%) – Sets the scale of the printed diagram. The default value is 100%.
- Pages Across – Defines how many pages wide the printed diagram should span.
- Pages Down – Defines how many pages tall the printed diagram should span.
- Fit to Pages – Automatically scales the diagram to fit within the specified number of pages across and down.
- Center Image – Centers the diagram on the printed page.
- Print Grid – When selected, the option includes the diagram grid in the printed output.
- Page Markup Mode – Determines whether and how to include page markup lines on the diagram to help align and assemble printed pages.
Tip
To return to the default settings, click Reset.
6. Click OK.