Print a diagram
Before printing, you can adjust page settings, such as orientation (portrait or landscape), paper size, source, margins, overlap, headers, and footers. Print options let you configure the image position (for example, centered), set the diagram scale manually or automatically to fit a specific number of pages, and include the grid. You can also enable page markup to help assemble printed pages.
To print a diagram:
1. On the Diagram toolbar, select ![]() Display Print Markup to display the markup grid, with gray stripes indicating page overlaps.
Display Print Markup to display the markup grid, with gray stripes indicating page overlaps.
2. Adjust the diagram layout to align with the markup grid.
3. On the File menu, select Print.
Alternatively, press Ctrl+P.
4. Specify the print options and select OK to print a diagram.
To hide the markup grid after printing, select ![]() Display Print Markup on the Diagram toolbar.
Display Print Markup on the Diagram toolbar.
Set print options
To set print options:
1. On the File menu, select Print Setup.
2. On the Print tab, specify the options.
3. To save the changes, select OK.
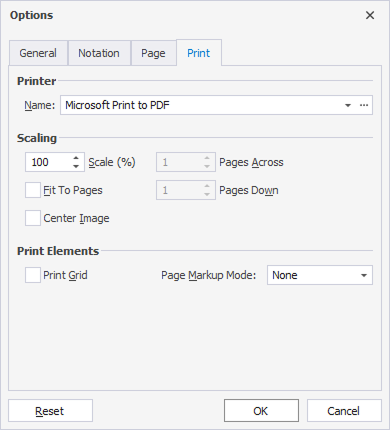
The table describes the options available in the Options > Print dialog.
| Category | Name | Description |
|---|---|---|
| Printer | Name | Specifies the printer used for printing. You can choose from installed printers or use a virtual printer. |
| Scaling | Scale (%) | Sets the scale of the printed diagram. The default value is 100%. |
| Scaling | Pages Across and Pages Down | Defines how many pages wide and tall the printed diagram should span. |
| Scaling | Fit to Pages | Automatically scales the diagram to fit within the specified number of pages across and down. |
| Print Elements | Center Image | Centers the diagram on the printed page. |
| Print Elements | Print Grid | When selected, the option includes the diagram grid in the printed output. |
| Print Elements | Page Markup Mode | Determines whether and how to include page markup lines on the diagram to help align and assemble printed pages. |
Set page options
To set page options:
1. On the File menu, select Page Setup.
2. On the Page tab, specify the options.
3. To save the changes, select OK.
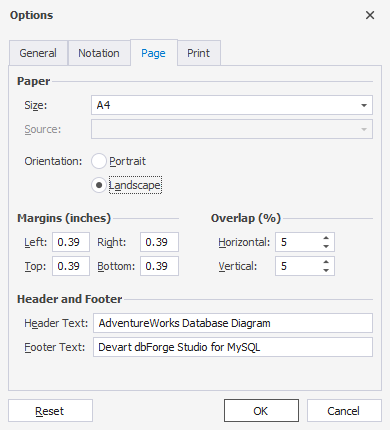
The table describes the options available in the Options > Print dialog.
| Category | Name | Description |
|---|---|---|
| Paper | Size | Sets the paper size for printing. The default value is A4. |
| Paper | Source | Specifies the paper source tray. Note: This option may be unavailable depending on the selected printer. |
| Paper | Orientation | Defines the page layout as either: Portrait (default): Vertical orientation. Landscape: Horizontal orientation. |
| Margins (inches) | Left, Right, Top, and Bottom | Sets the page margins in inches. The default value is 0.39. |
| Overlap (%) | Horizontal and Vertical | Defines how much the pages overlap when printing a large diagram across multiple sheets. The default value is 5. |
| Header and Footer | Header Text | Sets the text that appears at the top of each printed page. |
| Header and Footer | Footer Text | Sets the text that appears at the bottom of each printed page. |
Tip
To restore all settings to their default values, select Reset.
To close the dialog without saving changes, select Cancel.