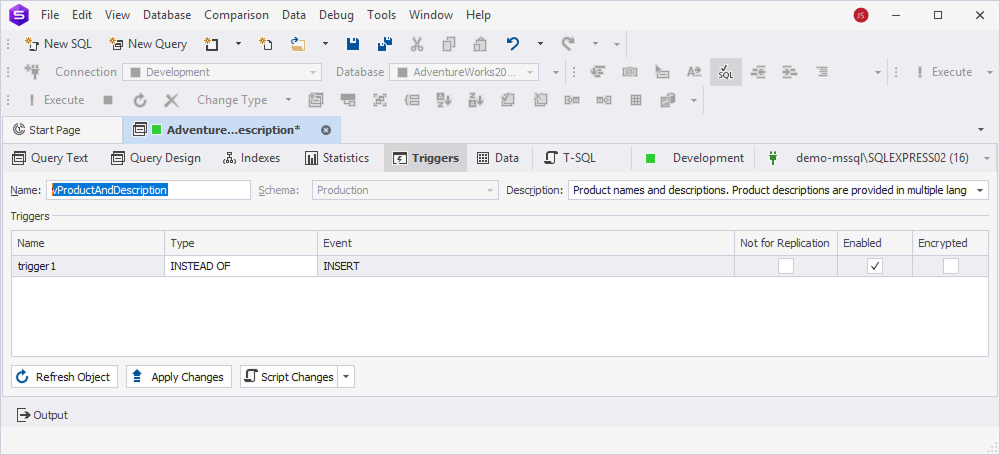
View Editor tab - Triggers
The Triggers tab allows you to create and manage row-level triggers that execute automatically in response to table events.
Create a trigger
To create a trigger:
1. In the grid, right-click the row or anywhere in the grid and select New Trigger.
Alternatively, press Ins.
2. In a new SQL document that opens with the CREATE TRIGGER template of the trigger, enter the trigger query.
3. To save the trigger, at the bottom of the SQL document, select Apply Changes.
Edit a trigger
To edit a trigger:
1. In the grid, right-click the row or anywhere in the grid and select Edit Trigger.
Alternatively, press Enter.
2. In a new SQL document that opens with the CREATE TRIGGER template of the trigger, update the trigger query.
3. To save the changes, at the bottom of the SQL document, select Apply Changes.
Turn off a trigger
To turn off a trigger, right-click the row or anywhere in the grid and select Disable Trigger.
Turn on a trigger
To turn on a trigger, right-click the row or anywhere in the grid and select Enable Trigger.
Delete a trigger
To delete a trigger, right-click the row or anywhere in the grid and select Delete Trigger.
View trigger properties
In the grid, you can view the following trigger properties:
- Name – Specifies the trigger name.
- Type – Determines when the trigger executes in response to a data modification event. A common type includes INSTEAD OF that replaces the standard action with custom logic.
- Event – Defines the DML (INSERT, UPDATE, DELETE) operation that activates the trigger.
- Not For Replication – When selected, it determines that the trigger does not execute when changes originate from a replication agent.
- Enabled – Determines whether a trigger is active.
- Encrypted – When selected, it determines that the trigger definition is hidden from users.
Save changes
An asterisk (*) in the file name on the tab title indicates unsaved changes. To save and apply them, select Apply Changes.
Refresh the view
To update the view to reflect the latest changes, on the View Editor toolbar, select Refresh Object.
Generate a SQL script
To generate a SQL script:
1. On the View Editor toolbar, select the Show Script Changes arrow in the Script Changes list.
2. To open the generated script in a new SQL document, select To New SQL Window.
Alternatively, press Shift+Alt+C.
3. To copy the generated script to the clipboard, select To Clipboard.
This script allows you to review, modify, or execute the script manually instead of applying changes immediately.