View Editor tab - Query Text
The Query Text tab lets you create, edit, and view the SQL definition of a selected view. You can also validate and execute the query to preview the results.
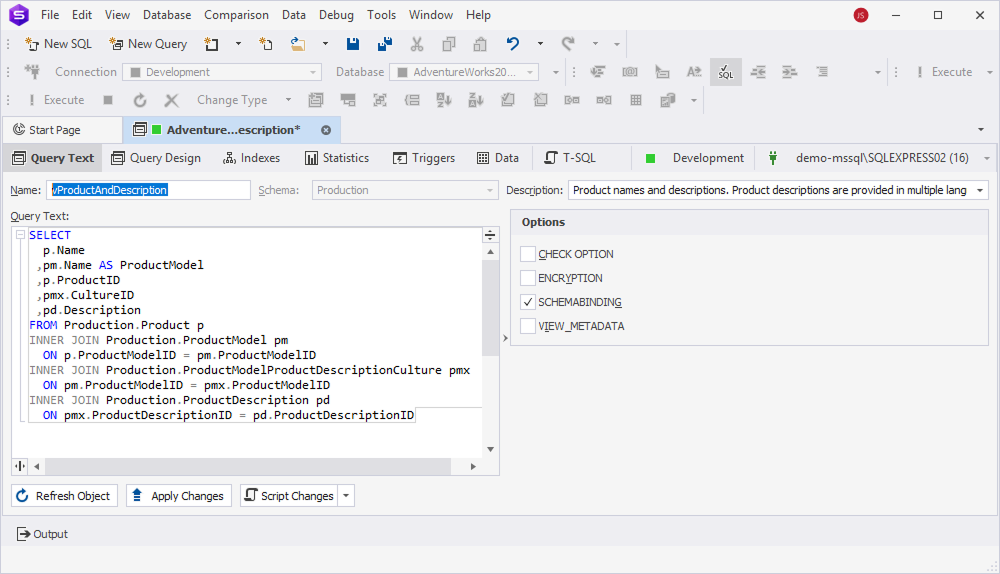
Create a view
To create a view:
1. In the Name box, enter the view name.
2. From the Schema list, select the schema from the list.
3. In the Description box, enter a description for the view and then do the following:
- Select OK to save the description.
- Select Cancel to discard the changes.
4. In the Query text box, enter the SQL statement of the view.
5. Configure view-specific options, including:
- CHECK OPTION – Ensures all modifications comply with the view definition.
- ENCRYPTION – Encrypts the view definition for security.
- SCHEMABINDING – Binds the view to its underlying tables, preventing structural changes.
- VIEW_METADATA – Exposes metadata as if it were a table.
6. To save the view, on the View Editor toolbar, select Apply Changes.
Edit a view
To edit a view:
1. In the Name box, edit the view name.
Note
When editing an existing view, you cannot change the schema name.
2. In the Description box, edit a description for the view and then do the following:
- Select OK to save the updated description.
- Select Cancel to discard the changes.
3. In the Query text box, update the SQL statement of the view.
4. Update view-specific options if needed.
5. To save the changes, on the View Editor toolbar, select Apply Changes.
Save changes
An asterisk (*) in the object name on the tab title indicates unsaved changes. To save and apply them, select Apply Changes.
Refresh the view
To update the view to reflect the latest changes, on the View Editor toolbar, select Refresh Object.
Generate a SQL script
To generate a SQL script:
1. On the View Editor toolbar, select the Show Script Changes arrow in the Script Changes list.
2. To open the generated script in a new SQL document, select To New SQL Window.
Alternatively, press Shift+Alt+C.
3. To copy the generated script to the clipboard, select To Clipboard.
This script allows you to review, modify, or execute the script manually instead of applying changes immediately.