How to work with the Text Editor
The text editor in dbForge Studio for SQL Server serves as both a general-purpose editor and a code editor. When editing plain text, it’s referred to as the text editor. When writing or editing SQL source code – its primary use – it’s called the code editor.
You can open multiple code editor windows to view and edit SQL code simultaneously. To manage open editor instances, use the Windows menu, which lists all active documents.
Open the Text editor
1. Open the New File dialog by doing one of the following:
-
On the top menu, select File > New > File > General > Text File or XML File> Create.
-
On the standard toolbar, click
 New File.
Note
The XML editor is similar to the text editor but includes syntax highlighting for XML content. You can customize XML highlighting and color settings in the Options dialog under Text Editor > Fonts and Colors.
User interface
The text editor consists of the following components:
- Code pane: The main area where you write, view, edit, navigate, format, and execute SQL code. You can customize this pane to suit your workflow.
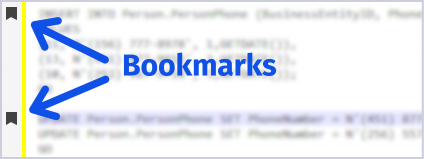
- Indicator margin: A gray column on the left side of the editor that shows markers for breakpoints and bookmarks. Click this margin to add or remove a breakpoint on a specific line.
- Selection margin: A column between the indicator margin and the code pane. Click to select entire lines of code.
- Horizontal and vertical scroll bars: Horizontal and vertical scroll bars that let you navigate through code that extends beyond the visible area of the editor.
Toolbar
The Text Editor toolbar provides quick access to features such as code completion, commenting and uncommenting code, bookmarks, and other editing tools.

The table describes the text editor toolbar options.
| Icon | Name | Description |
|---|---|---|
| Display an Object Member List | Shows a list of valid database objects, such as databases, tables, and columns. To insert a selected item into your code, press Tab, type a space, or type a period.Shortcut: Ctrl+K, Ctrl+L |
|
| Display a Parameter Info | Shows a list of parameters when you start typing a function or stored procedure and open the parenthesis (.Shortcut: Ctrl+Shift+Space |
|
| Display Quick Info | Shows general information about an identifier when you hover over it. Shortcut: Ctrl+K, I |
|
| Display Word Completion | Suggests possible completions for the word you are typing. Shortcut: Ctrl+K, W |
|
| Refresh Suggestions | Updates a list of suggestions to reflect the changes. Shortcut: Ctrl+Shift+R |
|
| Enable/Disable Code Completion for current document | Enables or disables the code completion feature for the active document. | |
| Decrease Line Indent | Moves the selected lines to the left by one level of indentation, for example, by removing a tab or leading spaces. | |
| Increase Line Indent | Moves the selected lines to the right by one level of indentation, for example, by adding a tab or a specific number of spaces. | |
| Comment out the selected lines | Turns the selected lines into comments, making them non-executable. Shortcut: Ctrl+K, C |
|
| Uncomment the selected lines | Removes comment markers from the selected lines, making the code executable. Shortcut: Ctrl+K, U |
|
| Toggle a bookmark on the current line | Adds or removes a bookmark on the selected line. Shortcut: Ctrl+K, K |
|
| Move the caret to the previous bookmark | Moves the cursor to the previous bookmark in the script. Shortcut: Ctrl+K, Ctrl+P |
|
| Move the caret to the next bookmark | Moves the cursor to the next bookmark in the script. Shortcut: Ctrl+K, Ctrl+N |
|
| Clear all bookmarks in the current document | Removes all bookmarks in the active document. Shortcut: Ctrl+K, L |
|
| Format Document | Automatically formats SQL code in the active document. Shortcut: Ctrl+K, D |
|
| Format Current Statement | Applies formatting to the SQL statement at the current cursor location. Shortcut: Ctrl+K, S |
|
| Analyze Code | Scans the SQL script to identify syntax errors, logical issues, and best practice violations before execution. |
Select text and code
You can quickly select a word, line, or block of text while working in the editor. Use your mouse or keyboard shortcuts to make selections efficiently.
To select a specific block of text, drag the mouse over the text.
To select a word, double-click that word or place your cursor next to the word and press Ctrl+Shift+Right Arrow/Left Arrow.
To select a line of text, drag the mouse over the line.
To select text from the cursor to the beginning of the current line, press Shift+Home.
To select text from the cursor to the end of the current line, press Shift+End.
Edit text and code
The editor provides standard text editing functionality similar to most word processors and code editors. You can:
- Copy and paste text or code within the editor, between multiple editor windows, or between the editor and external applications.
- Switch between insert mode and overstrike mode in the Code Editor by pressing Insert.
- Delete text using Delete or Backspace.
Navigate text and code
You can move through your code using the keyboard or mouse. The Code Editor supports several navigation methods:
- Use the arrow keys to move the cursor one character or line at a time.
- Press Ctrl+Left Arrow or Ctrl+Right Arrow to move the cursor one word at a time.
- Click anywhere in the editor to move the cursor to that position.
- Use the scroll wheel or scroll bars to navigate through the code without moving the cursor.
- Press Home or End to move the cursor to the beginning or end of a line.
- Press Page Up or Page Down to scroll one screen at a time.
- Press Ctrl+Page Up to move the cursor to the top of the visible window.
- Press Ctrl+Page Down to move the cursor to the bottom of the visible window.
- Press Ctrl+Up Arrow or Ctrl+Down Arrow to scroll the view without moving the cursor.
Go to a specific line
Use the Go To Line command to navigate to a specific line number in your document.
To enable line numbers:
1. On the top menu, select Tools > Options.
2. In the Options dialog, go to Text Editor > General.
3. Select the Line numbers checkbox.
4. Click OK to save the changes.
To go to a specific line:
1. With the document open in the editor, on the top menu, select Edit > Go To Line.
2. In the dialog that appears, enter the line number.
3. Click OK to jump to the specified line.
Change text case
You can change the case of selected text using menu commands or keyboard shortcuts.
To change text to uppercase:
1. Select the text you want to convert.
2. On the Edit menu, select Advanced > Make Uppercase, or press Ctrl+Shift+U.
To change text to lowercase:
1. Select the text you want to convert.
2. On the Edit menu, select Advanced > Make Lowercase, or press Ctrl+U.
Set bookmarks
Bookmarks help you navigate to frequently used sections in your code.
Add or remove a bookmark
To create or remove a bookmark:
1. Open a file in the editor.
2. Place the insertion point on the line you want to add or remove a bookmark.
3. On the Text Editor toolbar, click Toggle a bookmark on the current line.
Alternatively, press Ctrl+K.
Navigate between bookmarks
To move to a bookmarked line, do one of the following:
- Use the Move to previous bookmark or Move to next bookmark buttons on the Text Editor toolbar.
- Press Ctrl+K, Ctrl+P to move to the previous bookmark, or Ctrl+K, Ctrl+N to move to the next bookmark.
Note
Bookmarks work across files in the current solution or project.
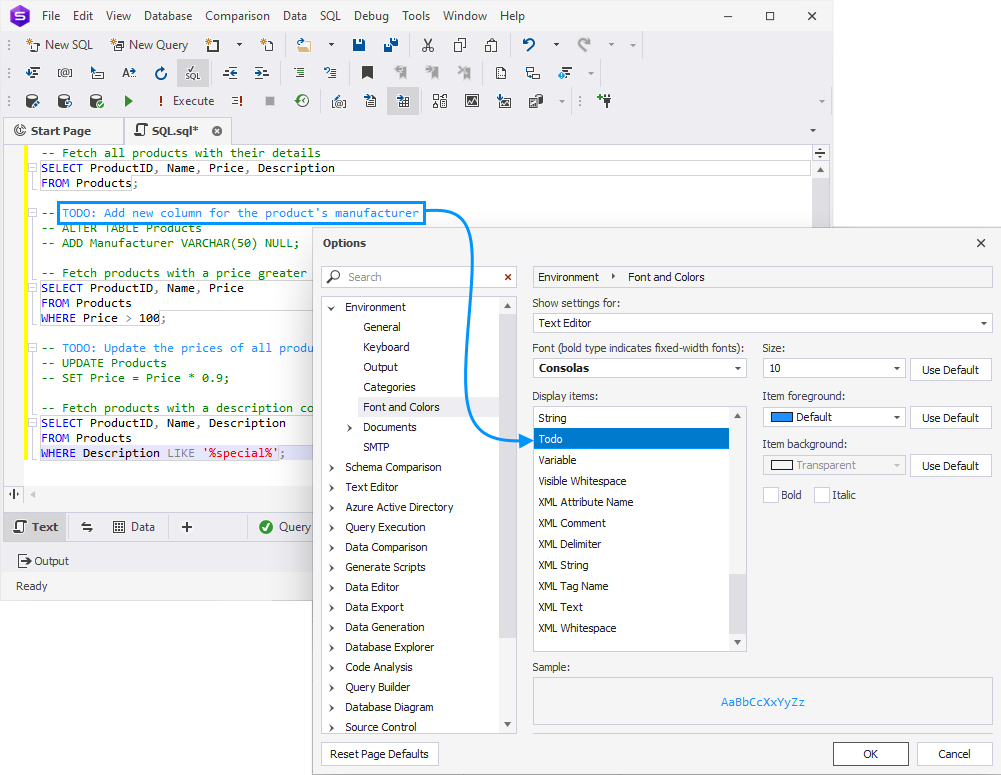
Change font color, size, and style
You can personalize the appearance of SQL code elements, such as TODO lists or comments.
To change font settings:
1. On the top menu, select Tools > Options.
2. Navigate to Environment > Font and Colors.
3. In the Display items list, choose the item you want to modify.
4. Adjust the Font, Size, Foreground color, and Background color as needed.
5. Click OK to apply the changes.
Show white space characters
View White Space mode displays spaces and tab characters.
To view white space:
1. Place the cursor anywhere in the editor.
2. On the top menu, select Edit > Advanced > View White Space.
Use word wrap mode
Word Wrap moves any part of a long line that extends beyond the visible width of the SQL Editor onto the next visual line, so you can view the entire line without scrolling horizontally.
To use word wrap mode, do one of the following:
- On the top menu, select Edit > Advanced > Word Wrap.
- Press Ctrl+E, W.
Comment out a block of code
You can temporarily disable a section of SQL code by commenting it out.
To comment out a block:
1. Place the cursor on the line or select the block of code you want to comment.
2. On the top menu, select Edit > Advanced > Toggle Block Comment.
Alternatively, press Ctrl+Shift+/.
Uncomment a block of code
To make a previously commented block executable again, do one of the following:
- On the top menu, select Edit > Advanced > Toggle Block Comment.
- Press Ctrl+Shift+/.
Comment a selection
To comment out selected lines of code:
1. Select the line or block of code you want to comment out.
2. Do one of the following:
-
On the top menu, select Edit > Advanced > Comment Selection.
-
On the toolbar, click
 Comment out the selected lines.
 -
Press Ctrl+K, C.
Uncomment a selection
To remove comment markers from selected lines of code:
1. Select the line or block of code you want to uncomment.
2. Do one of the following:
-
On the top menu, select Edit > Advanced > Uncomment Selection.
-
On the toolbar, click
 Uncomment the selected lines.
 -
Press Ctrl+K, U.
Increase line indent
To move selected lines to the right by one indentation level:
1. Select the lines you want to indent.
2. On the top menu, select Edit > Advanced > Increase Line Indent.
Alternatively, on the toolbar, click ![]() Increase Line Indent.
Increase Line Indent.
Decrease line indent
To move selected lines to the left by one indentation level:
1. Select the lines you want to unindent.
2. On the top menu, select Edit > Advanced > Decrease Line Indent.
Alternatively, on the toolbar, click ![]() Decrease Line Indent.
Decrease Line Indent.
Create user-defined outlining regions
You can define collapsible regions in your SQL code to make long scripts easier to navigate.
Define a region
To create an outlining region:
1. On a new line, type --region followed by an optional region name.
Note
Only spaces are allowed before
--regionon the same line.
2. Add your SQL code below the --region statement.
3. On a new line, type --endregion to close the region.
Tip
You can also include the region name after
--endregionfor clarity.
--region Setup
SELECT * FROM Customers;
SELECT * FROM Orders;
--endregion Setup
You can collapse or expand the region using the outline indicators in the SQL Editor.
Nest regions
You can nest multiple regions to group related code blocks:
--region MainBlock
  --region SubBlock
  SELECT * FROM Products;
  --endregion SubBlock
--endregion MainBlock
Nested regions help organize large scripts into logical, manageable sections.