Manipulate user logins
This topic describes how to create, edit, or delete user logins visually using Security Manager without typing SQL code.
A login is a security principal, or an entity that a secure system can authenticate. Users need a login to connect to SQL Server.
Create a user login
1. On the Database menu, select Security Manager.
2. Above the tree, click the arrow next to Create User and select Create Login.
Alternatively, right-click the Logins node and select New Login.

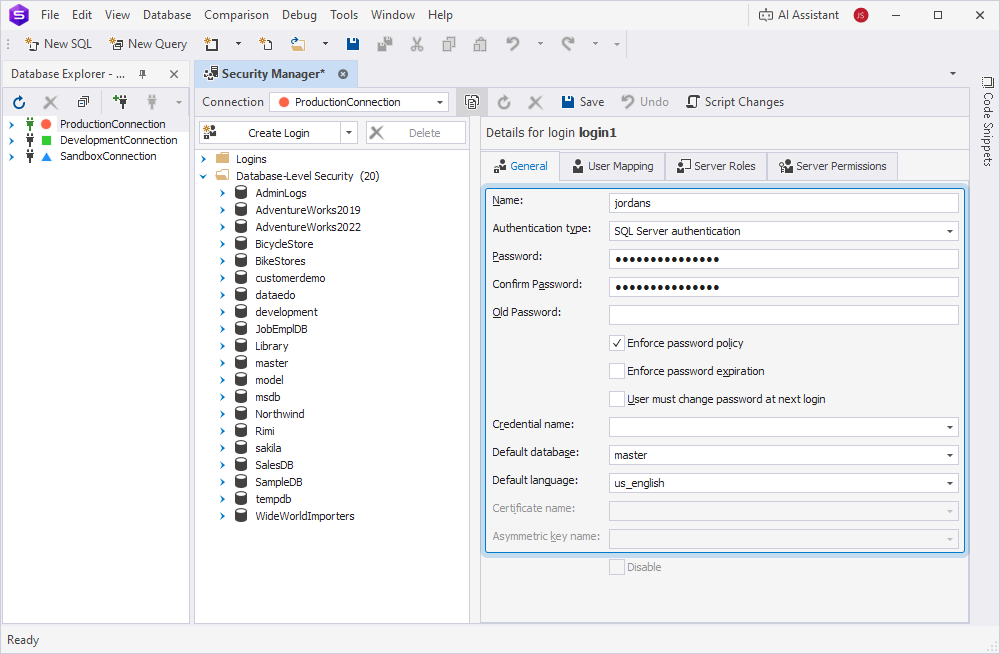
3. On the General tab, in Name, enter a new login.
4. In Authentication Type, select the type of authentication and fill out the fields depending on your selection:
- SQL Server authentication – Uses credentials stored in SQL Server.
Click for additional instructions.
4.1. In Password and Confirm Password, enter a password for signing in to the Studio.
4.2. Optional: Configure the password policy options:
- Enforce password policy – Applies Windows password policy rules.
- Enforce password expiration – Causes passwords to expire based on Windows or domain policy. Available only when password policy is enforced.
- User must change password at next login – Prompts the user to set a new password at the next sign-in. Available only when password expiration is enforced.
4.3. If the login requires access to external resources on behalf of Windows credentials, select the credentials in Credential name.
4.4. In Default database, select the database to open when the user connects to the SQL Server instance.
4.5. In Default language, select the language for SQL Server system notifications, error messages, and formats (such as the date format).
- Windows authentication – Uses Active Directory or local Windows account credentials.
Click for additional instructions.
4.1. If the login requires access to external resources on behalf of Windows credentials, select the credentials in Credential name.
4.2. In Default database, select the database to open when the user connects to the SQL Server instance.
4.3. In Default language, select the language for SQL Server system notifications, error messages, and formats (such as the date format).
- External authentication – Is used for Microsoft Entra or other external identity providers.
Click for additional instructions.
In Credential name, select the credentials to be used for signing in.
- Mapped to certificate – Uses a certificate stored in SQL Server.
Click for additional instructions.
4.1. If the login requires access to external resources on behalf of Windows credentials, select the credentials in Credential name.
4.2. In Certificate name, select the certificate.
- Mapped to asymmetric key – Uses an asymmetric key.
Click for additional instructions.
4.1. If the login requires access to external resources on behalf of Windows credentials, select the credentials in Credential name.
4.2. In Asymmetric key name, select the asymmetric key.
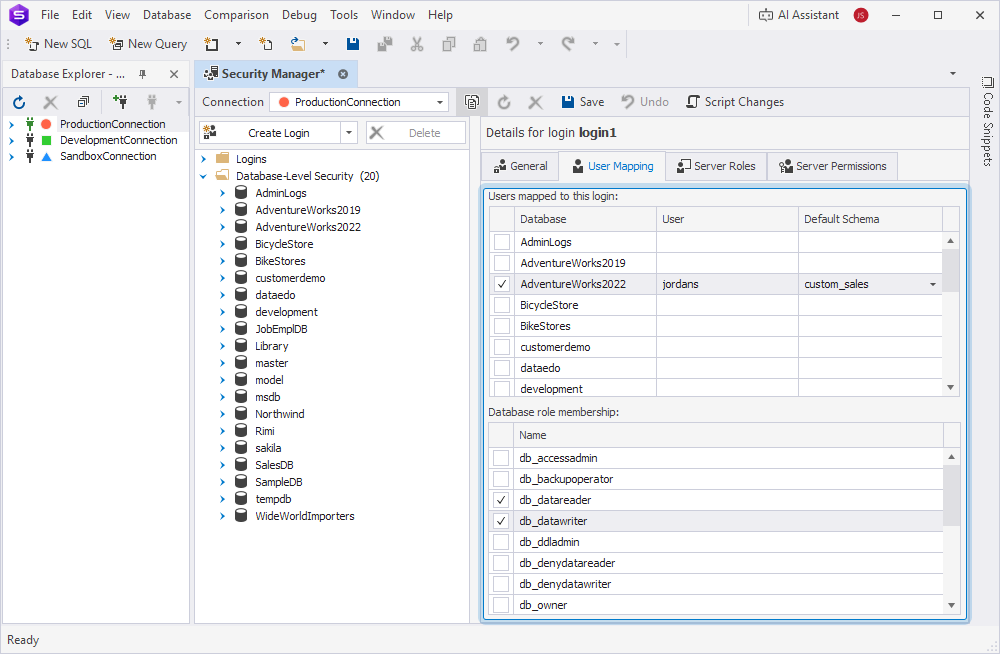
5. On the User Mapping tab, do the following:
5.1. Under Users mapped to this login, in the Database column, select the databases to which the login will have access.
5.2. In the User column, enter the user to be associated with the login.
5.3. In the Default Schema column, select the default schema for the login.
5.4. Under Database role membership, select one or more database roles for the login.
6. On the Server Roles tab, select one or more server roles for the login.
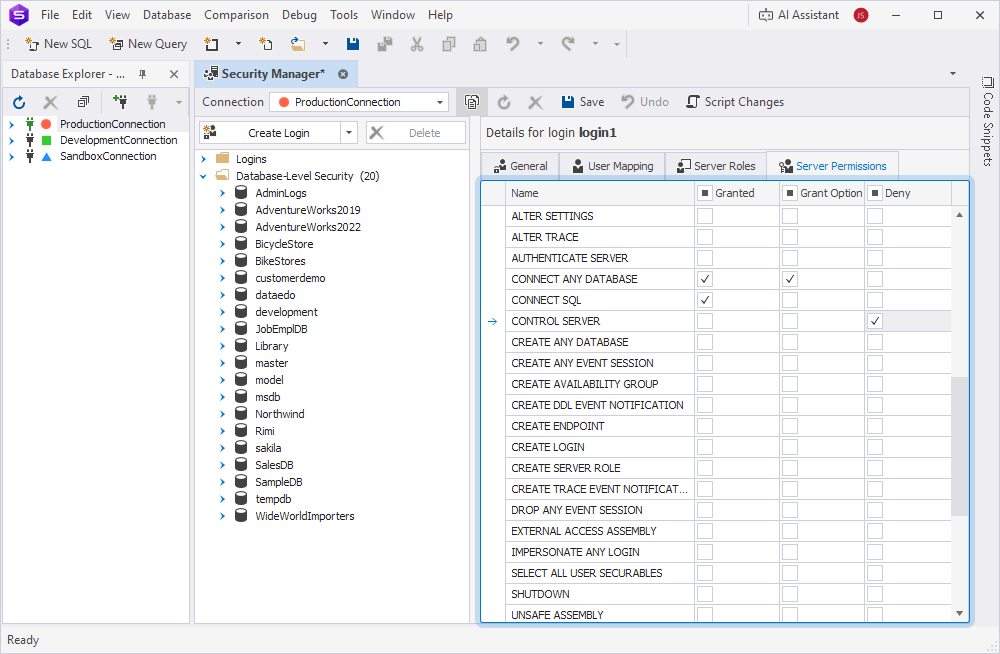
7. On the Server Permissions tab, select the privileges for the login:
- Granted – Grants the privilege to the login.
- Grant Option – Enables the login to grant the privilege to other logins.
- Deny – Blocks the login from using the privilege even if they inherit it.
8. Click Save on the Security Manager toolbar.
Edit a user login
1. On the Database menu, select Security Manager.
2. Expand the Logins node, then select the user login you want to edit.
3. Update the general details, user mapping, server roles, or server permissions as needed.
For logins using SQL Server authentication, you can change their password by entering the new password in Password and Confirm Password, and the current one in Old Password.
4. To apply the changes, click Save on the Security Manager toolbar.
To discard the changes, click Undo.
Tip
To view SQL statements that will apply your changes, click Script Changes on the Security Manager toolbar. The script opens in a new SQL document, where you can review, edit, and run it manually.
Disable a user login
You can temporarily block a login without deleting it.
Warning
If the user with this login is currently connected, their session will be terminated.
1. On the Database menu, select Security Manager.
2. Expand the Logins node, then select the user login you want to edit.
3. On the General tab, select Disable.
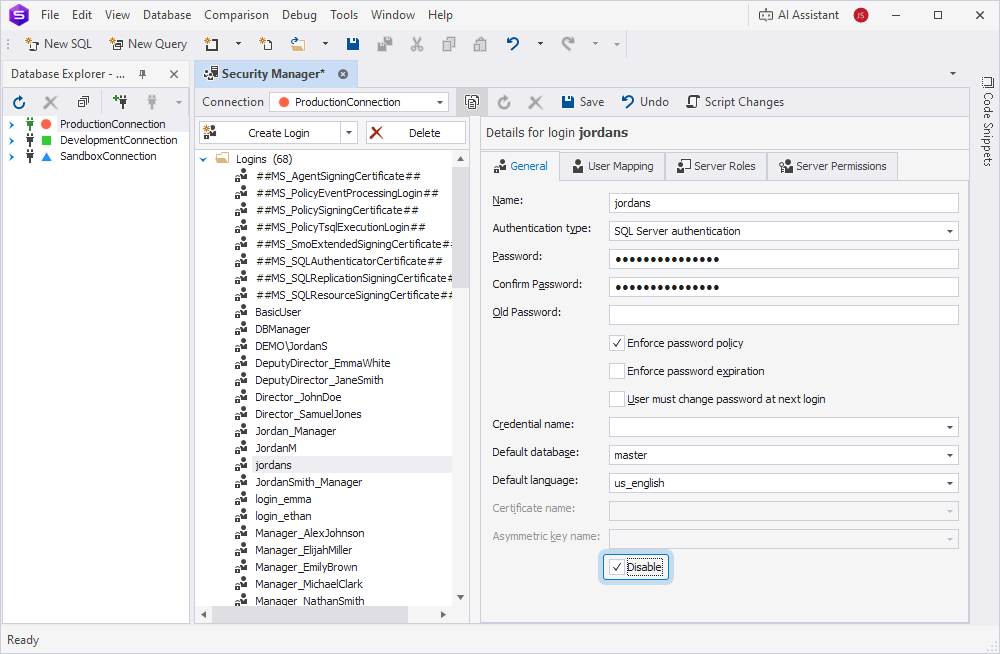
4. Click Save on the Security Manager toolbar.
Delete a user login
1. On the Database menu, select Security Manager.
2. Expand the Logins node.
3. Right-click the user login you want to delete and select Delete.
Alternatively, select the user login in the tree, then click Delete above the tree or press the Delete key.