Export data based on a WHERE condition
To export specific rows from a database table, you can use a .det template file with a custom condition. This file is created in the Data Export wizard and includes a WHERE clause that filters the data to be exported. The filtered data can then be exported to a .csv file using the command line with the /dataexport and /templatefile commands.
In addition, since a .det file is a standard XML file, you can open it in a text editor, modify the query directly within the file, save the changes, and reuse it for future exports.
Sample data
For demo purposes, we’ll use the following SELECT query with a WHERE clause from the AdventureWorks2022 database. The query retrieves a list of employees from the HumanResources.Employee table and filters for employees who are salaried and were hired after January 1, 2015.
SELECT
    e.BusinessEntityID,
    p.FirstName,
    p.LastName,
    e.JobTitle,
    e.HireDate,
    e.SalariedFlag
FROM
    AdventureWorks2022.HumanResources.Employee e
JOIN
    AdventureWorks2022.Person.Person p
ON
    e.BusinessEntityID = p.BusinessEntityID
WHERE
    e.SalariedFlag = 1 -- Salaried employees
    AND e.HireDate > '2015-01-01' -- Hired after January 1, 2015
ORDER BY
    e.HireDate DESC; -- Order by hire date, most recent first
To create a .det template file with a custom condition
1. On the SQL toolbar, select New SQL to open a SQL document.
2. Write a SELECT query with the WHERE condition based on which data will be filtered and exported.
3. On the SQL toolbar, select Execute to run the query. The query returns the results and displays them in the Data Results grid.
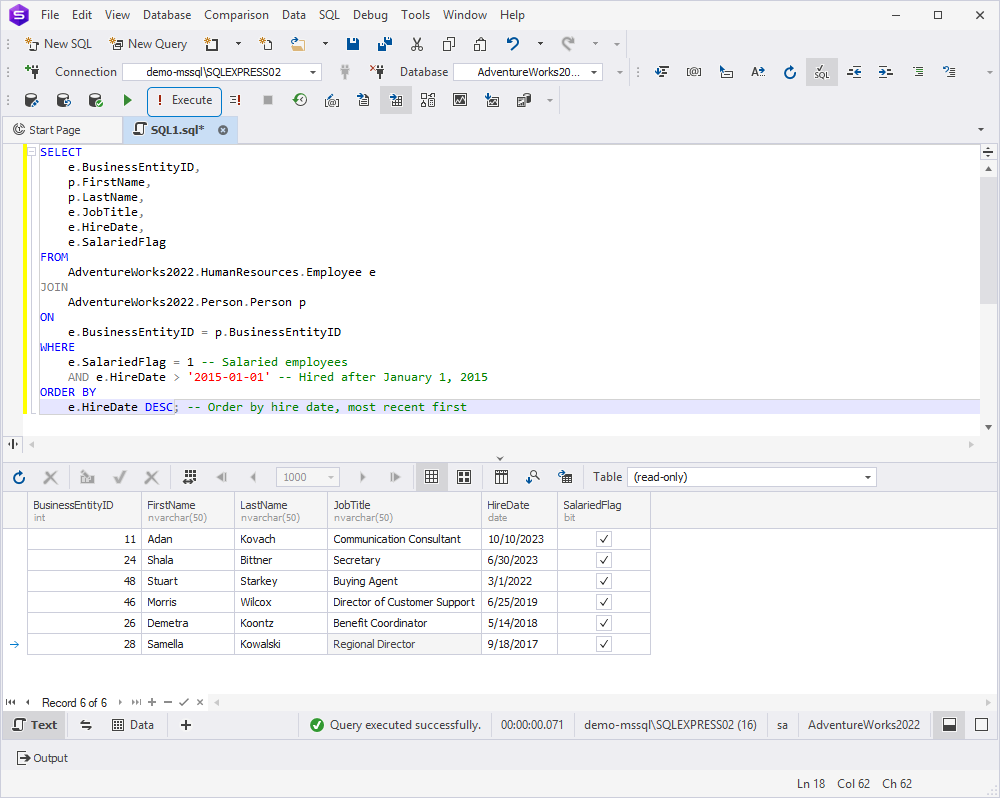
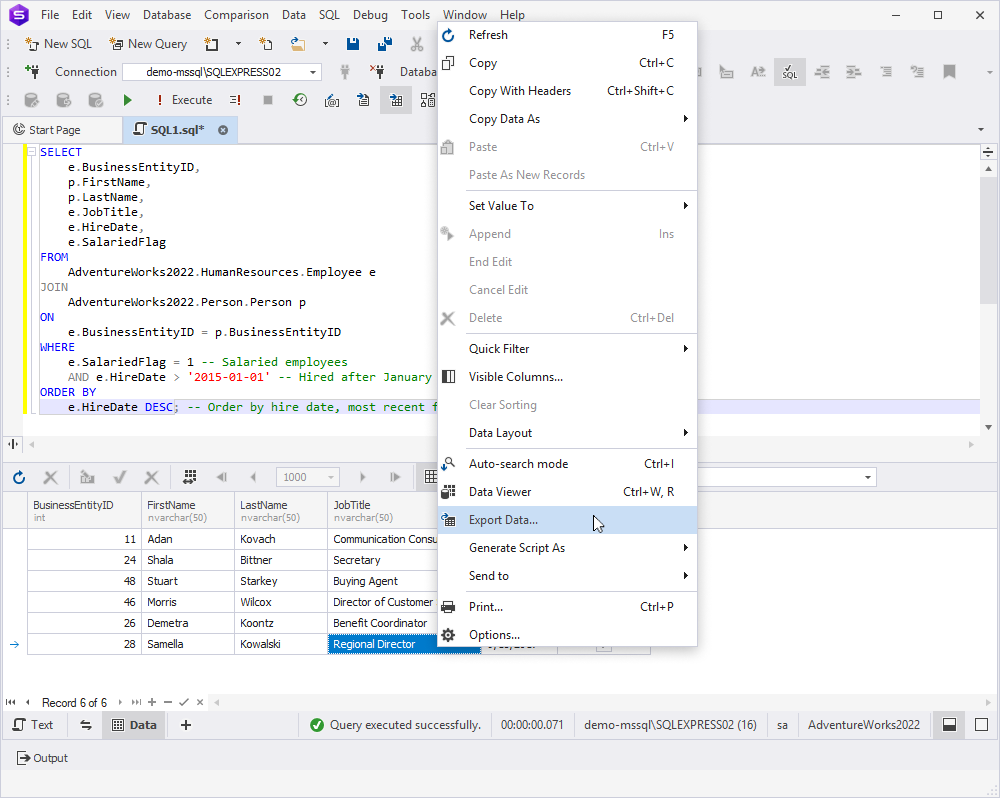
4. In the Data Results grid, right-click any row and select Export Data to open the Data Export wizard.
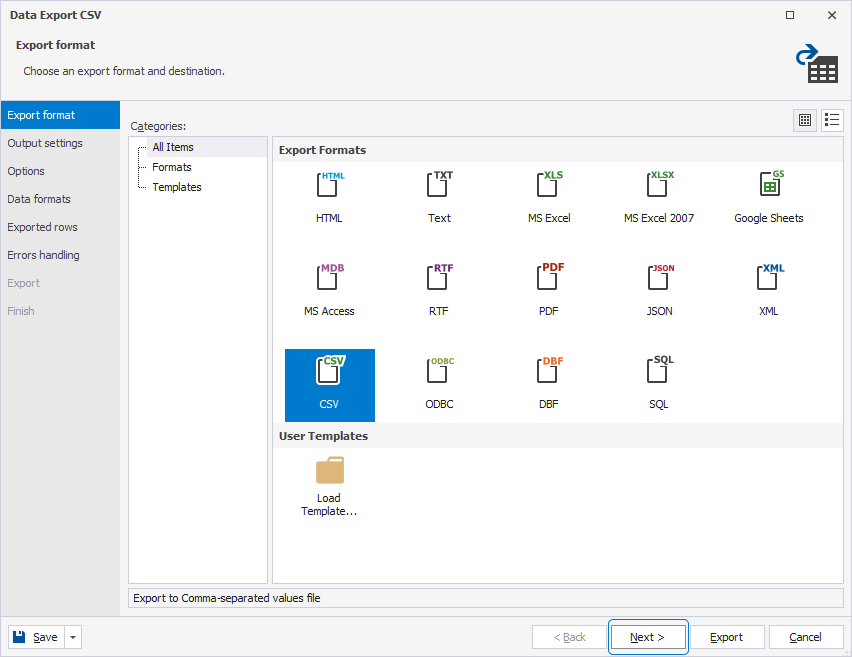
5. On the Export format page of the Data Export wizard, select the CSV export format and select Next.
6. On the Output settings page, select Save > Save Template in the left-lower corner of the wizard.
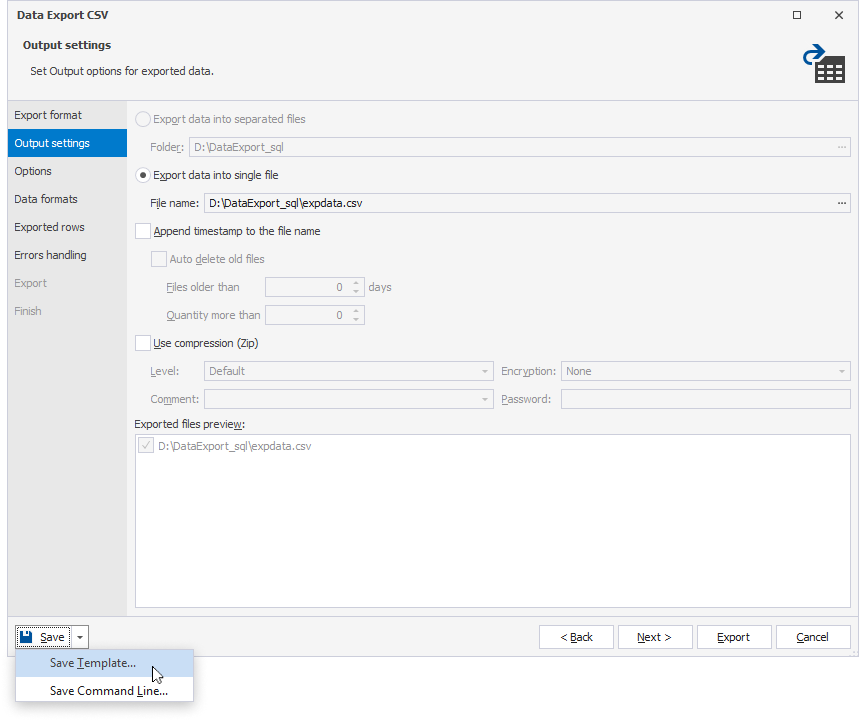
7. In the Save As window that opens, specify the name for the .det file at the required path and select Save to save the changes.
8. Close the wizard.
As a result, a .det file will be created containing the connection configurations, specified export format, and SELECT query used to retrieve the required dataset. Each time you execute the file, the query will run to fetch the data.
Note
You do not need to select Export to create a template file.
Export data from the command line using a .det file
When the .det template file is configured, you can run it to select the required rows from the table according to the specified condition and export them to a .csv file.
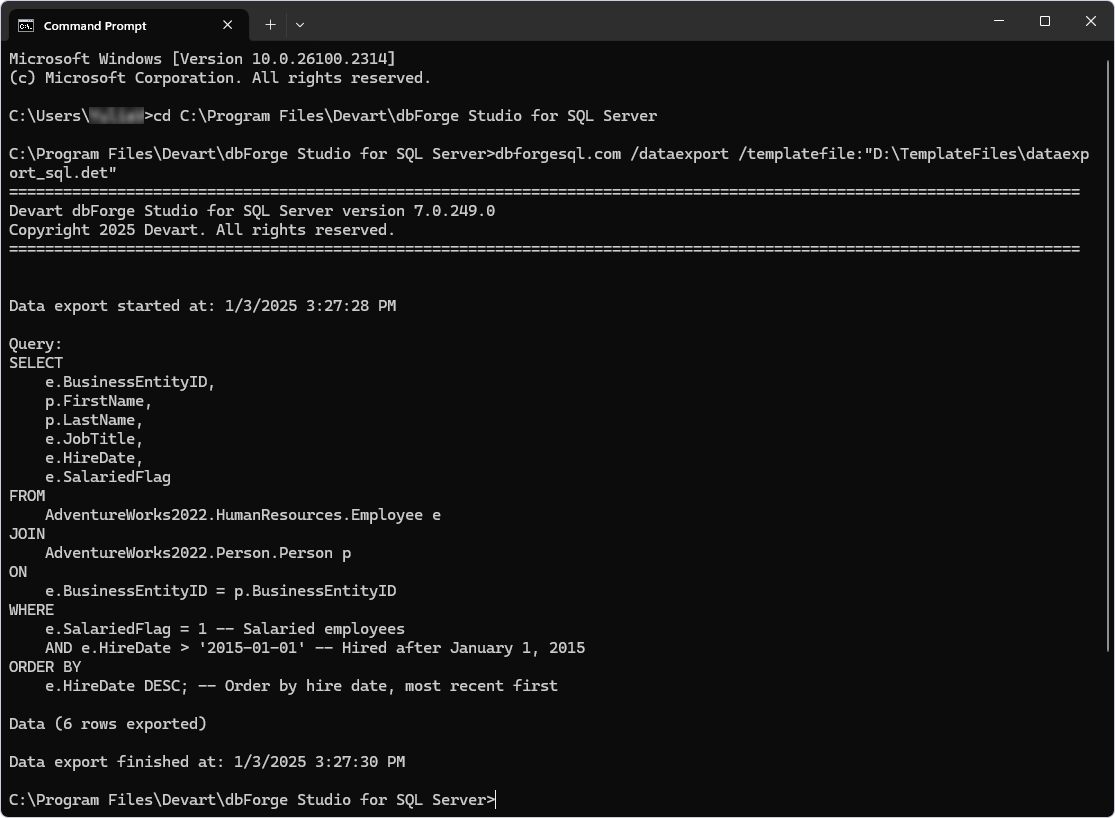
1. In the Command Prompt, navigate to the installation folder of dbForge Studio for SQL Server.
Note
The installation folder may vary depending on whether dbForge Studio was installed as a standalone tool or as part of the dbForge Edge bundle.
If the Studio was installed as part of dbForge Edge, the installation folder path is as follows:
C:\Program Files\Devart\dbForge Edge\dbForge Studio for SQL ServerIf the Studio was installed as a standalone tool, the installation folder path is as follows:
C:\Program Files\Devart\dbForge Studio for SQL Server
2. Specify the following command-line script to export data:
dbforgepsql.com /dataexport /templatefile:"path_to_template_file"
where:
/dataexportis the command to perform the data export operation./templatefileis the command-line parameter to specify the path to a .det file that saves export settings, such as the source table, output file to store exported data, and data format."path_to_template_file"is the path to the .det template file.
3. Press ENTER to execute the command.
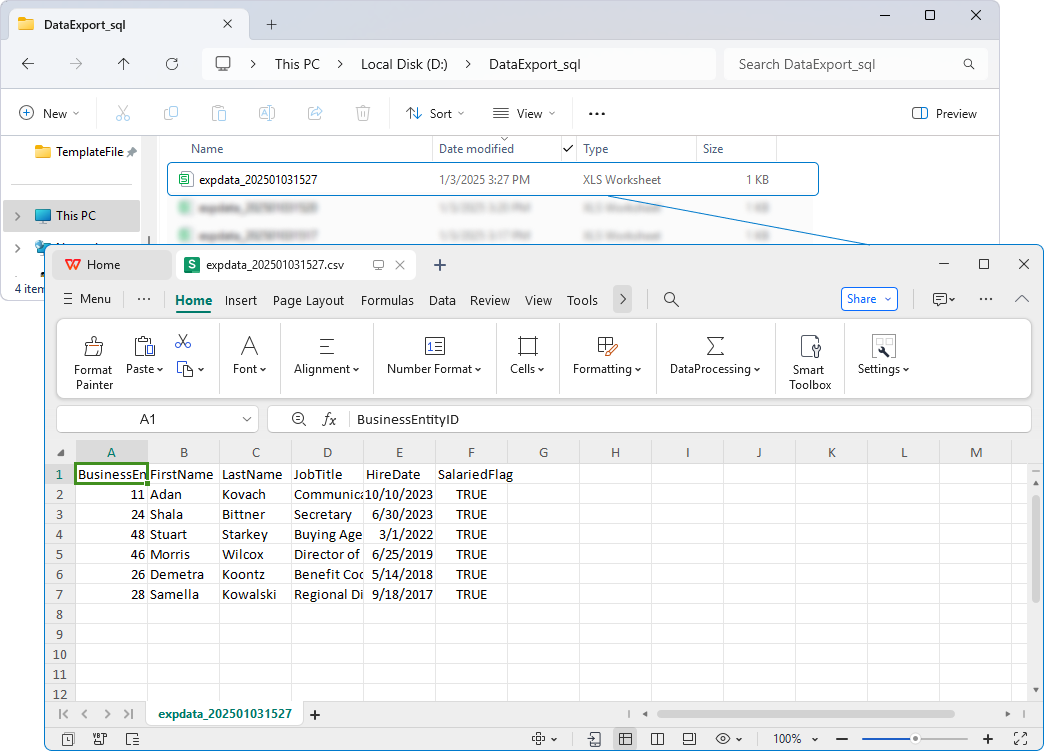
The exported data file is saved at the specified path and contains the following information:
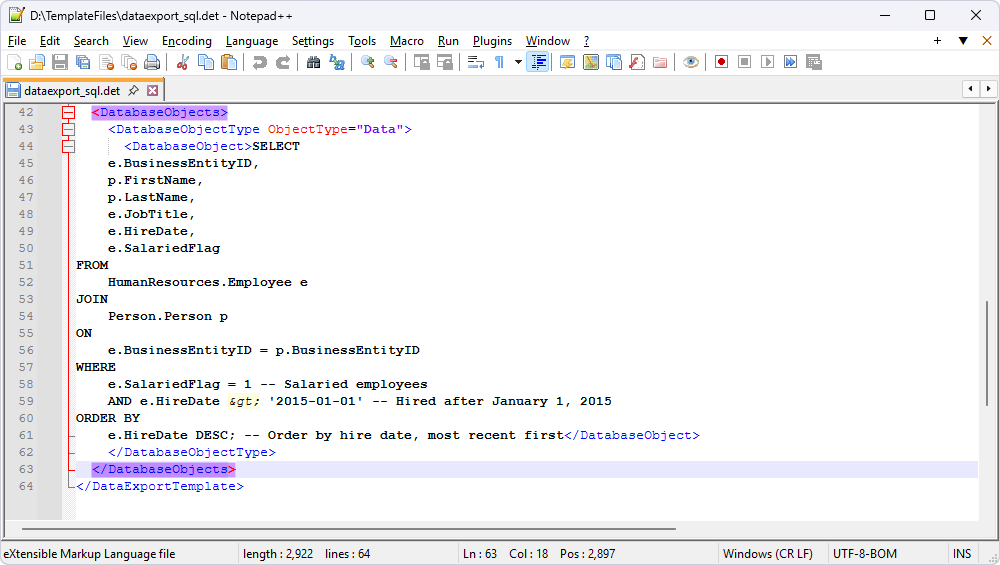
Edit a .det file
1. Open the .det file in any text editor, such as Notepad++.
2. Navigate to the <DatabaseObject> and </DatabaseObject> tags, which contain the query used for data export.
3. Update the query within the <DatabaseObject> and </DatabaseObject> tags.
4. Save the changes to use the file for future data exports.