Text import
This topic describes how to import data from a TXT file.
Note
The pages of the Data Import Wizard may vary slightly depending on the product you are using.
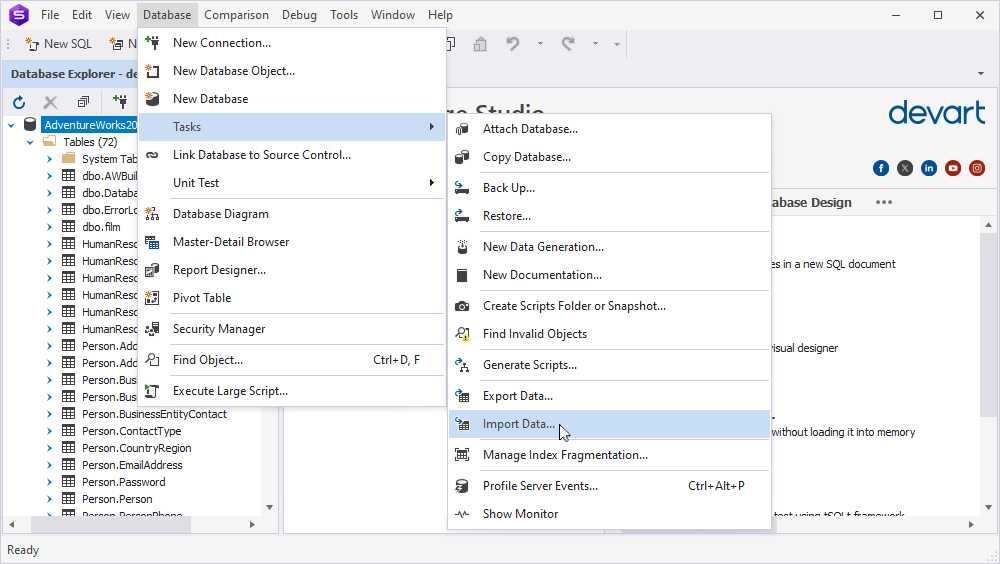
1. On the Database menu, navigate to Tasks > Import Data. The Data Import wizard opens.
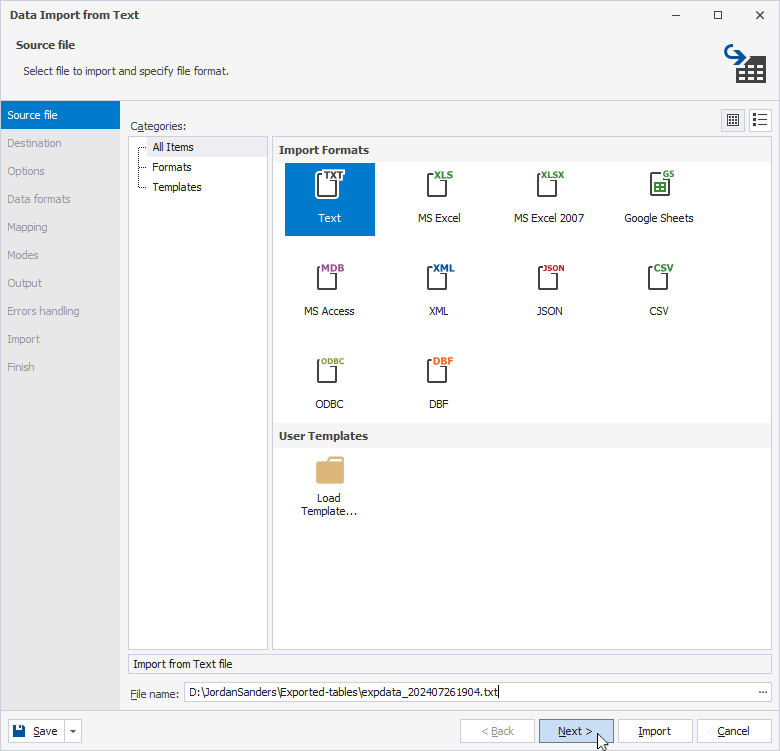
2. Click Text, then select the file you want to import in the File name field. Click Next to proceed.
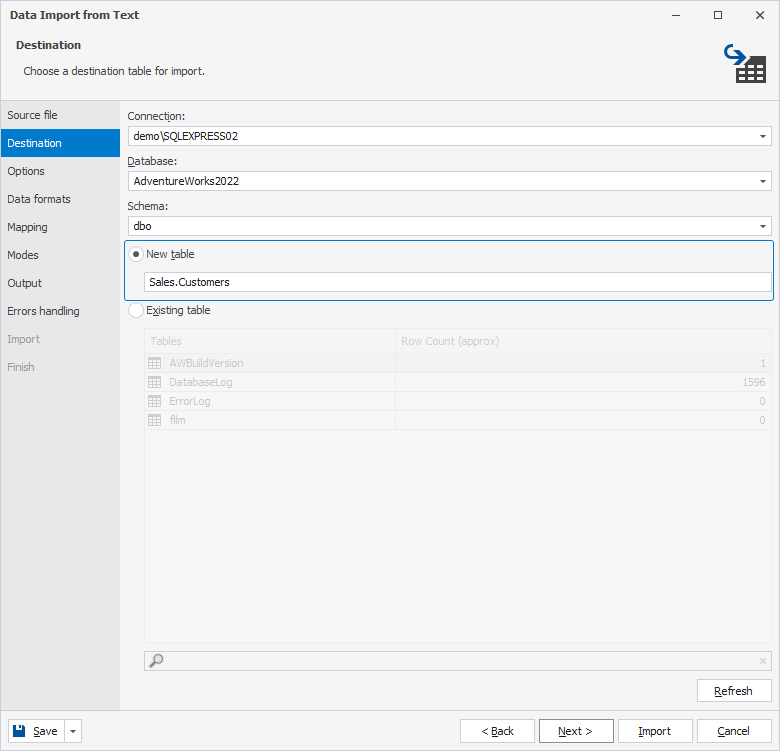
3. To upload the data to a new table, select New table and type the table name.
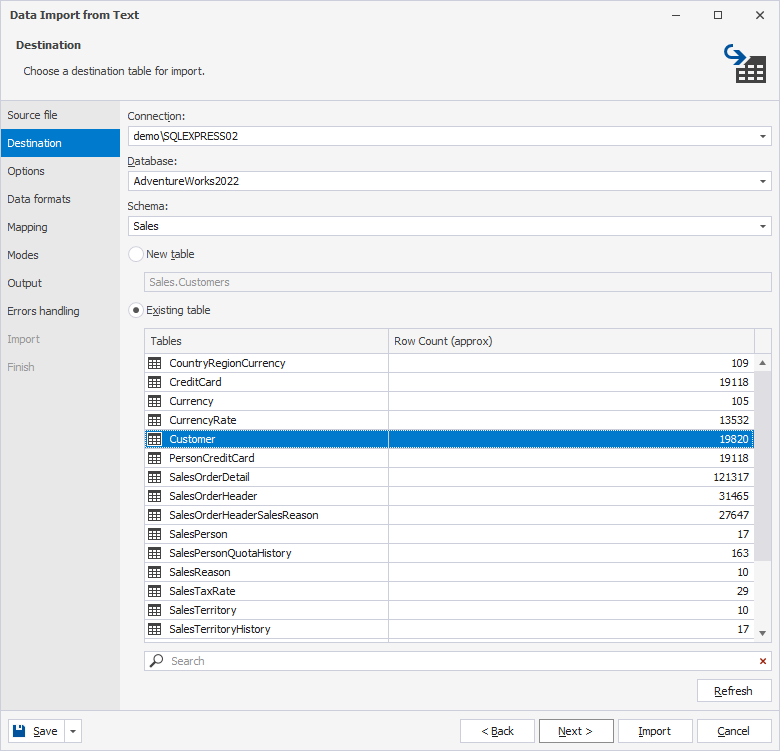
To insert data into an existing table, select Existing table and choose the desired table.
4. Click Next and adjust the options to your needs:
-
Encoding: Leave by default.
-
Field Quote: Select the character used to enclose field values in the source data file.
-
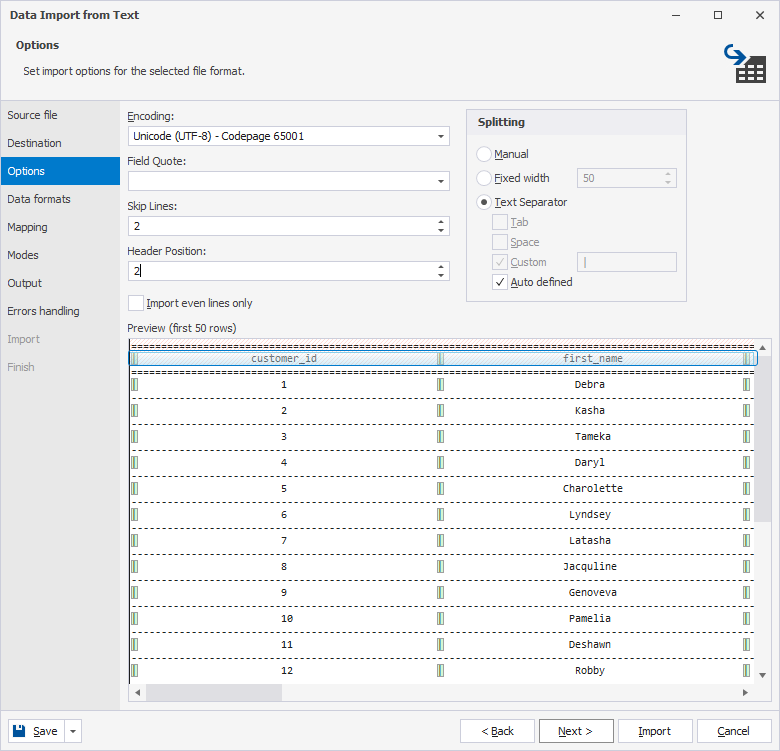
Skip Lines: Specify the number of lines to exclude from the import. For example, if you set it to 3, the first three lines will be skipped. In the Preview section, these lines will be highlighted in red for better clarity.
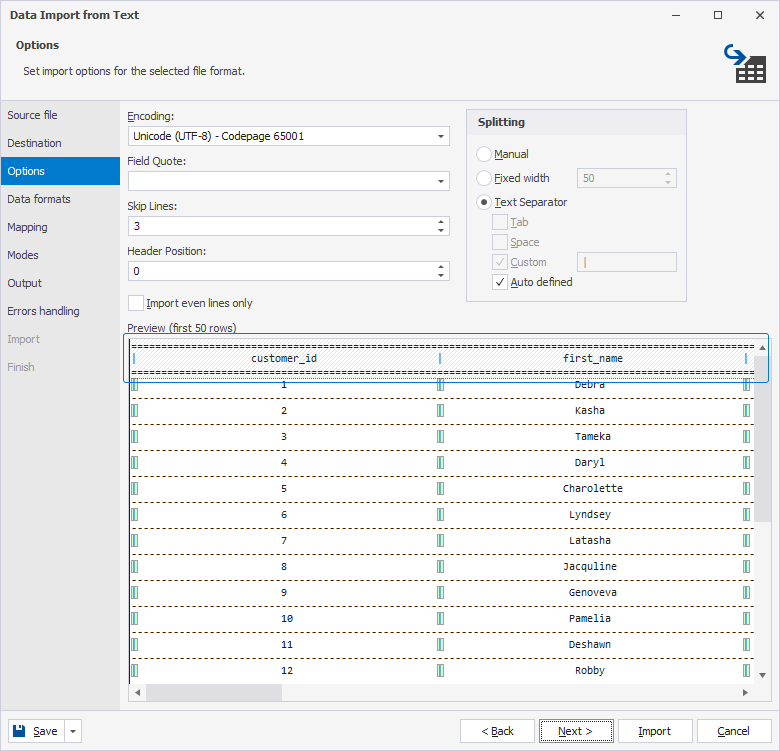
- Header Position: Specify the line number where the header is located. In the Preview section, it will be highlighted in blue.
- Import even lines only: Select the checkbox to import only rows with even line numbers (e.g., 2, 4, 6, etc.).
5. Select how you want to split the source data into columns:
-
Manual: Allows manual splitting of data. In the Preview section, double-click the desired positions to set column ranges. Markers will appear, which you can adjust by moving them forward or backward to change column lengths. To remove a marker, double-click it.
-
Fixed width: Splits the data into columns with a fixed width. Specify the width value, and the Preview section will display how the columns are split accordingly.
-
Text Separator: Splits the data into columns using a specified column separator.

6. Click Next and specify the data formats for the source data. The Common Formats section allows you to apply settings to all columns, while the Column Settings section lets you configure data formats for individual columns.
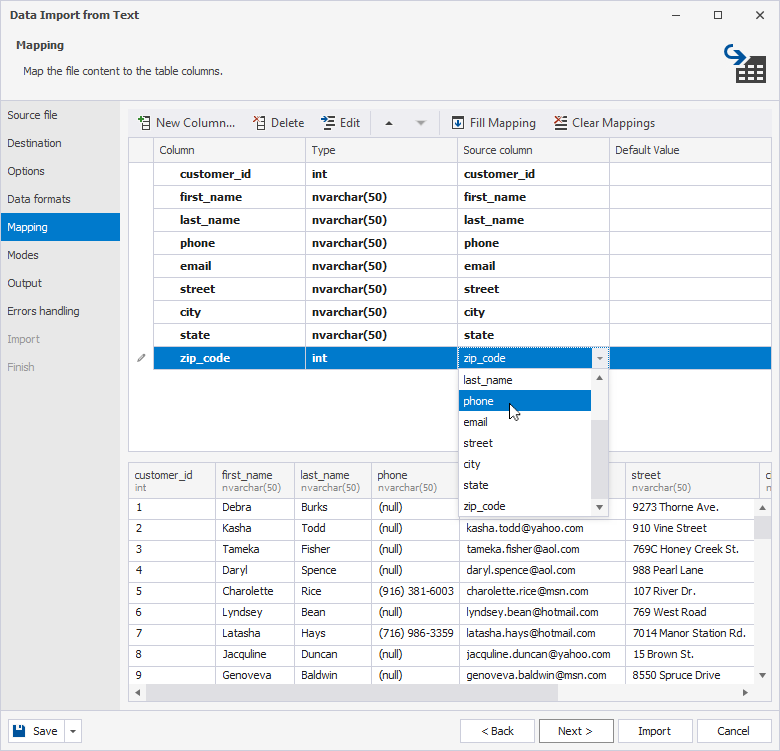
7. Click Next and map the source columns to the target ones. If you are importing data into a new table, dbForge Studio automatically creates and maps all the columns. If you are importing data into an existing table, columns with matching names are mapped automatically, while the rest must be mapped manually. If no columns with matching names are found, they are mapped sequentially, with the first source column mapped to the first target column, and so on.
To change the automatic mapping, do the following:
- For columns split with the text separator: Click the desired source column in the top grid and select the required columns from the drop-down list.
- For columns with a fixed width or manual splitting: Select a target column in the top grid and click Unmap. To map it to a source column, click the required one in the bottom grid and click Map. The length and starting position values of the source column will appear in the corresponding fields in the top grid. If required, you can change these values manually.
Note
To cancel the mapping of all columns, click Clear Mappings on the toolbar. To restore the mapping, click Fill Mapping.
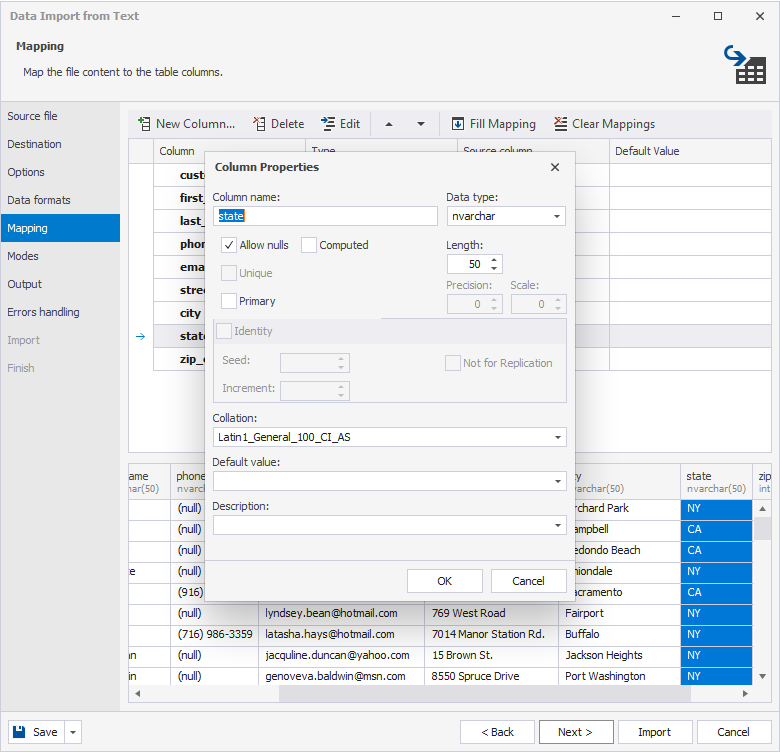
Also, if you are importing to a new table, you can edit a target column properties by double-clicking it in the top grid. If you are importing data into a new table, you can edit the properties of a target column by double-clicking it in the top grid.
8. Select the Key checkbox for a column with a primary key and click Next. Note that at least one column must be selected as a key; otherwise, certain import modes on the Modes wizard page will be disabled.
9. Choose an appropriate import mode:
- Append: Inserts records into the target table.
- Update: Replaces a record in the target table with a matching record from the source table.
- Append/Update: Updates a record if it exists in the destination table or adds it if it does not.
- Delete: Removes records in the destination table that match records in the source table.
- Repopulate: Deletes all records from the destination table and replaces them with records from the source table.
Additionally, two checkboxes are selected by default:
- Use a single transaction: Executes the data import operation within a single database transaction.
- Use bulk insert: Enables a high-performance method for importing large volumes of data into the target database.
10. Click Next and customize the output settings:
- Open the data import script in the internal editor: Opens the script in dbForge Studio after the import process is complete.
- Save the data import script to a file: Saves the script as a file. You can select Add timestamp to the file name to include a timestamp or Open in the internal editor to open the file in dbForge Studio after the import is complete.
- Import data directly to the database: Inserts records directly into the target database.
11. Click Next and configure the error-handling settings:
- Abort at the first error: Stops the import process when the first error occurs.
- Prompt a user for an action: Pauses the import process and lets the user decide whether to continue or abort.
- Ignore all errors: Continues the import process regardless of errors.
If you want to save logs, select Write a report to a log file and set the path to the file.
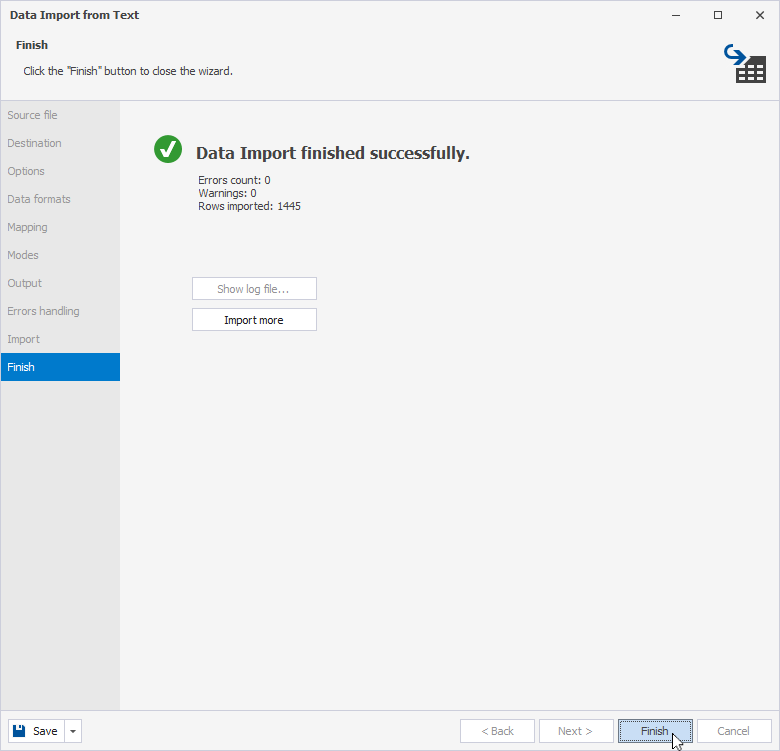
12. To launch the import process, click Import. After the data import process is complete, click Finish.
Note
You can save the import settings as a template for future use. Click Save Template on any wizard page to save the selected settings. Next time you should only select a template and specify the location of the source data - all the settings will be already set. For more information, refer to How to save and use import templates.