Register dbForge Studio for SQL Server in Microsoft Entra ID
To use Microsoft Entra authentication, you must register dbForge Studio for SQL Server in Microsoft Entra ID and configure its permissions. During registration, an application ID is generated automatically.
Step 1: Register dbForge Studio in Microsoft Entra ID
1. Sign in to the Azure portal.
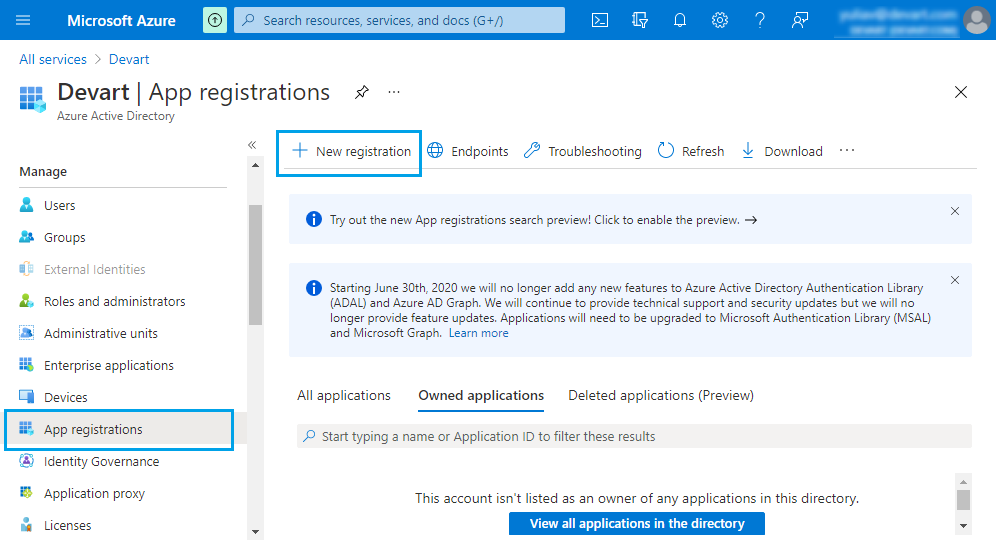
2. In Azure services, select Microsoft Entra ID.
3. On the Overview page, select Add > App registration.
4. On the Register an application page, in Name, enter a name for the application, for example, dbForge Studio.
5. Click Register.
The Studio is registered as an application, and a unique and unchangeable Application ID is automatically generated on the Overview page.
Tip
To connect dbForge Studio for SQL Server to an Azure database, copy the Application ID and save it for future use.

Step 2: Configure authentication settings
1. On the dbForge Studio page, click Add a Redirect URI.

2. On the Authentication page, click Add a platform.
3. In the Configure platforms, select Mobile and desktop applications.

4. In the Configure Desktop + Devices window, select https://login.microsoftonline.com/common/oauth2/nativeclient as a redirect URI.
5. Click Configure.
6. Under Advanced settings, select Yes for Allow public client flows.
7. Click Save.
Note
The default value for Allow public client flows is No. If you leave this setting unchanged, the application is registered as a confidential client, requiring either a certificate or a secret for authentication.
Step 3: Assign API permissions
1. Navigate to the API permissions page.
2. Click Add a permission.

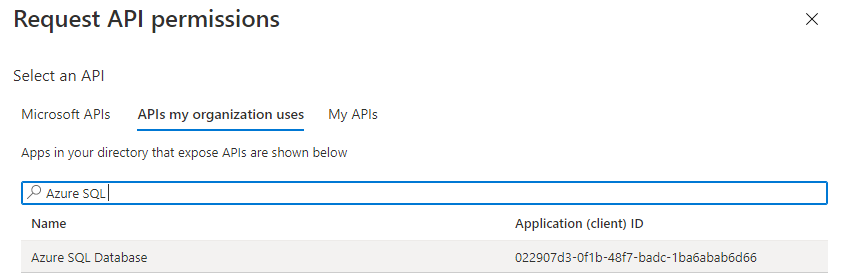
3. In the Request API permissions window, select APIs my organization uses.
4. In Search, start typing Azure SQL.
5. In the list that appears, select Azure SQL Database.
6. Select Delegated permissions, then select user_impersonation.

7. Click Add permissions.
dbForge Studio for SQL Server is now registered as a Microsoft Entra ID application. For instructions, see How to connect with Microsoft Entra ID authentication.