Manage database connections
dbForge Studio for SQL Server offers a visual, quick, and simple way to manage database connections.
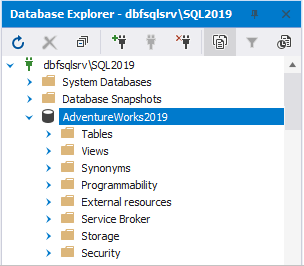
Open Database Explorer
By default, Database Explorer opens automatically when dbForge Studio starts. If it is closed, you can open it one of these ways:
- In the top menu, select View > Database Explorer.
- Press Ctrl+W, L.
Database Explorer shows recently used database connections. If opened for the first time, no connections are shown.
Open a database connection
You can open a database connection in one of these ways:
-
In Database Explorer, double-click a closed connection.
-
In Database Explorer, right-click a closed connection, then select Open.
-
In Database Explorer, select a closed connection, then click
 Open Connection on the toolbar.
In Database Explorer, the connection icon changes to ![]() , and the connection node displays a list of databases associated with the connection.
, and the connection node displays a list of databases associated with the connection.
Close a database connection
You can close a database connection in one of these ways:
-
In Database Explorer, right-click an open connection, then select Close.
-
In Database Explorer, select a open connection, then click
 Close Connection on the toolbar.
In Database Explorer, the connection icon changes to ![]() .
.
Edit a database connection
1. In Database Explorer, right-click a connection you want to edit, then select Modify Connection.
2. In the Database Connection Properties dialog, edit the connection parameters.
3. Click Connect.
The connection parameters are saved.
Delete a database connection
1. In Database Explorer, right-click a connection you want to delete, then select Delete.
2. In the dialog that appears, click Yes to confirm the deletion.
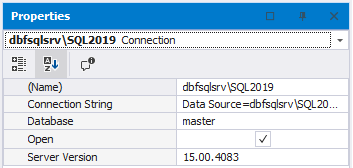
View the database connection details
In Database Explorer, right-click a connection and select Properties, or press F4.
The Properties pane opens, displaying information about the connection properties.
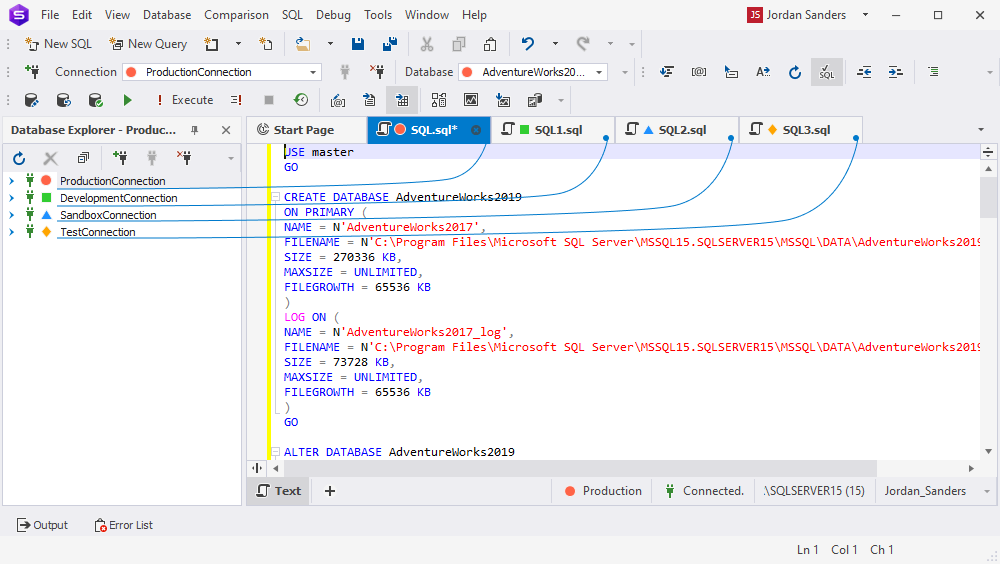
Tabs and connection coloring
Colored shapes on connections, databases, and tabs help you quickly identify the connected server.
To add a colored shape:
1. Open the Database Connection Properties dialog.
2. In Environment Category, select a colored shape for the connection.
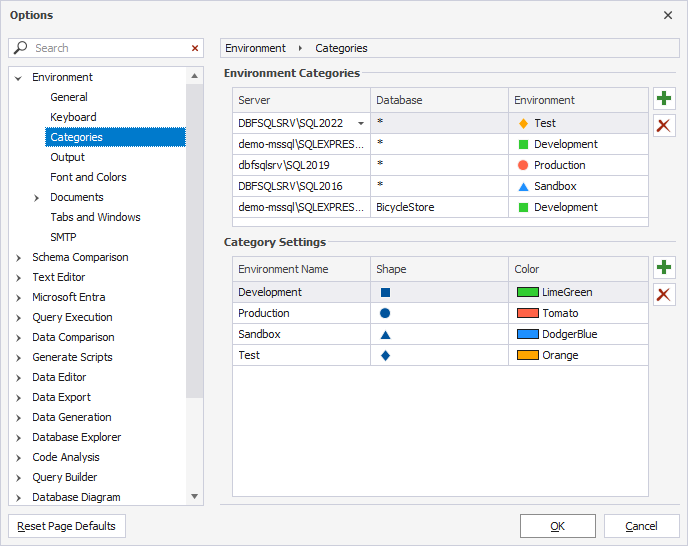
Customize category settings
On the Categories page of the Options dialog, you can can customize category settings by assigning colors to all or specific schemas within a connection. You can also add, edit, or delete categories.
To access the Categories page, do one of the following:
-
In the Database Connection Properties dialog, click Browse in Environment Category.
-
In the Tools menu, select Options, then select Environment > Categories.
Note
Tab coloring and category settings affect execution warnings.
Assign coloring to an environment category
1. Under Environment Categories, click  .
.
2. In a new row, specify a server and/or a schema name and environment.
3. Click OK to save the changes.
Note
Categories are not associated with a specific connection. They are determined by rules configured through connection attributes, such as a data source (a name or network address of the SQL Server instance to connect to) and a database name. If two connections share identical values for these attributes, they are assigned the same category.
Alternatively, you can create a DNS alias for the connection to assign a unique environment category.
Remove coloring from an environment category
1. Select the color match you want to remove.
2. Under Environment Categories, click  .
.
3. Click OK to save the changes.
Add a new category
1. Under Category Settings, click .
2. In a new row, specify an environment name and choose a shape and a color.
3. Click OK to save the changes.
Delete a category
1. Select the category you want to delete.
2. Under Category Settings, click .
3. Click OK to save the changes.