How to Quickly Set Up Review Assistant
This topic is meant for users who want to start using Review Assistant right away. For more detailed instructions on how to use Review Assistant, please refer to the corresponding sections of this manual.
Download and Installation
You can find the latest stable release of Review Assistant here.
For more detailed instructions on how to install Review Assistant, please see the Server Installation or Client Installation topics above.
Initial Start
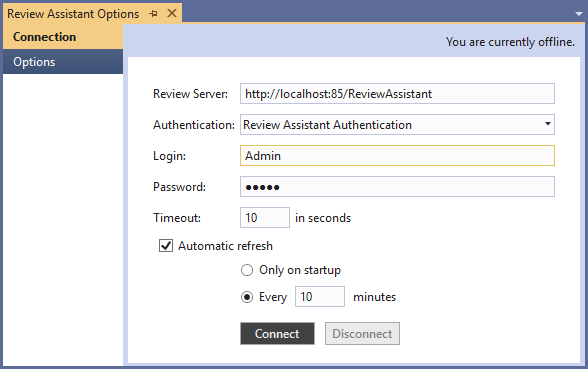
To login as an administrator:
-
Click the Options button, on the Code Review Board window (or in the Review Assistant Toolbar).
-
Enter a Review Server URL (the default URL is http://localhost:85/ReviewAssistant).
-
Select an authentication method. You can select either the Review Assistant Authentication method, which is set by default or the Windows Authentication method.
-
If you have selected the Review Assistant Authentication method in previous step, enter your user name (login) and the password. The default administrator’s login/password are Admin/Admin. If you have selected the Windows Authentication method, you can log in using Active Directory credentials.
-
Optionally, you can change Timeout, and the Automatic Refresh settings.
-
Click Connect.
If you are having connection problem refer to the Server Connection Troubleshooting topic.
Add Users to a Server
Note:
If you use TFS or Visual Studio Online, you can import a project together with related users from TFS. In this case, you may skip the following two sections.
To perform this procedure, you must be an administrator.
-
Click Options on the Code Review Board window (or in the Review Assistant Toolbar).
-
Go to the Users tab.
-
Click the Add User button and fill the fields with credentials.
or
-
Click Import Users and select From Active Directory to add users from Active Directory to Review Assistance.
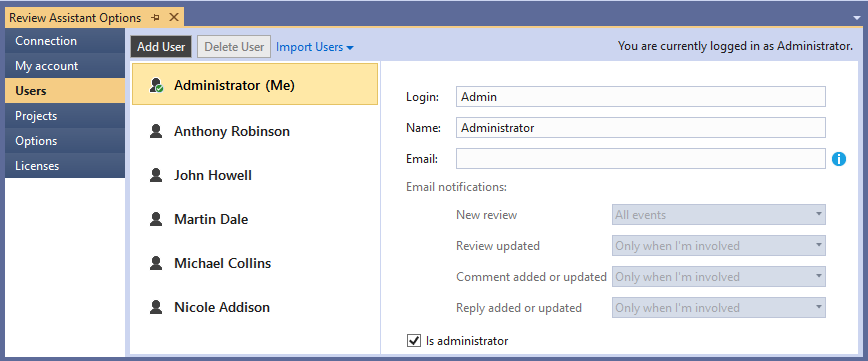
See Managing Users for more info.
Creating a Project
To create a new project and assign an owner to it:
-
Click Options on the Code Review Board window (or in the Review Assistant Toolbar).
-
Go to the Projects tab
-
Click Add Project.
-
Enter the project name.
-
Click Add new repository. Select the version control system type from the drop-down list and enter its parameters. For more detailed instructions on how to setup a repository see Setting Up Source Control Integration.
-
Click Add new member(s), and select at least one user from the drop-down list and grant them the Owner status. (Once the system administrator has created a project and assigned the owner, the latter one can take over and add other users and setup a repository).
-
Click Apply.
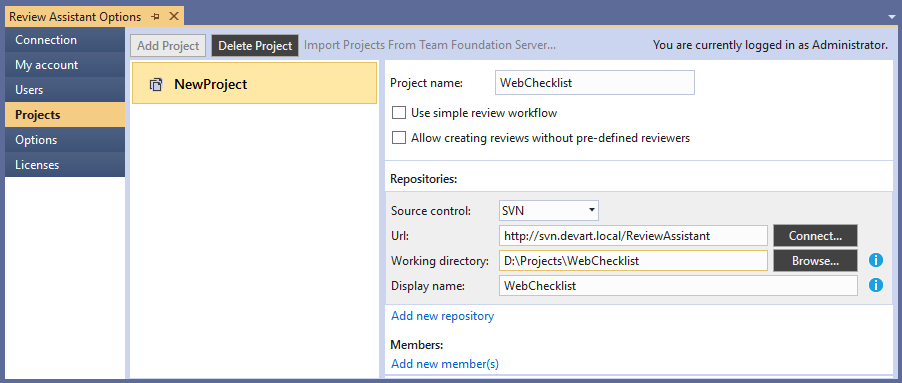
Note:
To be able to create a review you must be a member of the project, and you have to have either the owner or viewer project role.
Third-Party Diff Tool Setup
Code Compare is set as default diff tool to display file differences. If you open files for comparison using the Code Review Board window, you don’t need to make some additional configurations.
To set up a third-party diff tool, please refer to Setting Up Integration with File Diff Tool.