View and edit data in the Card view
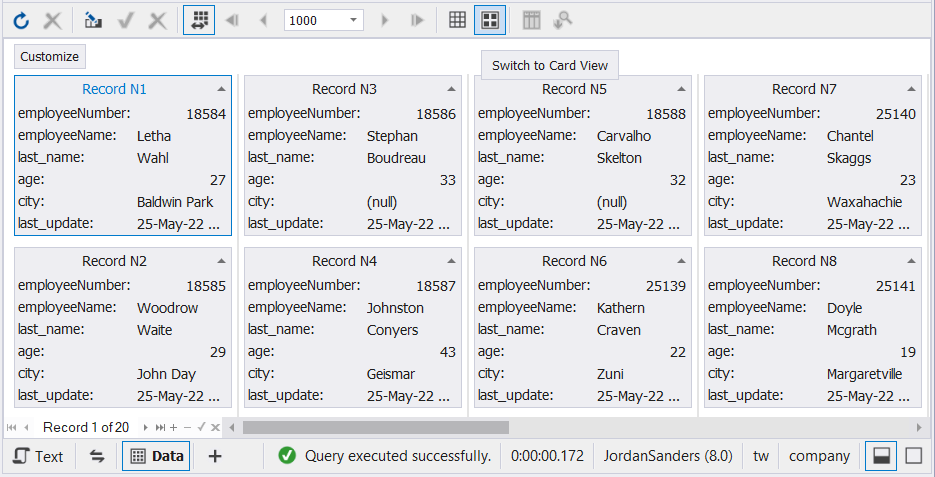
Data Editor allows you to view, edit, and print data in the Card View mode where each data row is represented as a card with the caption ‘Record N’ and number.
Enable card view
To enable the Card View mode, click  Switch to Card View on the Data Editor toolbar.
To return to the grid view mode, click
  Switch to Grid View on the Data Editor toolbar.

You can view or edit data in the same way as in the grid view mode. Data cards can be expanded and collapsed with the expander arrow in the upper right corner of the card.
As opposed to the vertical scrolling of the Grid View, the Card View features horizontal scrolling.
Manipulate the results output
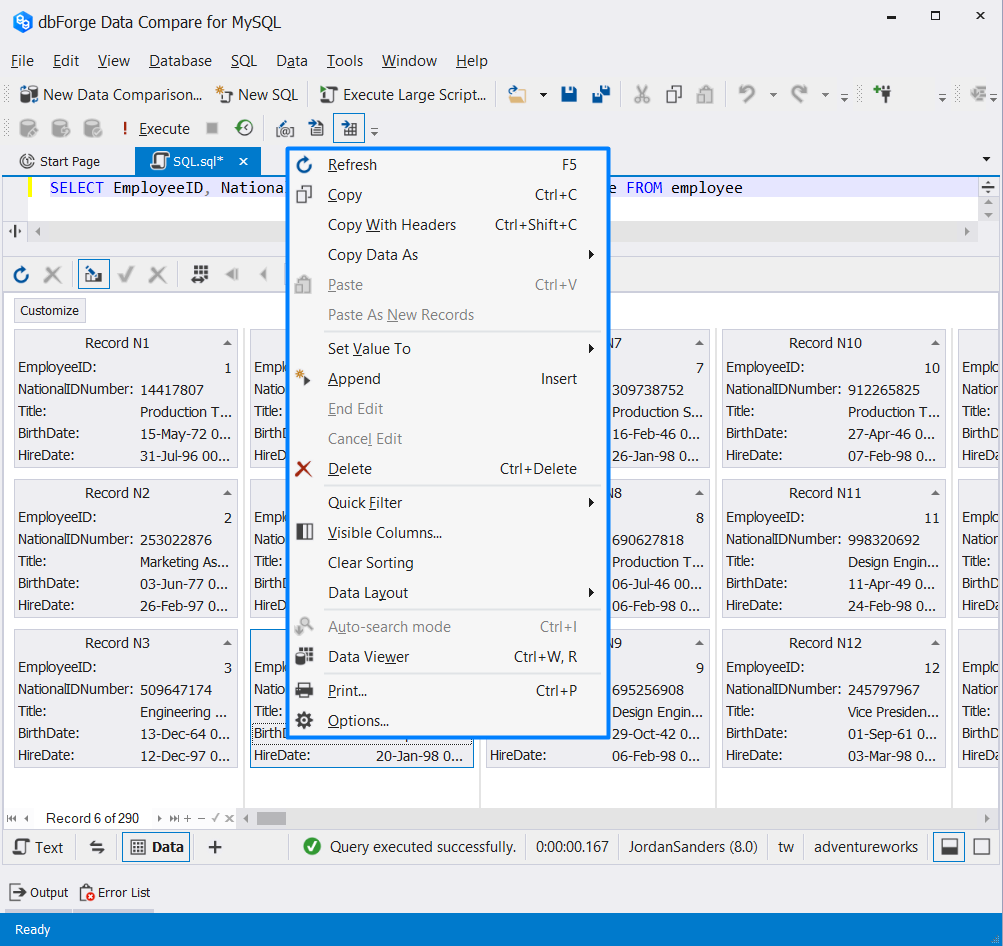
You can use a rich set of data management options from the shortcut menu.

To sort data in the card mode, click Customize and then select Sort. To filter data in the card mode, click Customize and then select Filter next to a column. For more information about how to filter data, see Filter data in grid.
View data in the Card view
The Data Editor toolbar has the following options:

 Refresh Data/Stop Refresh Data: Refresh and stop refreshing data in the grid, respectively.
 Cached Updates Mode: Control data editing within a single database object. If you enable this mode for an object, your changes will be stored locally on the client side until you click Apply Changes. If you do not need the changes to be applied, click Cancel Changes. If you close a document in the Cached Updates Mode, you will cancel all the changes made since the latest Apply Changes command.
 Paginal Mode: Switch to the paginal mode.
 Go to First Page, Go to Previous Page, Go to Next Page, Go to Last Page: Move between pages, respectively. Select the number of records per page.
 Grid View/Card View: Switch between the grid view and card view.
 Show Group by Box: Group data by column.
 Auto-Search mode: Enable the auto-search mode.
The bottom of the grid has the following options:
 : Navigate down the grid one record at a time, or instantly get to the first or the last record in the grid.
 : Append or delete records from the grid.
 : Apply or cancel changes made during editing.
Note
Use the Set Value To menu to set an empty string, zero, or the current date.
Refresh data
To refresh data, select Refresh on the Data menu, on the shortcut menu or on the toolbar. To abort an overly long refresh operation, select Stop Refresh on the Data menu or on the toolbar.
Sort cards
You can sort cards by column. To do that, click Customize and then select Sort next to a column.
To clear sorting on the current column, select Clear Sorting on the shortcut menu.
Print cards
You can print data by right-clicking a card and selecting Print on the shortcut menu. Alternatively, press CTRL+P.

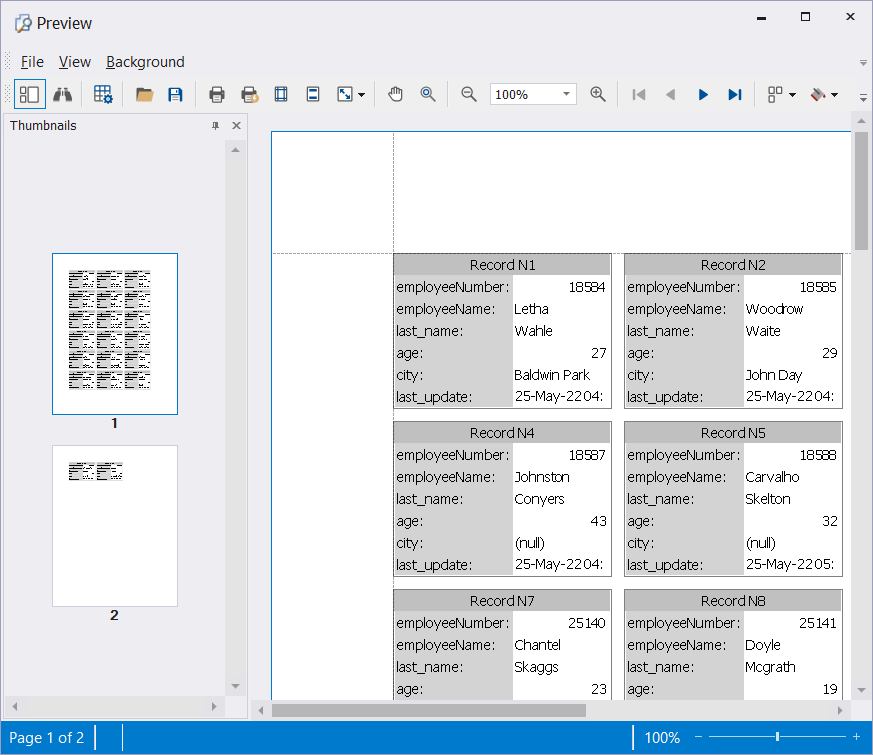
In the Preview dialog that opens, you can preview and adjust cards before printing. You can view thumbnails for each page, search for required data, customize printing options, open/save printing documents in the .prnx format, conduct page setup (format, width, height, orientation, and margins), add header and footer, zoom in and out, and navigate across pages. For more information about the preview options, see Manipulate data in the preview mode.
Print options can be configured on the Tools menu > Options> Data Editor > Print. Alternatively, select Options on the shortcut menu.
Edit data in the Card view
When dbForge Data Compare for MySQL executes any statement returning a result set, the retrieved data is displayed in the Data Editor of the data view of the same SQL document.
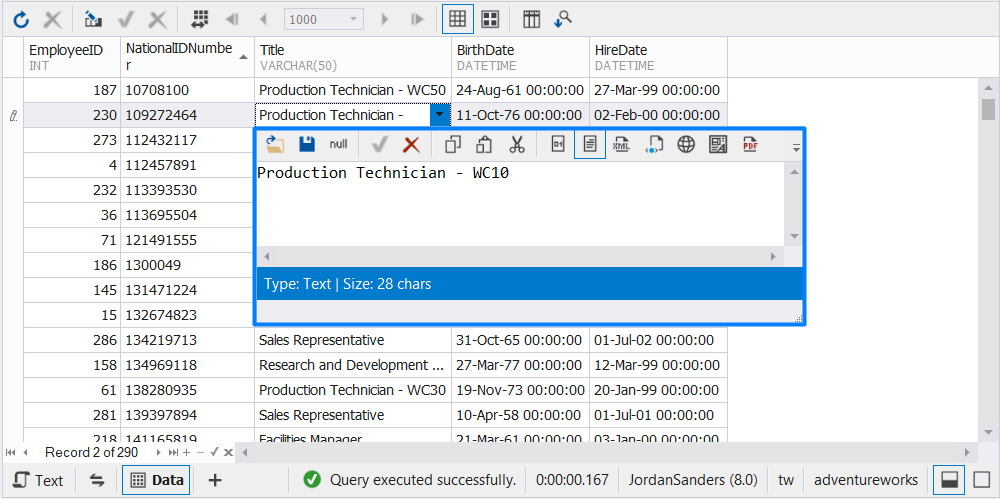
You can view and edit data in the built-in the Data Editor. To edit data, double-click the cell you want to edit and enter the value. Alternatively, double-click the cell and click the arrow. In the Data Editor that opens, you can do the following:

 Load data: Copy and load data from a source file.
 Save Data: Save data to a file.
![]() Null Data: Remove data.
Null Data: Remove data.
 Apply Changes: Apply the changes made to the data.
 Cancel Changes: Discard the changes made to the data.
 Copy, Paste, Cut: Copy, paste, and cut data respectively.
 [Format] View: View data in multiple formats.
 View White Space: When enabled, makes white spaces visible.
 : Enable Word Wrap in the Data Editor window.
Insert, delete, copy, and paste data
Use the shortcut menu or the corresponding options under the grid. For example, you can do the following:
- To insert NULL (instead of empty string), select Set Value To, NULL on the shortcut menu. You can also use the CTRL+0 key combination.
Note
Use the Set Value To option to set an empty string, zero, or a current date.
-
To add a new record, select Append from the shortcut menu or click Append under the grid. To delete a record from the grid, select Delete from the shortcut menu or click Delete under the grid or press CTRL+DEL keys.
-
To copy and paste cell values, use the corresponding options from the shortcut menu. For more information about how to copy data, see Copy data from the results grid.
Note
Some queries return read-only data; for example, queries with aggregate functions (e.g. COUNT, AVG) or data, retrieved from non-updatable views. Such data cannot be edited. It is also impossible to edit the results of multiple SELECT statements.
Row and cell indicators
When working with the grid, you can see special indicators next to the focused cell. These indicators reflect the current editing state.
 The row is focused.
 The row has been edited.
 Incorrect value was
entered into a cell. You must either fix the value or press the ESCAPE key to cancel changes made
to the cell.