Filter data in the grid
In the Data Editor, you can filter data in the following ways:
- Use quick filtering options
- Hide columns using the Visible Columns dialog
- Use a filter on the header
- Create a new filtering condition
- Add a new condition group
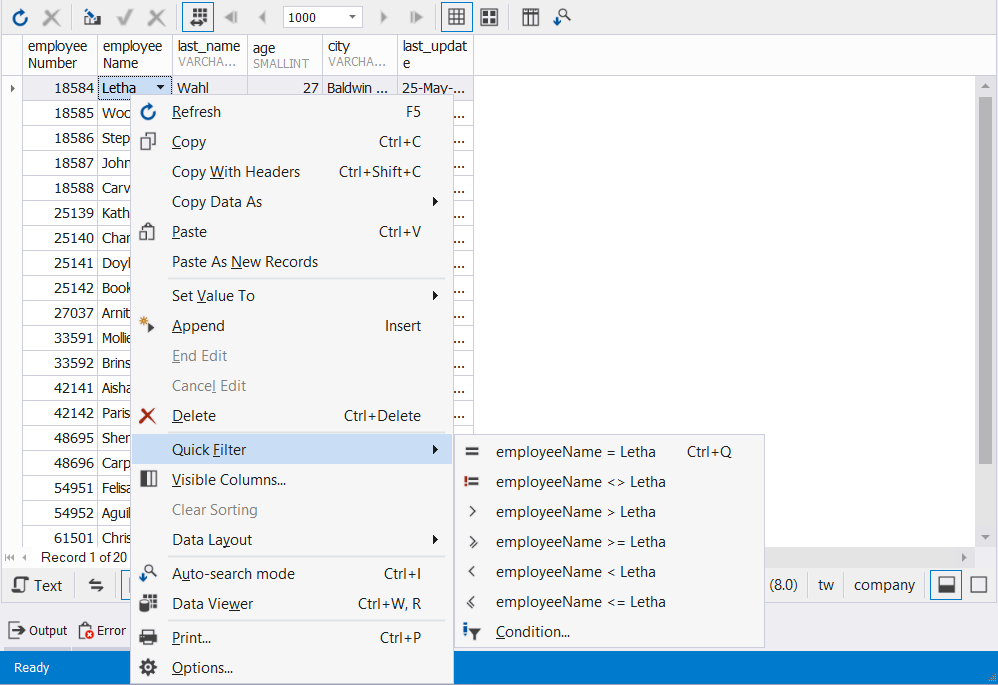
Use quick filtering options
Quick filtering options are conditions for the current column name that depend on the value in the cell.
To filter data, right-click the cell and select Quick Filter > option you want to apply.
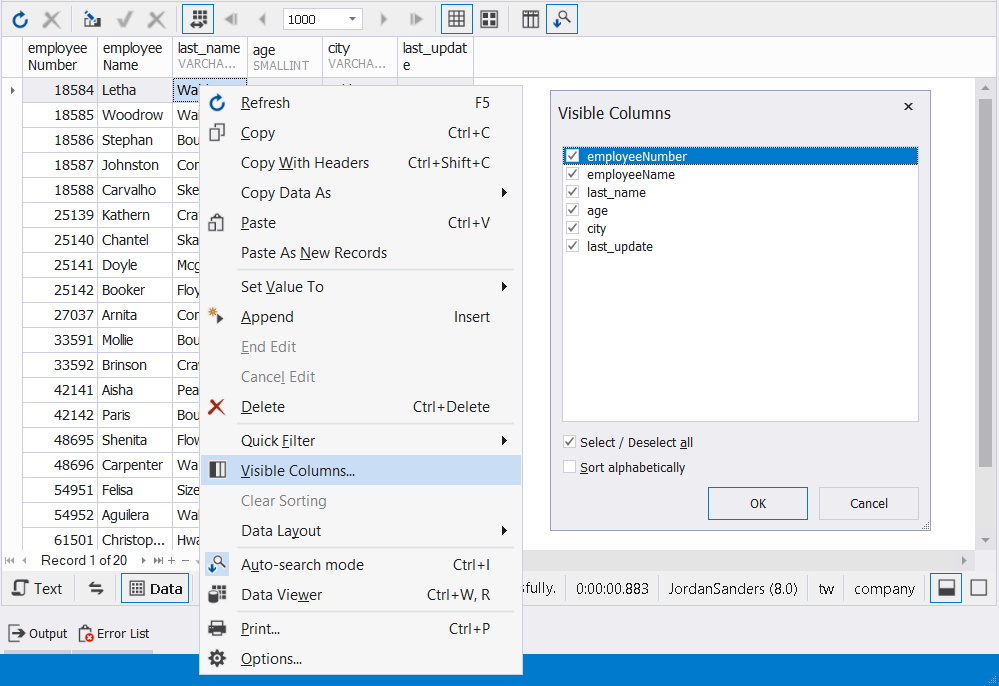
Hide columns using the Visible Columns dialog
To hide columns from the grid using visible columns:
1. Right-click the required column and select Visible Columns.
2. In the Visible Columns dialog that opens, clear the checkbox(es) next to the column(s) you want to hide in the grid.
3. Click OK to close the dialog and apply the filter condition.
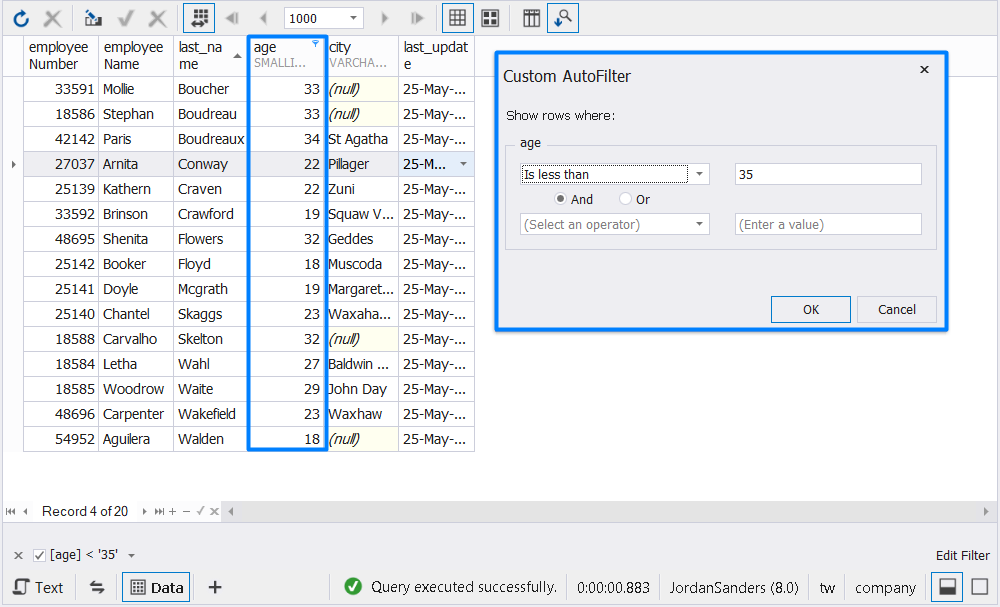
Use a filter on the header
You can filter columns either by any of the column values (All, Is Null, Is not Null) or by applying a custom filter.
1. Click Filter in the upper right corner of the required column header.
2. Select the filter value from the dropdown list.
-or-
3. Create a custom filter by clicking Custom. In the Custom AutoFilter dialog that opens, specify filtering conditions, and click OK.
When the data is filtered, the column Filter icon ![]() is changed to
is changed to ![]() active filter.
The filter condition appears in the Edit Filter section at the bottom of the grid. You can manage them in the following ways:
active filter.
The filter condition appears in the Edit Filter section at the bottom of the grid. You can manage them in the following ways:
-
To remove all filter conditions, click
 Remove at the bottom of the grid. To remove
the filter condition of a column, right-click this column and select Clear Filter.
Remove at the bottom of the grid. To remove
the filter condition of a column, right-click this column and select Clear Filter. -
To switch from the filtered data to the full data display, clear the checkbox at the bottom of the grid.
-
To edit the filter condition, click Edit Filter. Alternatively, right-click the column header on which the filter has been applied and select Filter Editor. In the Filter Editor dialog that opens, edit the filter and click OK.
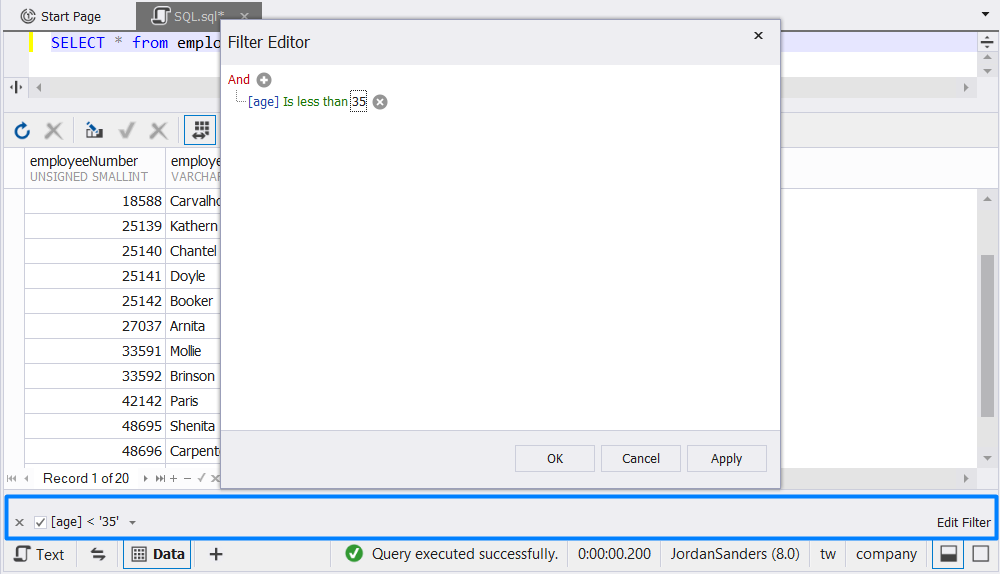
Create a new filtering condition
1. Right-click the column for which you want to create a filtering condition and select Quick Filter > Condition.
2. In the Filter Editor dialog that opens, set up condition options:
-
Click the upper-level operator to select the operator based on which you want to add a condition:
- AND displays the records when both conditions are TRUE.
- OR displays the records when at least one of the conditions is TRUE.
- NOT (AND/OR) meets the opposite condition set in the WHERE clause.
-
Click
 Add a new condition to this group next to the upper-level operator.
 -
Select a column from the dropdown list for which you want to set a filter.
-
Click the operator to select the comparison or logical operator for the condition.
-
Click enter a value to set the condition.
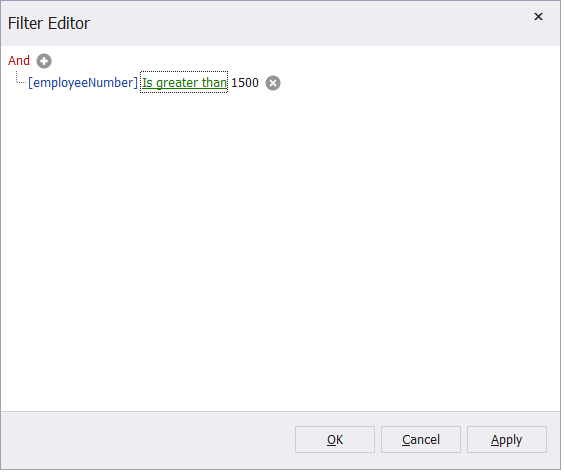
3. To save the changes, click OK.
To remove the condition, click ![]() Delete next to the corresponding condition.
Delete next to the corresponding condition.
Add a new condition group
1. Click the upper-level operator and select Add Group.
2. Click the upper-level operator to select the operator based on which you want to add a condition.
3. Select a column from the dropdown list for which you want to set a filter.
4. Click the operator to select the comparison or logical operator for the condition.
5. Click enter a value to specify the condition.
6. To save the changes, click OK.
Note
Data sorting and filtering can be performed either on the client or on the server side. To learn more about it, see Server-side and client-side sorting and filtering.