Deploy changes to databases
Source Control simplifies change management in team-based database development. It provides an easy way to commit changes to a version control repository and automatically generates scripts for database objects.
Using Source Control Manager, developers can select changed objects and commit them to the repository. The tool detects changes, generates the corresponding .sql scripts, and stores them in the repository. Other team members can retrieve these changes by updating their local database using the generated scripts.
Note
Source Control begins tracking changes only after the database has been linked to source control.
Warning
To prevent data loss when updating your local database or reverting changes, ensure static data is also linked to source control.
Walkthrough: How to deploy changes to a database
Assume you are working with two databases: development and production, both linked to the same development repository. The databases are synchronized and contain consistent schema objects, for example, Table1 and Table2.
You can deploy changes from development to production using dbForge Source Control. The steps may differ depending on whether the production database was disconnected from source control at any point.
Deployment scenarios
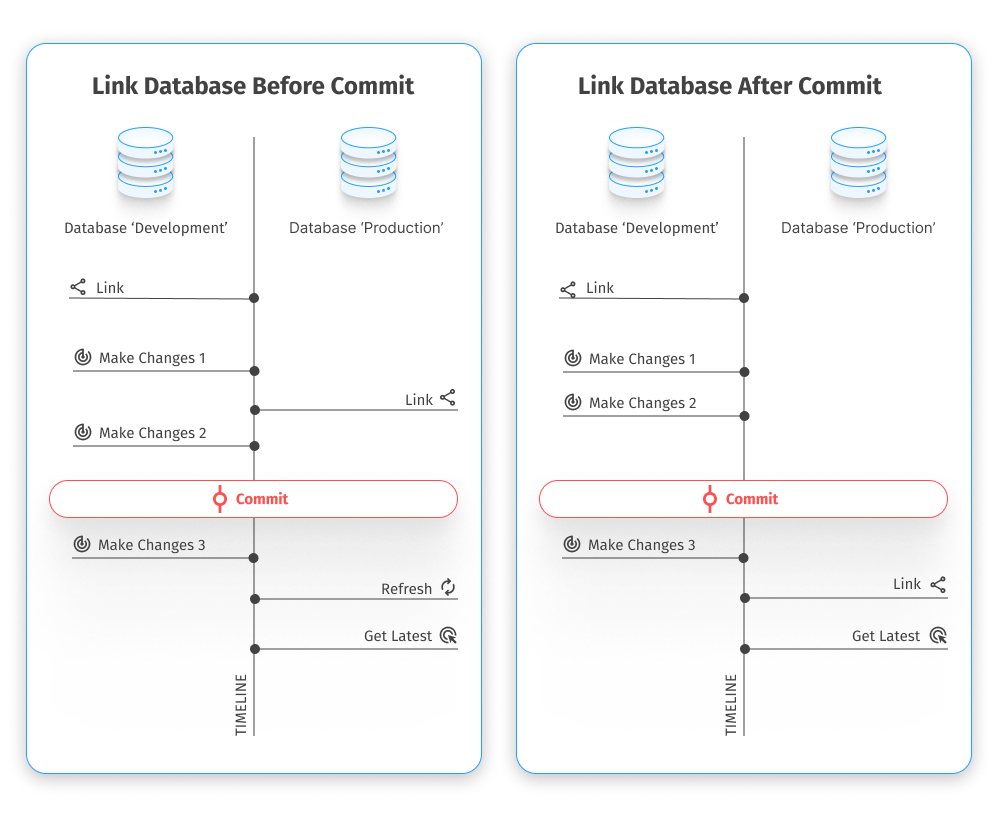
- Case 1: Both databases are linked to the same version control repository. A user makes changes and commits them to the repository without disconnecting from it at any point. Then, the user gets the remote changes into the production database.
- Case 2: Both databases are linked to the same version control repository. The user disconnects the production database from source control, modifies the development database, and commits those changes. Then, the user re-links the production database to the repository to retrieve any remote changes.

Case 1: Both databases remain linked
1. Link the development and production databases to the development repository in the dedicated database development mode.
The Refresh window opens automatically, showing the stages of the refresh operation. Source Control Manager also opens for each database.
Note
You can link the database at any time before committing the changes.
2. In the development database:
- Modify Table1 by adding a column.
- Delete Table2.
- Add Table3.
3. Commit these changes to the development repository.
The Commit window opens, showing the stages of the commit operation.
4. To close the window, click OK.
5. Switch to Source Control Manager of the production database and click Refresh.
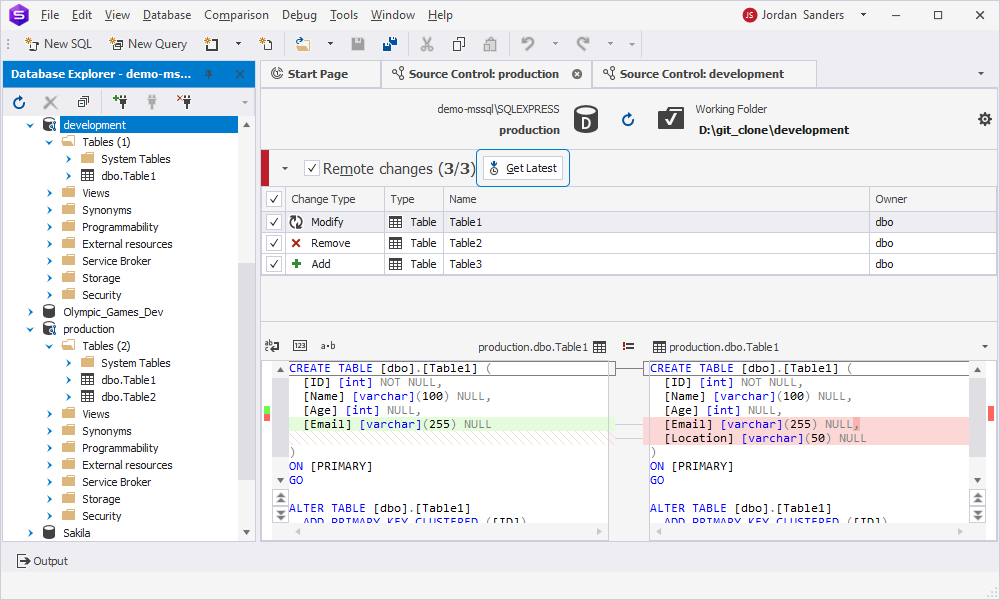
Source Control detects the changes and shows them in the Remote changes section:
- Modify for Table1
- Remove for Table2
- Add for Table3
6. Select the objects to deploy and click Get Latest.

Case 2: Production database was disconnected
1. Link the development and production databases to the development repository in the dedicated database development mode.
The Refresh window opens, showing the stages of the refresh operation. Source Control Manager also opens for each database.
2. Unlink the production database from the repository.
3. In the development database:
- Modify Table1 by adding the column.
- Delete Table2.
- Add Table3.
4. Commit these changes to the development repository.
5. Re-link the production database to source control.
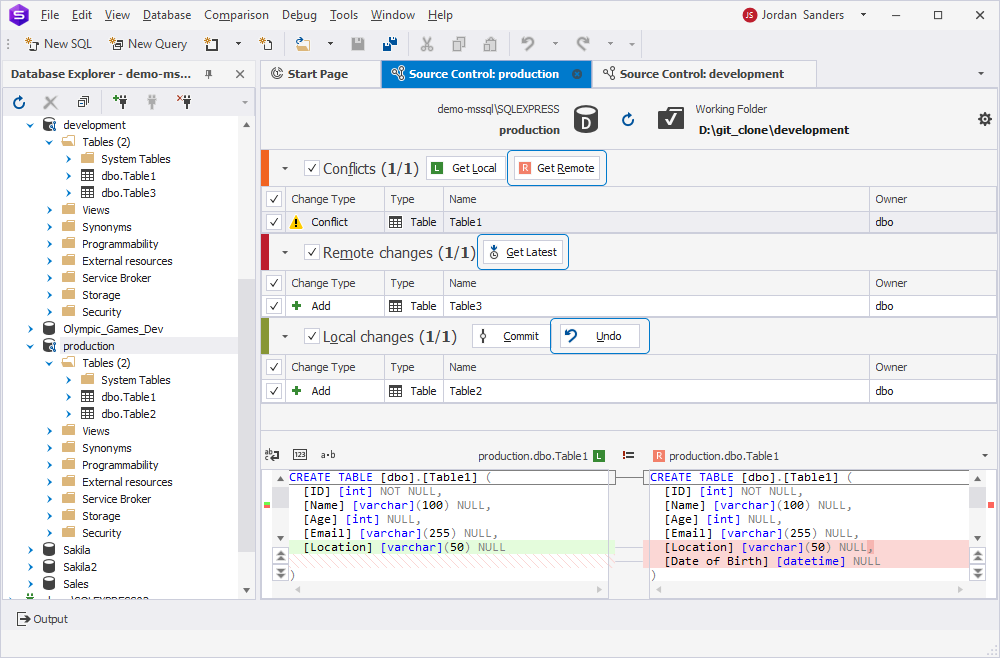
Source Control displays the following:
- Table1 appears in the Conflict section.
- Table3 appears in the Remote changes section.
- Table2 appears in the Local changes section.
6. To deploy the changes:
- In the Remote changes section, click Get Latest for Table3.
- In the Local changes section, click Undo for Table2, then click Yes in the confirmation dialog.
- In the Conflicts section, click Get Remote for Table1.
- After that, Table1 appears under the Remote changes section.
- Select the object and click Get Latest.

In conclusion, when deploying changes from the development repository to the production database using dbForge Source Control, it is recommended to always maintain the connection between the source control and the production database. Alternatively, it is possible to deploy changes using the dbForge Schema and Data Compare tools.