Add a Git repository
Schema Compare allows you to establish the connection to a Git repository.
Schema Compare supports Git for Windows client. Thanks to it, you can work with all possible connection and authentication types as this task is delegated to the Git client. Before trying to connect to a Git repository, make sure that you have Git for Windows client installed on your machine and a clone of the repository you want to connect.
You can make a local clone of the repository from the command line: Open the Command Prompt or terminal, navigate to the folder that will store SQL scripts for your database project, and execute the git clone <url> <path> command or use the GUI tool. Note: Specify a dot at the end of the command to clone the repository to the folder you have created. Otherwise, another subfolder will be created.
To add a Git repository as source
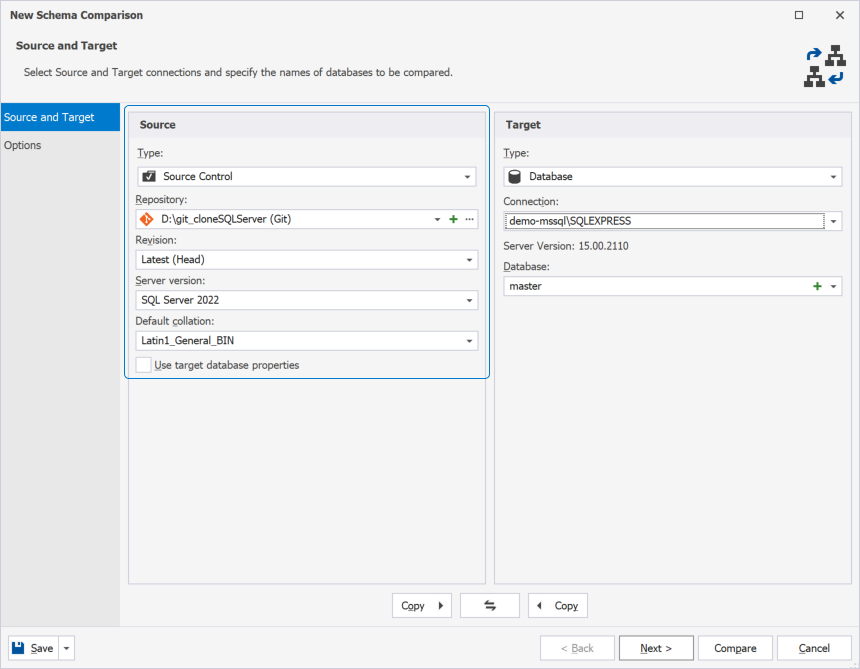
1. In the upper-right corner of the Start Page or on the toolbar, click New Schema Comparison to open the New Schema Comparison wizard.
2. On the Source and Target page of the wizard, select Source Control as a source type.
3. In the Repository menu, click + New to open the Source Control Repository Properties dialog.
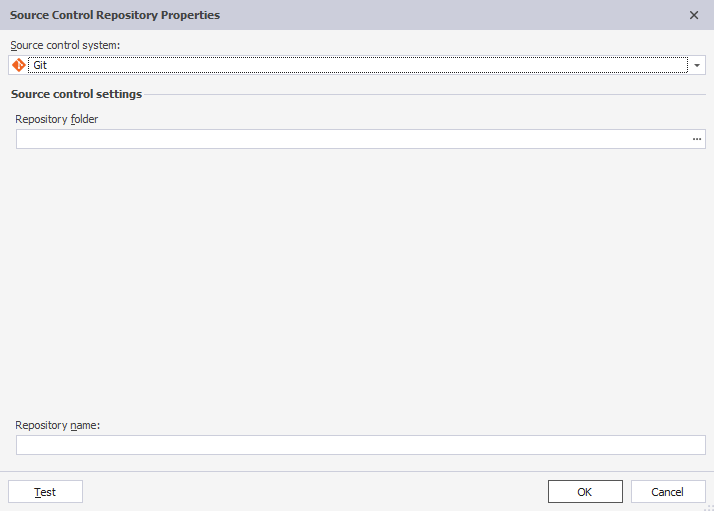
4. In the Source Control Repository Properties dialog that opens, do the following:
- From the Source control system list, select Git as a source control system.
- In the Repository folder field, click
 Browse to add the repository folder. In the Select Folder window that opens, select the folder, which is a local copy of your remote repository, and then click Select Folder.
 - Optional: The Repository name is automatically derived from the server URL. However, you can specify a different name of the repository.
- Optional: Click Test to check the connection. The pop-up window notifying you that the connection has been successfully established appears. Click OK to close the window.
Note
Keep in mind that you should work with the current repository branch. For this, it must have at least one commit.
5. Click OK to close the Source Control Repository Properties dialog.
To add a Git repository as target
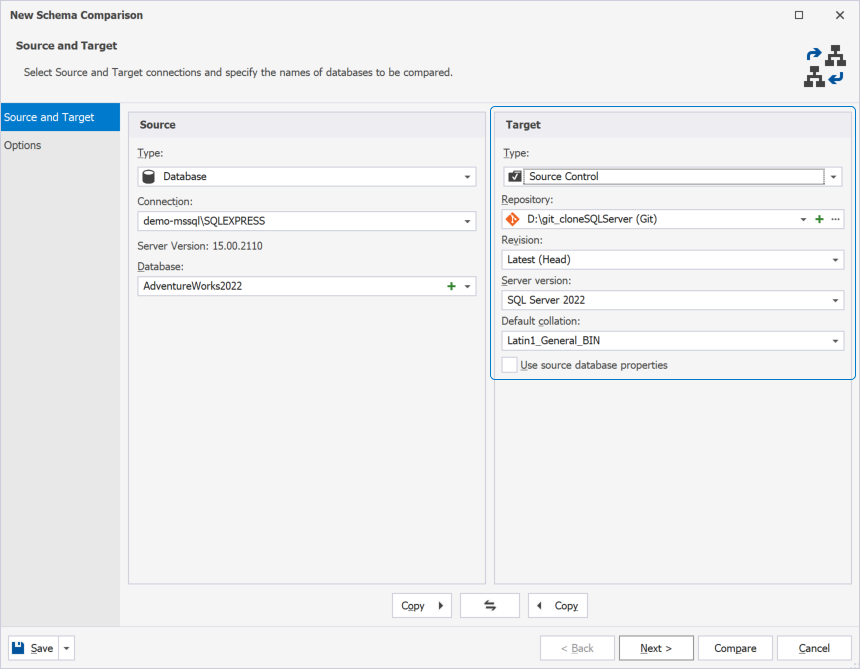
1. In the upper-right corner of the Start Page or on the toolbar, click New Schema Comparison to open the New Schema Comparison wizard.
2. On the Source and Target page of the wizard, select Source Control as a target type.
3. In the Repository menu, click + New to open the Source Control Repository Properties dialog.
4. In the Source Control Repository Properties dialog that opens, do the following:
- From the Source control system list, select Git as a source control system.
- In the Repository folder field, click Browse to add the repository folder. In the Select Folder window that opens, select the folder, which is a local copy of your remote repository, and then click Select Folder.
- Optional: The Repository name is automatically derived from the server URL. However, you can specify a different name of the repository.
- Optional: Click Test to check the connection. The pop-up window notifying you that the connection has been successfully established appears. Click OK to close the window.
Note
Keep in mind that you should work with the current repository branch. For this, it must have at least one commit.
5. Click OK to close the Source Control Repository Properties dialog.
See also: How to create a GIT repository from scratch on GitHub.