Select synchronization output
After you have selected the objects for synchronization, you can use the Data Synchronization Wizard to create a SQL synchronization script.
Note
When you select the Source and Target, the sync operation only applies changes to the target database, while the source database remains unchanged.
Synchronize databases
To open the Data Synchronization Wizard, click  Synchronize data to the target database on top of the Data Comparison document.
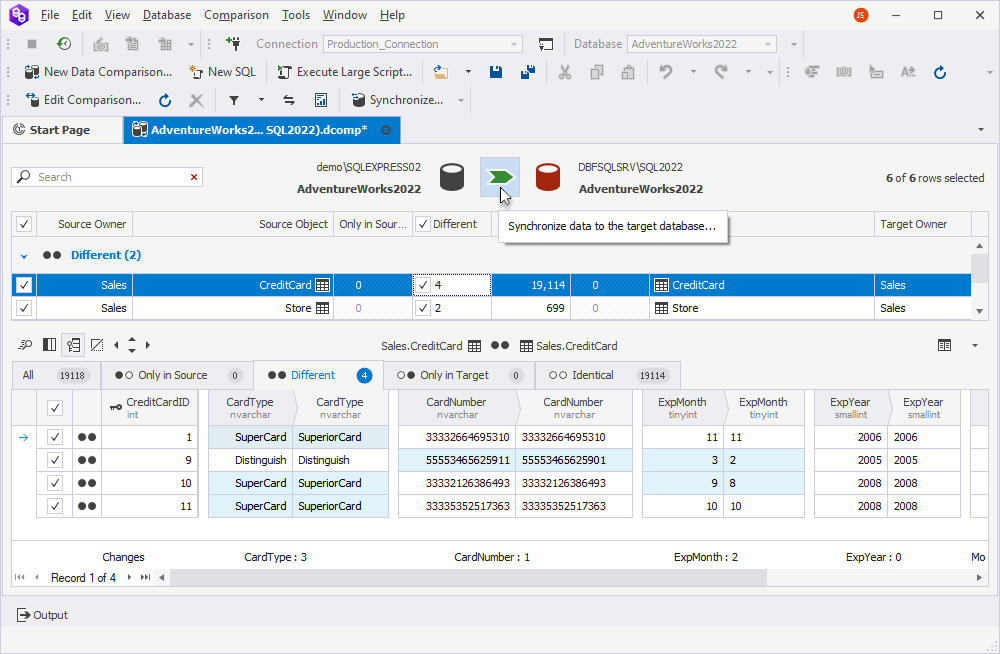
On the Data Synchronization Wizard > Output page, you can select one of the output options to manage the synchronization script.
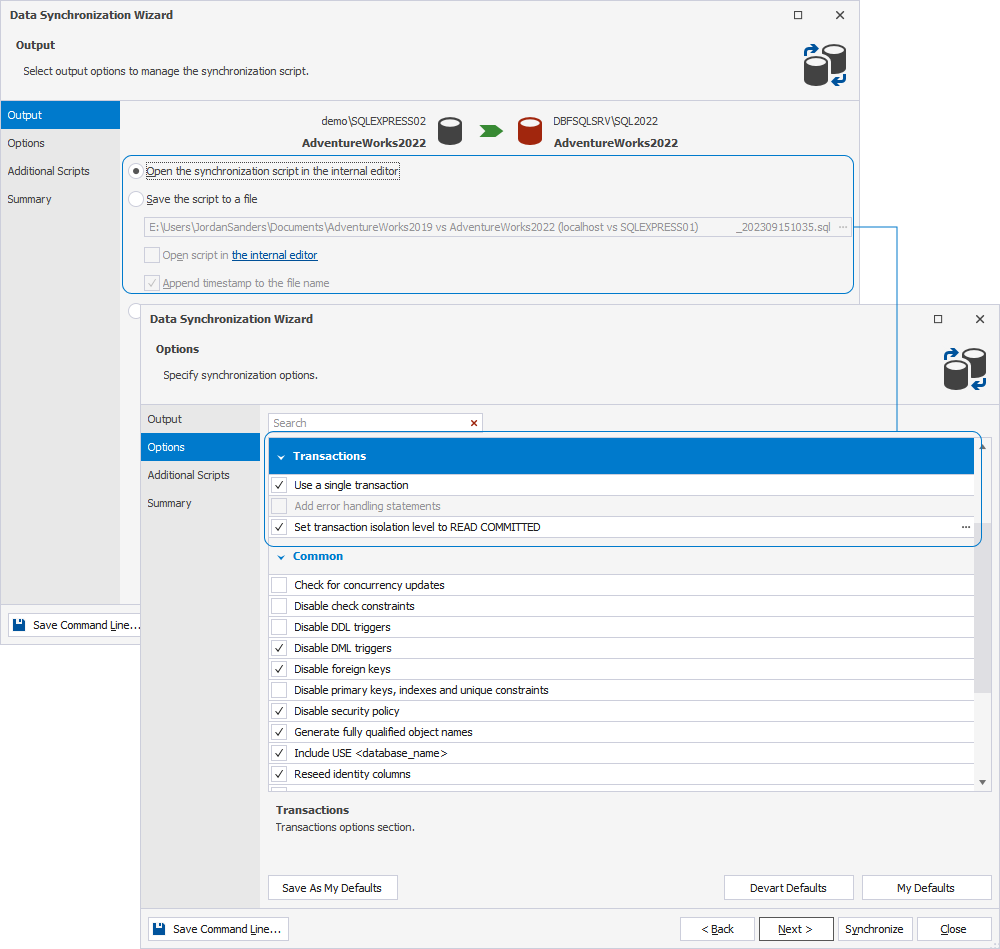
Open the synchronization script in the internal editor
This option is selected by default. The script for database synchronization will open in the internal editor of the Data Compare tool where you can view and modify it if needed. To synchronize the database, click Execute on the toolbar menu.
The synchronization script will be executed as a single transaction. If any part of the synchronization encounters an error or fails, none of the changes will be saved in the database, and the entire process will be rolled back. For example, if the script contains three INSERT statements, and any of them encounters an error, data won’t be inserted in any table.
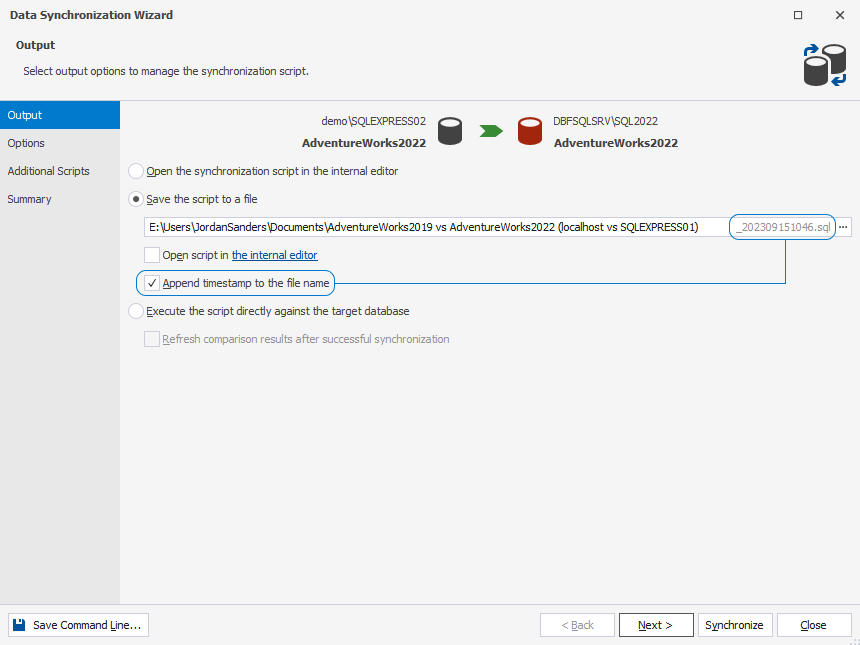
Save the script to a file
Select this option to save the script locally on your PC. By default, the script is saved in a predefined location. To change the file location and name, click  More options. In the Save As window that opens, specify a new name and/or choose a path to the folder you want to save the script to, and click Save.
A timestamp is automatically added to the file name. If you want to exclude the timestamp from the file name, clear the Append timestamp to file name checkbox.
Tip
When you perform a database comparison and save the synchronization script using the default file name, which includes the source and target database names, re-synchronizing the same databases with the same file-saving option may overwrite the existing script. To avoid this, enable the Add Timestamp option when saving the script. This appends a timestamp to the file name, ensuring each synchronization script remains distinct.
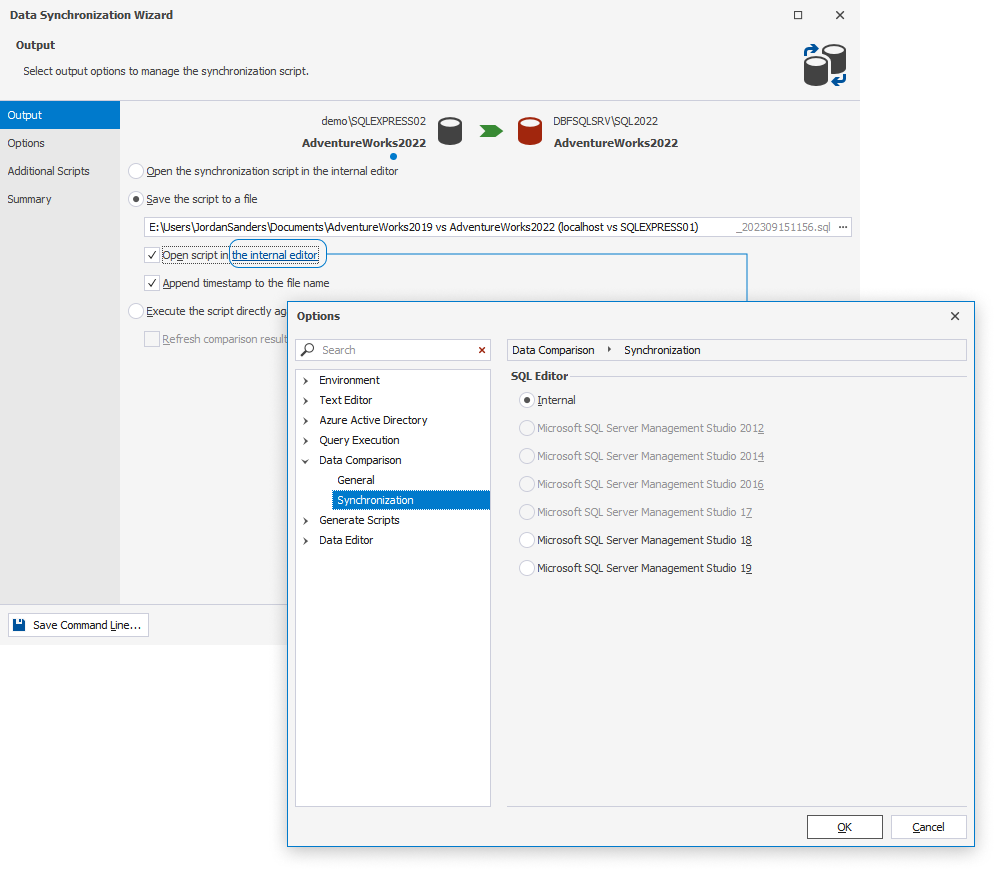
If you want to open the script in the internal editor after saving, select the Open script in the internal editor checkbox. You can also change the editor that will open after saving the file. To do this, click the internal editor link. In the Options > Synchronization window that opens, select the corresponding option.
The synchronization script will be executed as a single transaction. If any part of the synchronization encounters an error or fails, none of the changes will be saved in the database, and the entire process will be rolled back. For example, if the script contains three INSERT statements, and any of them encounters an error, data won’t be inserted in any table.
Execute the script directly against the target database
Select this option to execute the script without reviewing it.
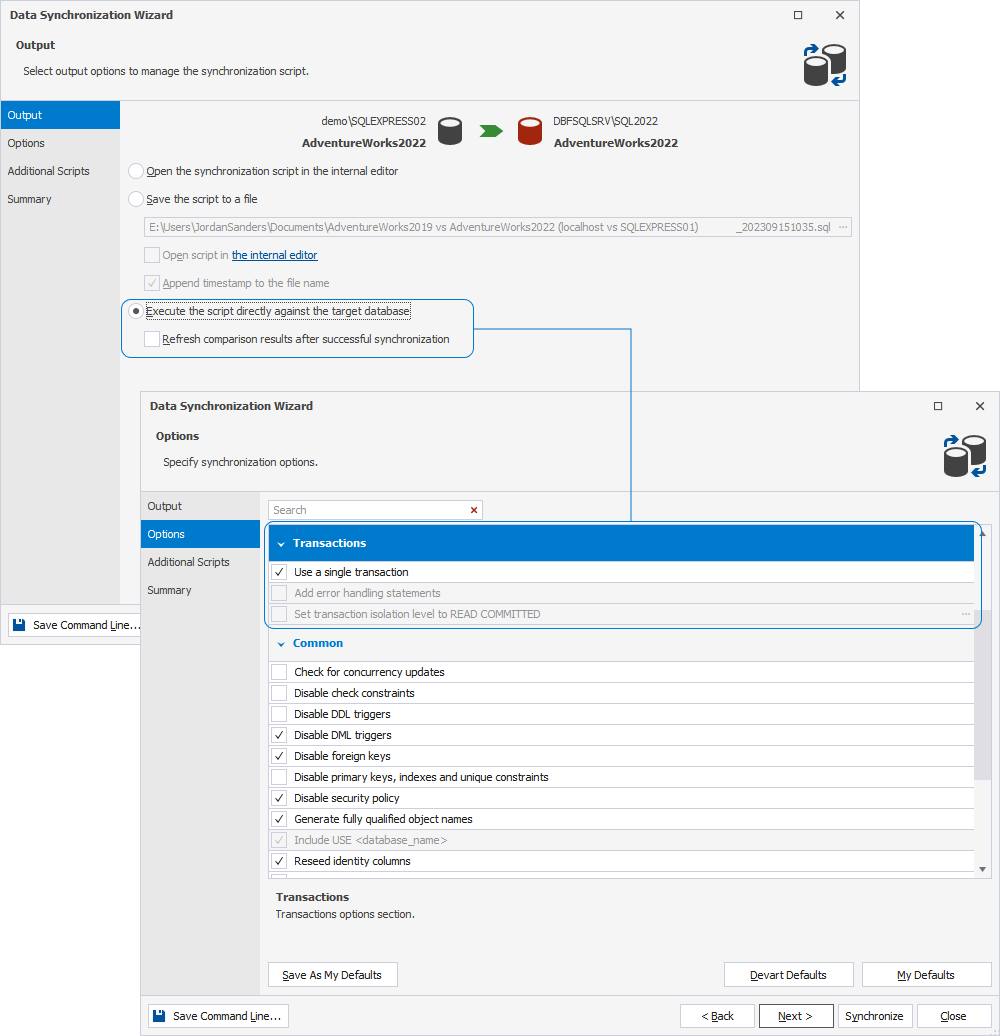
The synchronization script will be executed as a single transaction. If any part of the synchronization encounters an error or fails, none of the changes will be saved in the database, and the entire process will be rolled back. For example, if the script contains three INSERT statements, and any of them encounters an error, data won’t be inserted in any table.
Customize the default behavior of a synchronization script
You can customize the behavior of the synchronization script by setting up different synchronization options on the Options page of the wizard > Transactions group.
Case 1: No transaction options are selected.

If any step in the synchronization script encounters an error or fails, the script continues the execution. The changes made up to that point may still be saved in the database, except for those that failed. For example, the script contains three INSERT statements. The first and third statements are successful, while the second one encounters an error. As the result, the data will be inserted only in the first and third tables.
Case 2: The Add error handling statement option is selected.

The script will stop executing after encountering an error. For example, the script contains three INSERT statements. The first statement is executed without errors, while the second one fails. As the result, the script stops executing and inserts data only in the first table, even if the third statement is successful.
Case 3: The Use a single transaction option is selected.
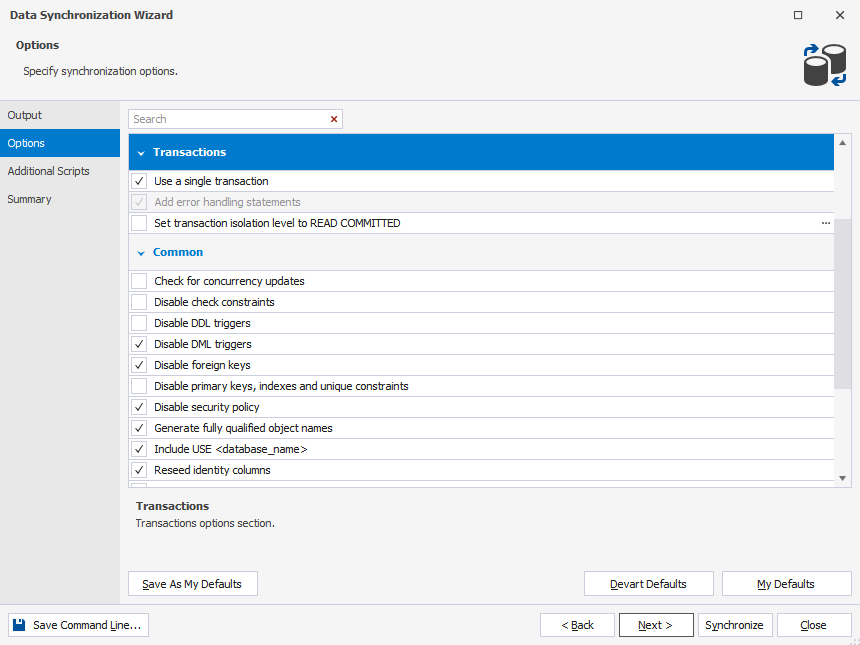
All changes made during the synchronization process are treated as a single, atomic transaction. If any errors occur, the entire process is rolled back, and no changes are saved.
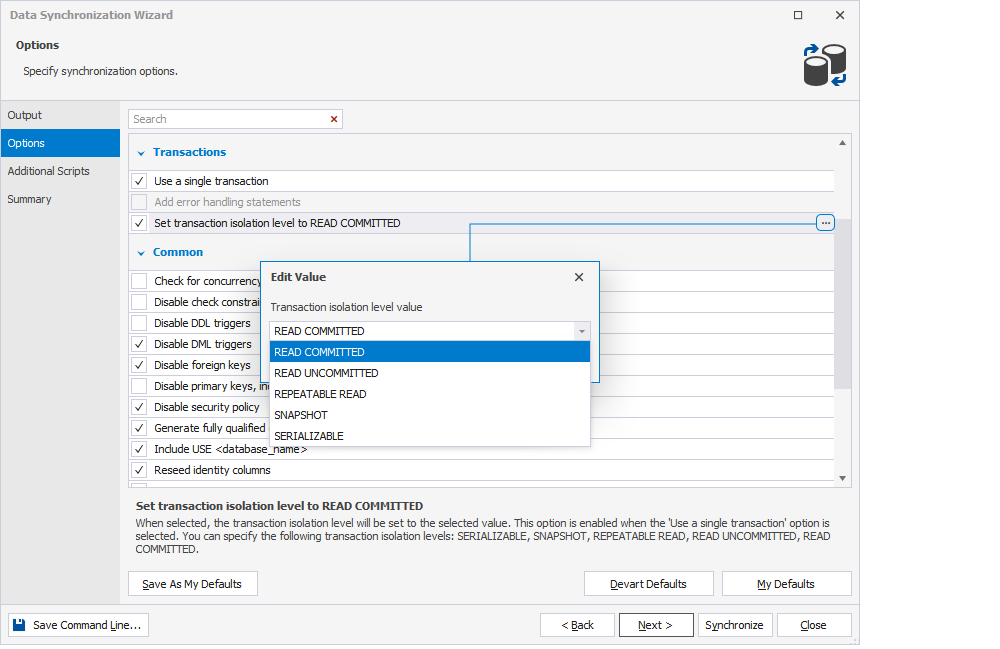
Set transaction isolation level
A transaction isolation level defines the rules and behaviors regarding how transactions interact with each other when they are executed simultaneously. The default transaction isolation level is READ COMMITTED.
Note
The Set transaction isolation level option can be selected only if the Use a single transaction option is selected.
It is possible to specify different transaction isolation levels such as SERIALIZABLE, SNAPSHOT, REPEATABLE READ, READ UNCOMMITTED, and READ COMMITTED. To do this, click More options next to the Set transaction isolation level to checkbox and select the required level:
For more information about transaction isolation levels, see the Microsoft documentation.
Synchronize backups
If you select a backup as the Target, the Data Synchronization Wizard generates a script to update the database from which that backup was created. You can not modify backups directly with Data Compare for SQL Server.
If you select a backup as the Source and a database as the Target, Data Compare for SQL Server can synchronize the database with the data from the backup.
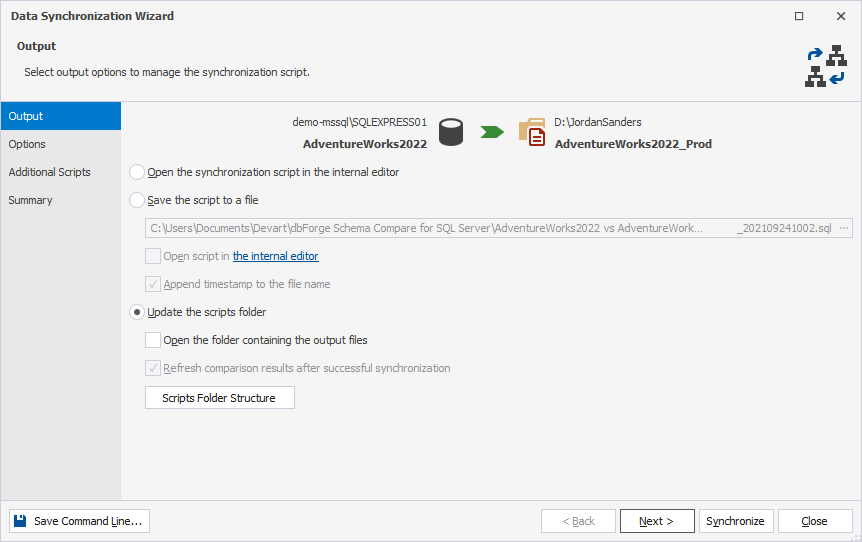
Synchronize scripts folders
If you select a scripts folder as the Target, you can either create a data changes deployment script to update the database from which that scripts folder was created, or update files in the scripts folder directly. The possible options in this case are as follows:
- Open the synchronization script in the internal editor
- Save the script to a file
- Execute the script directly against the target database
Note
dbForge Data Compare can be involved in the DevOps process by creating the data comparison task with the help of the command-line script.
For more information about deploying static data, see the How to deploy static data topic.