Configure synchronization options
After selecting the objects for synchronization and configuring the synchronization output, you can use the Data Synchronization Wizard to set synchronization options.
How to configure the synchronization options
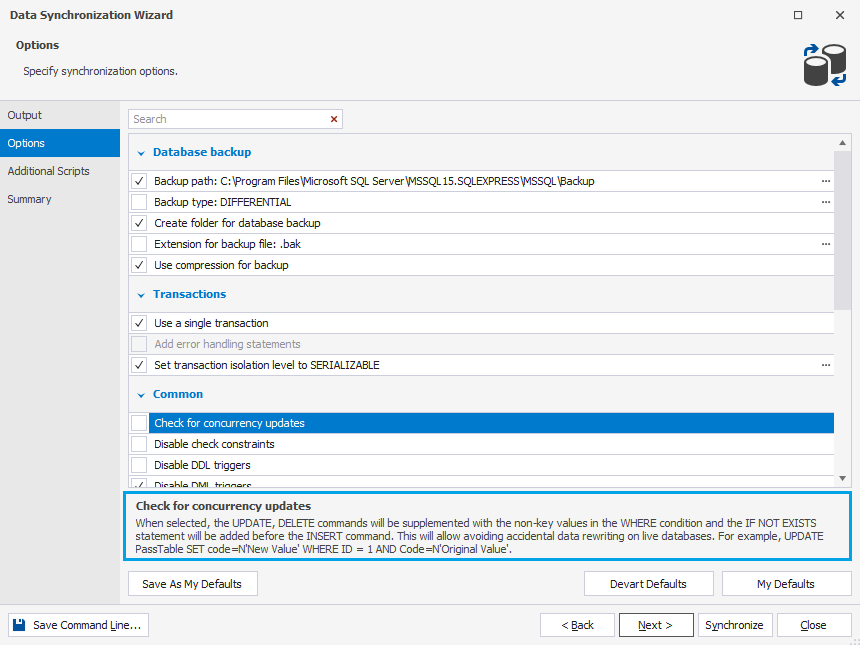
To configure data synchronization options, navigate to the Options page. For your convenience, each option has a detailed description.

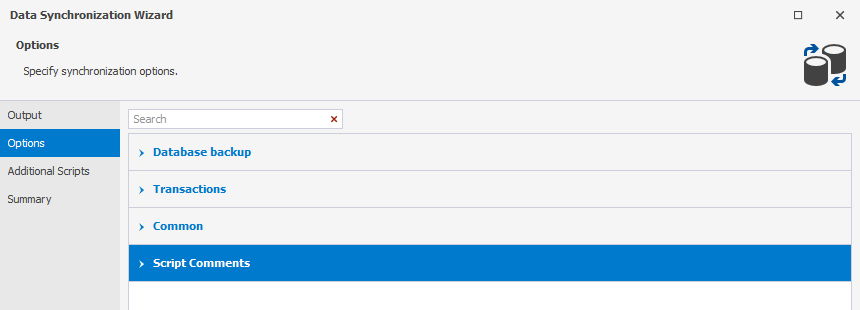
Note that the options can be grouped.

To configure the synchronization, select or clear checkboxes in the list of options.
Search for options
On the Options page, you can search for specific synchronization options by typing the search text or symbol, such as an underscore, in the Search box. The list is filtered to display only those options that contain the search text.
The default search mode is case-insensitive. It means that searching for a term such as backup will highlight all options containing the text whether it is capitalized (Backup) or lowercase (backup). As you type, the text that matches your search criteria will be highlighted in the grid. The number of matching options will be displayed in the search bar.

If you write the text divided by spacebars, each subsequent input will highlight new results.

In the Search box, you can use the following keyboard shortcuts:
- Ctrl+A to select all.
- Ctrl+Left Arrow (←) to move the caret to the beginning of the word.
- Ctrl+Right Arrow (→) to move the caret to the end of the word.
- Ctrl+Shift+Left Arrow (←) to select text from the current caret position to the beginning of the current word and move the caret to the beginning of the word.
- Ctrl+Shift+Right Arrow (→) to select text from the current caret position to the end of the current word and move the caret to the end of the word.
- Ctrl+Backspace to delete the word to the left of the cursor.
To remove the search input, click ![]() in the Search box.
in the Search box.
Note
To use the options you have set later, click Save As My Defaults.
To apply options you have saved earlier, click My Defaults.
To return to the default settings of the tool, click Devart Defaults.
After you’ve configured the synchronization options, click Synchronize.
How to save the synchronization options
Data Compare for SQL Server allows saving synchronization options as a .dcomp file for further use, for example for automating and/or scheduling database synchronization tasks.
To save the synchronization settings (the .dcomp file), you need to close the Data Synchronization wizard after configuring all the necessary options (before clicking Synchronize). Then, in the comparison results document, click the Save icon or press Ctrl+S.
The asterisk near the .dcomp file name means that the project has not yet been saved.

Note
If you save the .dcomp file before configuring the synchronization settings, it will contain the custom settings you configured in the Data Comparison wizard and the default synchronization settings.
Data Compare synchronization options
| Option Name | Option Group | Default State | Option Description |
|---|---|---|---|
| Backup path | Database backup | Enabled | Creates a backup and allows specifying the location of the target database backup file. The backup file name will be generated in the following format: <database_name>_yyyy_MM_dd_hh_mm.bak |
| Backup type | Database backup | Disabled | Creates a backup in the selected mode. Please, note that creating a differential database backup requires a previous full database backup. If your database has never been backed up, a full database backup will be created. Copy-only mode option is available for SQL Server 2008 or later versions. |
| Create folder for database backup | Database backup | Enabled | Creates a folder for a database backup. |
| Extension for backup file | Database backup | Disabled | Specifies the extension for a backup file. When the option is disabled, the default extension (.bak) will be used for a backup file. |
| Use compression for backup | Database backup | Enabled | Performs the backup compression. This option is available for SQL Server 2008 or later versions. |
| Use a single transaction | Transactions | Enabled | Executes a synchronization script as a single transaction. All the changes to the databases will be rolled back in case of any error when executing the synchronization script. |
| Add error handling statements | Transactions | Disabled | Stops executing a script when encountering an error. |
| Set transaction isolation level to | Transactions | Enabled | Sets the transaction isolation level. This option is enabled when the Use a single transaction option is selected. You can specify the following transaction isolation levels: SERIALIZABLE, SNAPSHOT, REPEATABLE READ, READ UNCOMMITTED, READ COMMITTED. |
| Check for concurrency updates | Common | Disabled | Supplements the UPDATE and DELETE statements with the non-key values in the WHERE condition and adds the IF NOT EXISTS statement before the INSERT statement. This will allow avoiding accidental data rewriting on live databases. |
| Disable check constraints | Common | Disabled | Drops check and not null constraints at the beginning of the synchronization. After the synchronization, those constraints are restored. |
| Disable DDL triggers | Common | Disabled | Disables DDL triggers before the synchronization. After the synchronization, the triggers are enabled. |
| Disable DML triggers | Common | Enabled | Disables DML triggers before the synchronization. After the synchronization, the triggers are enabled. The option is applicable to tables and views. |
| Disable foreign keys | Common | Enabled | Drops foreign keys before the synchronization. After the synchronization, the foreign keys are restored. |
| Disable primary keys, indexes, and unique constraints | Common | Disabled | Drops primary keys, indexes, and unique constraints before the synchronization. After the synchronization, the primary keys, indexes, and unique constraints are restored. If a primary key, index, or a unique constraint is the comparison key, it cannot be dropped. |
| Generate fully qualified object names | Common | Enabled | Generates fully qualified object names in the synchronization script. If the option is enabled, the names of objects in the synchronization script will include a schema name. |
| Include USE <database_name> | Common | Enabled | Adds the USE <database_name> clause to the script. |
| Reseed identity columns | Common | Enabled | Reseeds a current value for the identity columns. |
| Restore constraints using WITH CHECK | Common | Disabled | Creates constraints with WITH CHECK parameter. |
| Synchronize a database in the single user mode | Common | Disabled | Synchronizes a database in the single user mode. |
| Synchronize via files path | Common | Disabled | Creates a separate file using the OPENROWSET function for each value which size is greater than 1MB. To upload these files on a remote server, you need to specify a shared network folder accessible both from the client and the server machines. |
| Exclude comments | Script Comments | Disabled | Prevents comments generation in the synchronization script. |
| Include print comments | Script Comments | Disabled | Adds comments to the output when executing the synchronization script. If the print comments are included in the synchronization script, it is easier to locate the items in the output. |
You can find the list of the available comparison options in the Configure comparison options topic. Additionally, the topic outlines the process of generating a command-line arguments file, which may include not only comparison options but also synchronization options.