How to involve dbForge Data Compare into DevOps
dbForge Data Compare can be involved in the DevOps process by creating the data comparison task with the help of the command-line script. This can help you automate the data comparison process as part of the database development or deployment pipelines, ensuring consistent and reliable data synchronization between databases.
Before you start, make sure that dbForge Data Compare for SQL Server is installed on the computer on which you want to run the pipeline. You can add the data comparison task to a new CI pipeline or the existing one in Azure DevOps. For more information about how to create a sample Azure Pipeline application using the dbForge DevOps Automation Azure DevOps plugin for SQL Server, see Build CI/CD pipelines in Azure DevOps.
Using dbForge Data Compare with Azure DevOps includes the following steps:
- Step 1: Set up a data comparison project
- Step 2: Add the data comparison task to the Azure DevOps pipeline
- Step 3: Run the pipeline
Step 1: Set up a data comparison project
Launch the dbForge Data Compare tool and perform the following steps to set up the data comparison project:
1. On the toolbar, click New Data Comparison to set up the general options of the data comparison project.
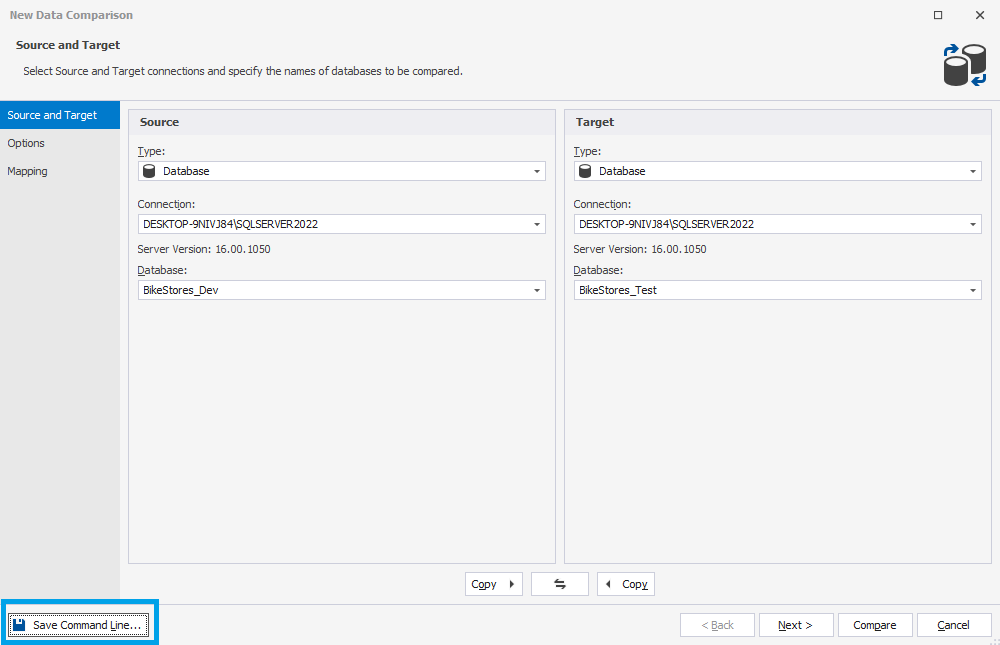
2. On the Source and Target page of the wizard, select Database as the source and target type, and choose the connections and databases you want to compare.
To customize the default options of the comparison process, navigate to the Options page.
Optional: Go to the Mapping page to manually map objects with different names.
3. To generate command-line settings, click Save Command Line in the left-bottom corner of the wizard.
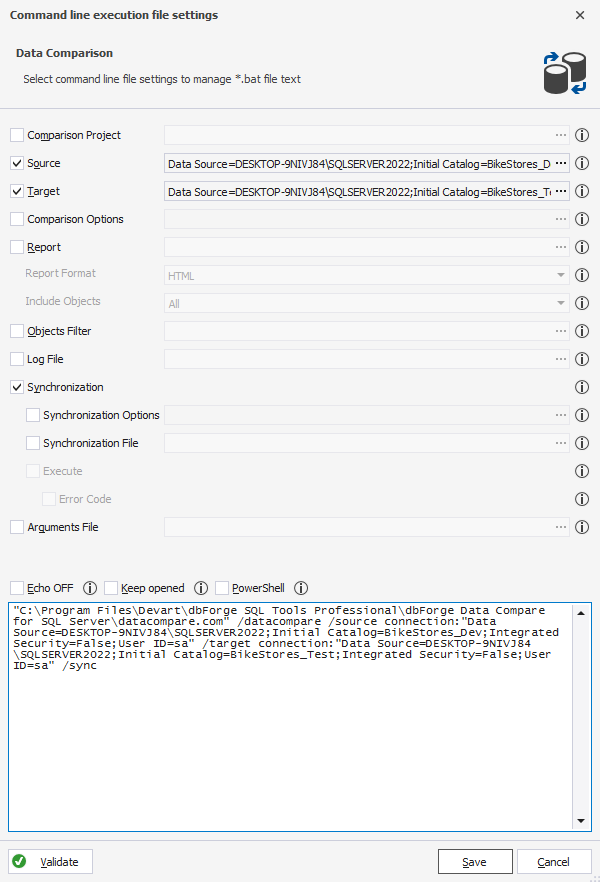
4. In the text field, the command-line arguments are generated. Later you’ll need to copy them to enter in the data comparison task in the Azure DevOps configuration pipeline.
Step 2: Add the data comparison task to the Azure DevOps pipeline
After the command-line arguments have been created, you can add a task that executes dbForge Data Compare to the Azure DevOps pipeline. To do this, follow the steps:
1. Sign in to your Azure DevOps organization and navigate to your project.
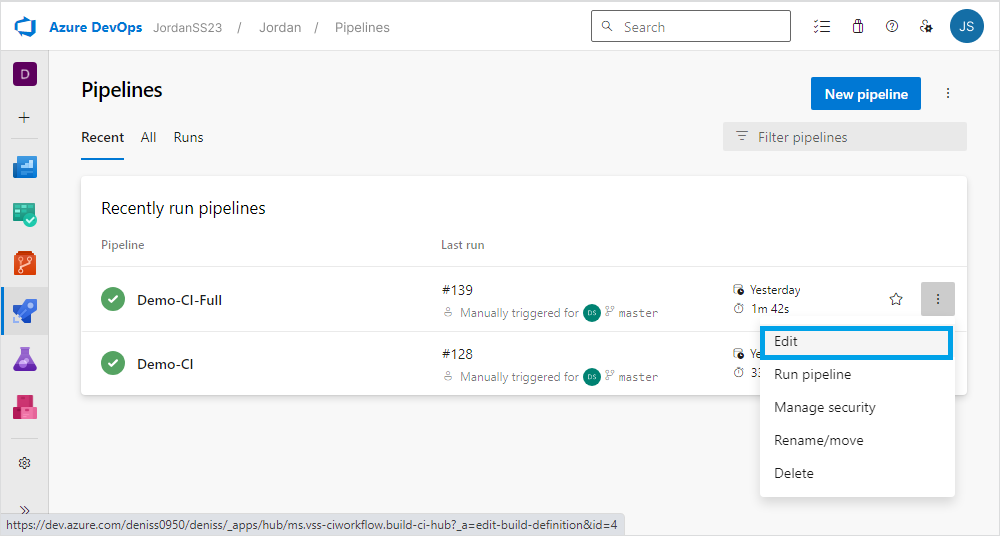
2. On the Pipelines page, navigate to the pipeline into which you want to integrate the data comparison process and select Edit from the More options menu.
3. On the Tasks tab, click Add a task to configure the data comparison task.
4. In the Add tasks panel, type the command line in the search field and click Add.
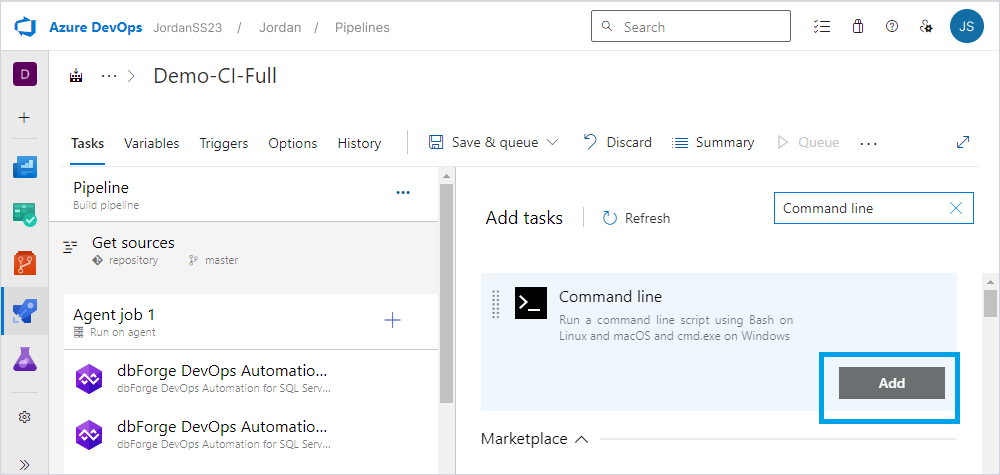
The Command Line Script task template will appear in the Tasks section.
5. Select the task and paste the content copied from the text field of the Command line execution file settings dialog to the Script text box.
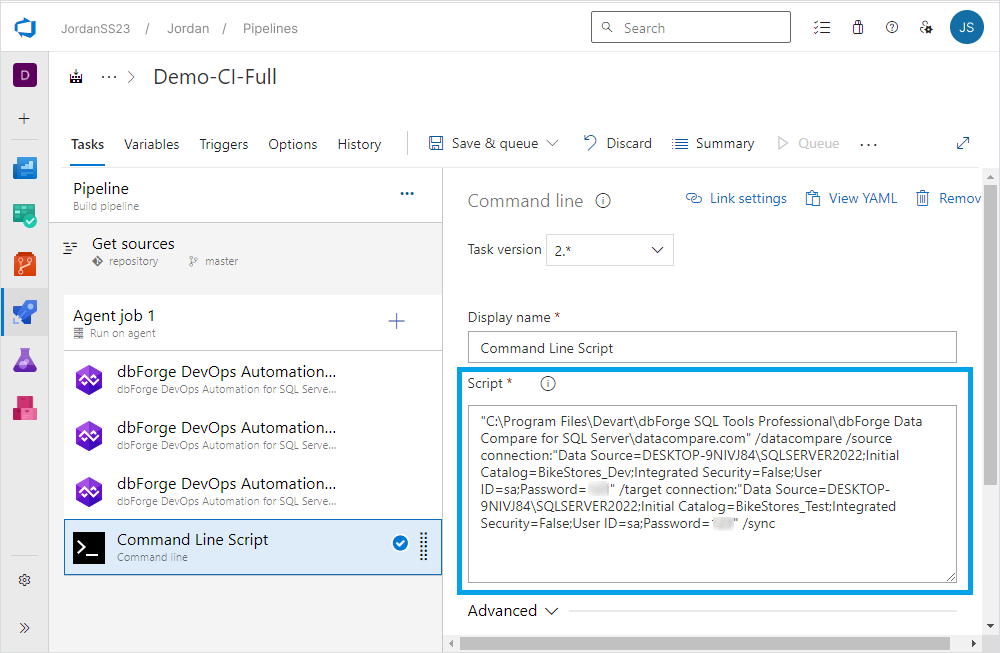
Step 3: Run the pipeline
1. Navigate to the Save & queue tab and select Save & queue from the dropdown list to run the pipeline.
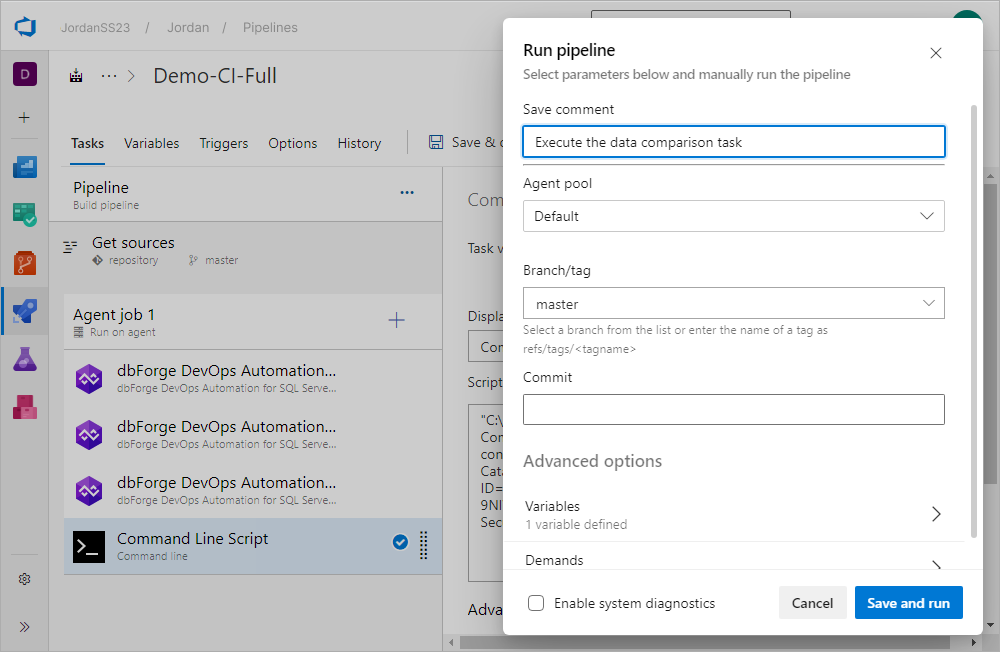
2. In the Run pipeline window, set parameters and click Save and run to manually run the pipeline. As you can see, the script has been successfully executed.
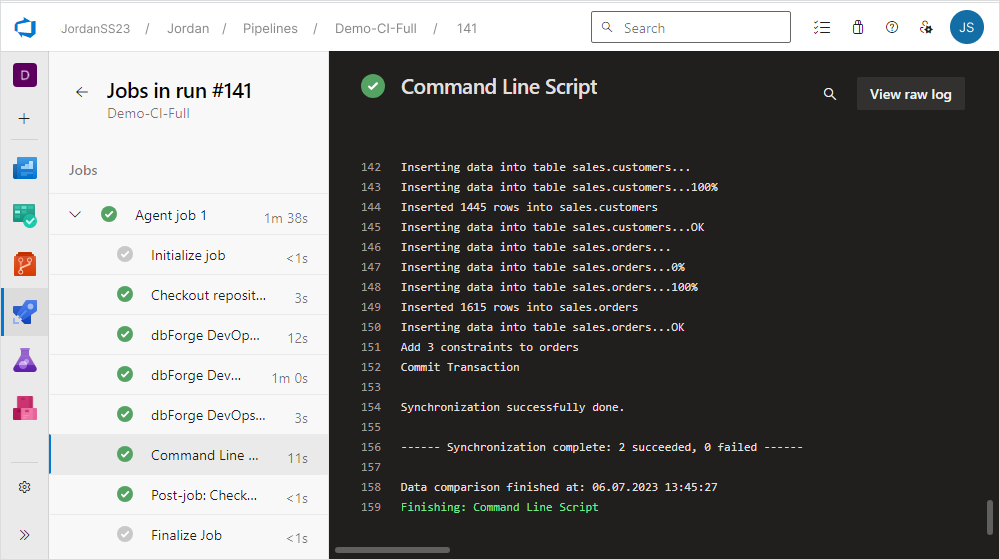
Use variables in the Command Line Script task
In the Azure DevOps pipeline configuration, you can also declare variables to help you parameterize and customize your pipeline behavior. They can provide values for various parameters or arguments.
To define the variables, perform the following steps:
1. Navigate to the Variables tab > Pipeline variables and then click Add to create a variable.
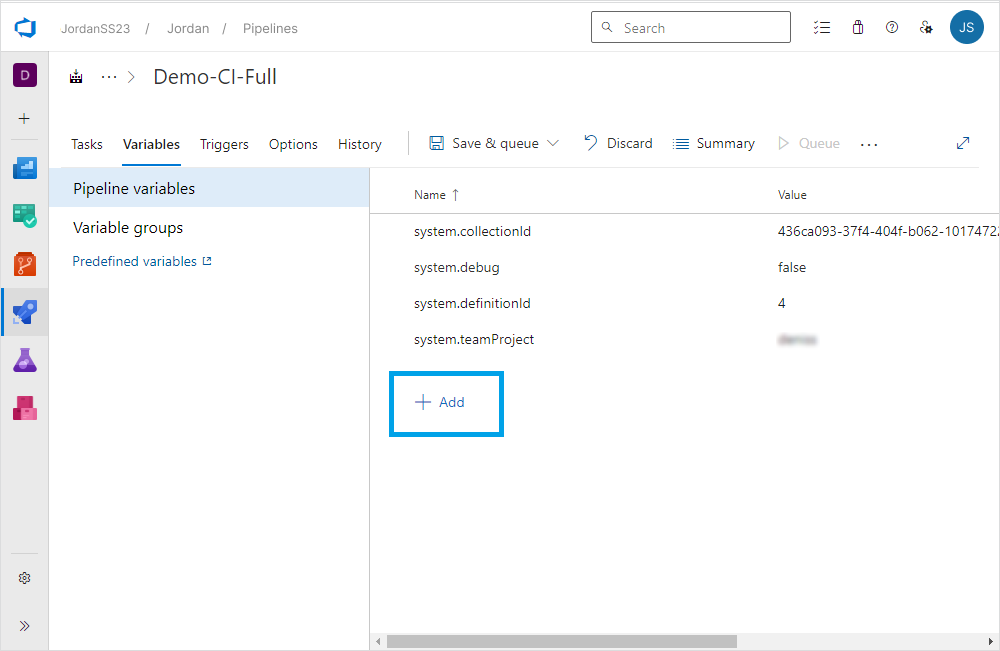
2. Under Name, specify the variable you want to create.
3. Under Value, enter the value you want to define for the variable.

4. Go to the Tasks tab > Command Line Script and enter the variables instead of the connection parameters.
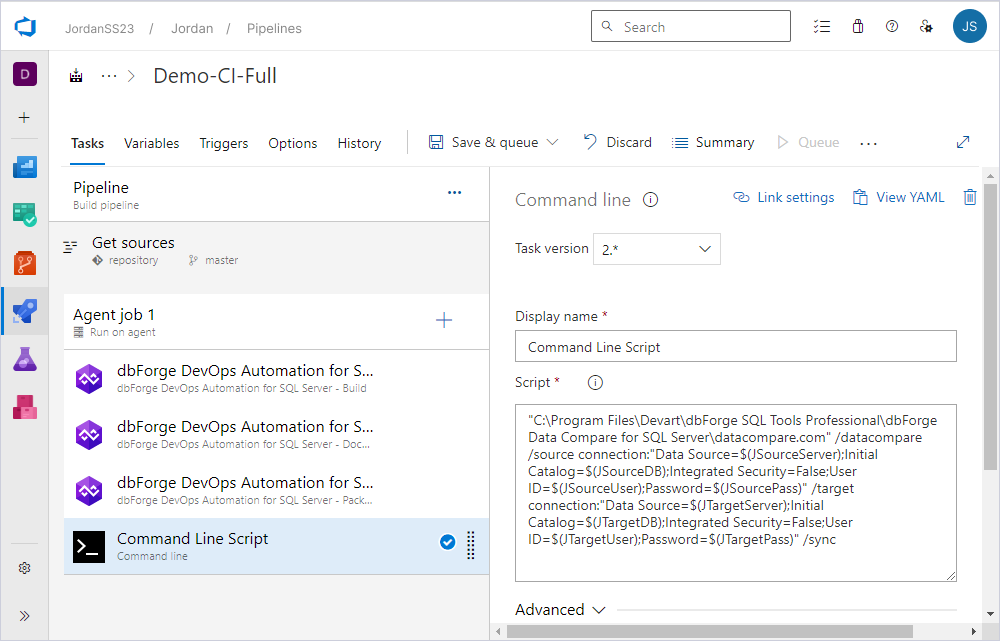
Here is an example of the command-line script:
"C:\Program Files\Devart\dbForge SQL Tools Professional\dbForge Data Compare for SQL Server\datacompare.com" /datacompare /source connection:"Data Source=$(JSourceServer);Initial Catalog=$(JSourceDB);Integrated Security=False;User ID=$(yourusername);Password=$(yourpassword)" /target connection:"Data Source=$(JTargetServer);Initial Catalog=$(JTargetDB);Integrated Security=False;User ID=$(yourusername);Password=$(yourpassword)" /sync
5. From the Save & queue dropdown list, select Save to save the changes or select Save & queue to run the pipeline.
Similar to Azure DevOps, you can use the command-line script generated with dbForge Data Compare using the TeamCity, Bamboo, or Jenkins plugins.