Work with the Database Object Editor
Last modified: May 28, 2025
The Database Object Editor is a visual tool to create, view, and modify database objects, such as tables, views, stored procedures, functions, or triggers. It provides an intuitive interface for generating a .sql file to create or alter a database, add and manage filegroups, and configuring database settings without writing SQL scripts manually. These settings also define how the database operates and can be adjusted to optimize performance, enforce security policies, and manage resource utilization.
Key features of the Database Object Editor:
- Creating a database using a visual editor without writing SQL code.
- Generating a SQL script to create and alter a database.
- Defining configuration options to customize default database behavior.
- Previewing and editing the generated SQL script before applying modifications.
Open the Database Object Editor
To open the Database Object Editor, do one of the following:
- In the Database menu, select New Database to create a database.
- In Database Explorer, right-click the connection and select New Database to create a database.
- In Database Explorer, right-click the database and select New Database to create a database or Edit Database to modify an existing one.
The Database Object Editor includes the following sections:
- Tabs - Provides access to specific editors, such as Files, Filegroups, Options, and T-SQL.
- Database Details area - Allows you to specify the database name, owner, and description.
- Object Editor toolbar - Allows you to refresh the database, apply or script changes.
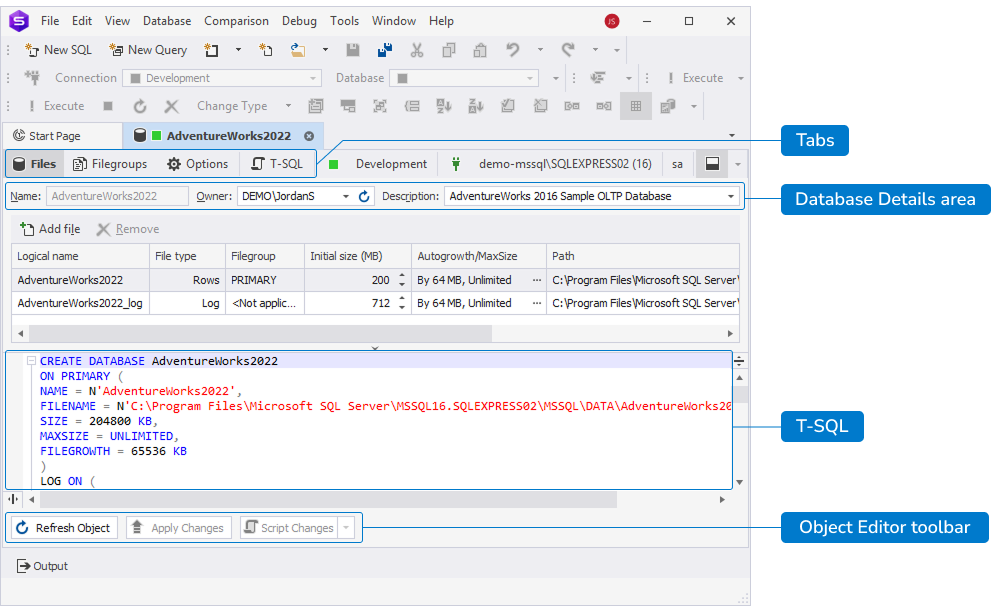
Database Details area
You can specify the following details:
- Name - Enter the database name.
- Owner - Select the database owner from the list. If you leave Default, the username you used to connect to the server is applied. To refresh the list of owners, select Refresh or press Ctrl+R.
- Description - Enter a description for the database. Select OK to save the changes or Cancel to discard them.
Note
If you’re editing an existing database, you cannot update the database name in the Database Object Editor. Instead, you can change the database name from Database Explorer > Rename shortcut menu.
Tabs
Tabs include:
Files
On the Files tab, you can configure the database files in the database files grid, including the logical file name, file type, filegroup, initial size (MB), autogrowth and maximum size, full path to store the file, and file name.

Configure database files
By default, the database files grid shows two files that inherit the database name in their names:
- database_name.mdf (Master Database File) - The primary data file of a SQL Server database contains the schema (tables, views, stored procedures) and actual data stored in the database.
- database_name_log.ldf (Log Database File) - The transaction log file records all transactions and database modifications. It is used for data recovery and rollback operations.
Note
Each SQL Server database must have at least one .mdf file and one .ldf file.
To add a file to the database, select Add file. The file appears in the grid.
To delete the selected file from the grid, select Remove.
In the grid, you can manage the following details:
- Logical name - Modify the logical file name.
- File Type - Choose a file type for a new file.
Note
You cannot change the file types or create filegroups for the default .mdf and .ldf files. When adding another file, you can select Filestream from the File Type column. Filestream allows storing and managing unstructured data, such as images, videos, and documents, directly in the file system while maintaining database consistency.
-
Filegroup - Create a new filegroup by selecting
 in the Filegroup column for the required file, except for default files.
 -
Initial Size (MB) - Modify the initial size of the file by using the up and down arrows in the column.
-
AutoGrowth/MaxSize - Change the maximum size for the file.
-
Path - Specify the full path to the file. The default path is
C:\Program Files\Microsoft SQL Server\MSSQL16.SQLEXPRESS02\MSSQL\DATA\.
To change it, select Browse. In the Browse For Folder window that opens, select a different folder and select OK to save the changes.
 -
File name - Modify the file name.
In the grid, you can also filter files per columns.
Filter files by columns
Hover over the column header and select the filter icon in the upper-right corner of the column:

Logical name
On the Values tab, select the checkboxes next to the logical names you want to show. Alternatively, select a condition from the list and specify a value on the Text Filters tab.
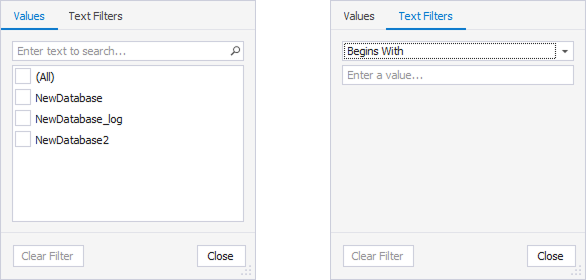
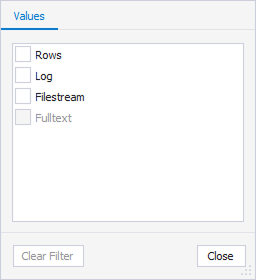
File type
On the Values tab, select the checkboxes next to the file types you want to show.
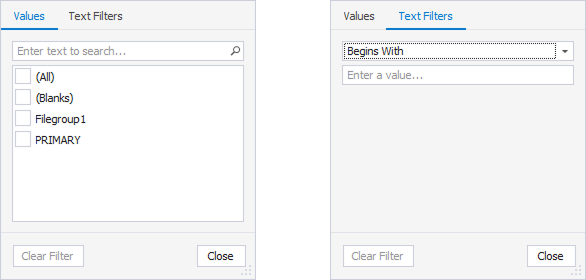
Filegroup
On the Values tab, select the checkboxes next to the filegroups you want to show. Alternatively, select a condition from the list and specify a value on the Text Filters tab.
Initial size (MB)
On the Values tab, use the slider to set the minimum and maximum values or enter them manually in the From and To boxes.
Alternatively, select a condition from the list and specify a value on the Numeric Filters tab.

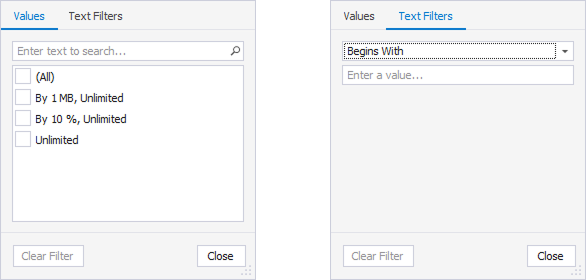
AutoGrowth/MaxSize
On the Values tab, select the checkboxes next to the sizes you want to show.
Alternatively, select a condition from the list and specify a value on the Text Filters tab.
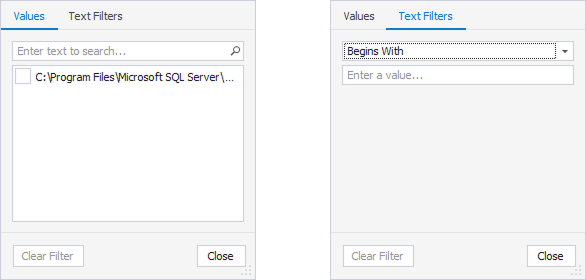
Path
On the Values tab, select the checkboxes next to the path you want to show.
Alternatively, select a condition from the list and specify a value on the Text Filters tab.
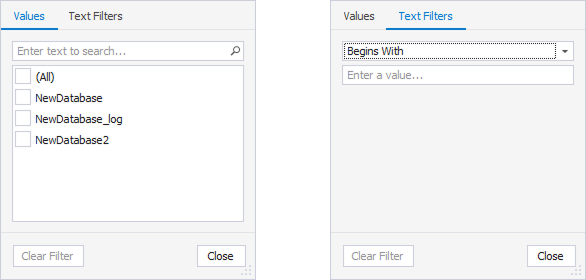
File name
On the Values tab, select the checkboxes next to the file names you want to show.
Alternatively, select a condition from the list and specify a value on the Text Filters tab.
Some filters allow you to search for required items.
To search for items:
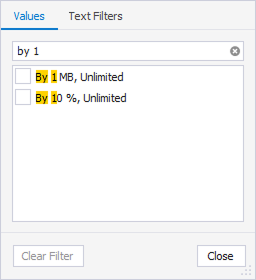
1. In the filter windows, enter the search string in the Search box. The options that match the search criteria will be filtered in the grid, and the matching text will be highlighted in yellow.
2. The screenshot shows an example of searching for an item in the AutoGrowth/MaxSize column.
To delete the text in the Search box, select  Delete in the Search box.
To remove the filter, select Clear Filter in the filter window.
To save the filters, select OK in the filter window.
The tool allows you to add, edit, or delete filters using the Filter panel or the Filter Editor dialog.
Use the Filter panel
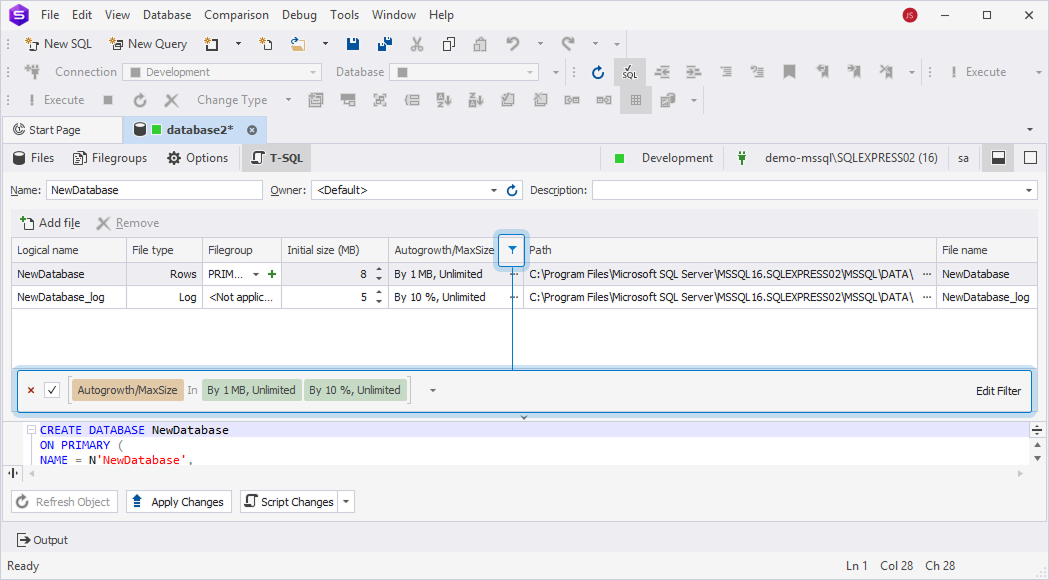
The Filter panel appears at the bottom of the database files grid after a filter is applied. It allows you to:
- View the applied filters.
- Clear the checkbox to delete the filter.
- Select the
 delete icon to remove the filter.
Use the Filter Editor dialog
To open the Filter Editor dialog, do one of the following:
- In the database files grid, right-click the column header and select Filter Editor.
- In the Filter panel, select Edit Filter.
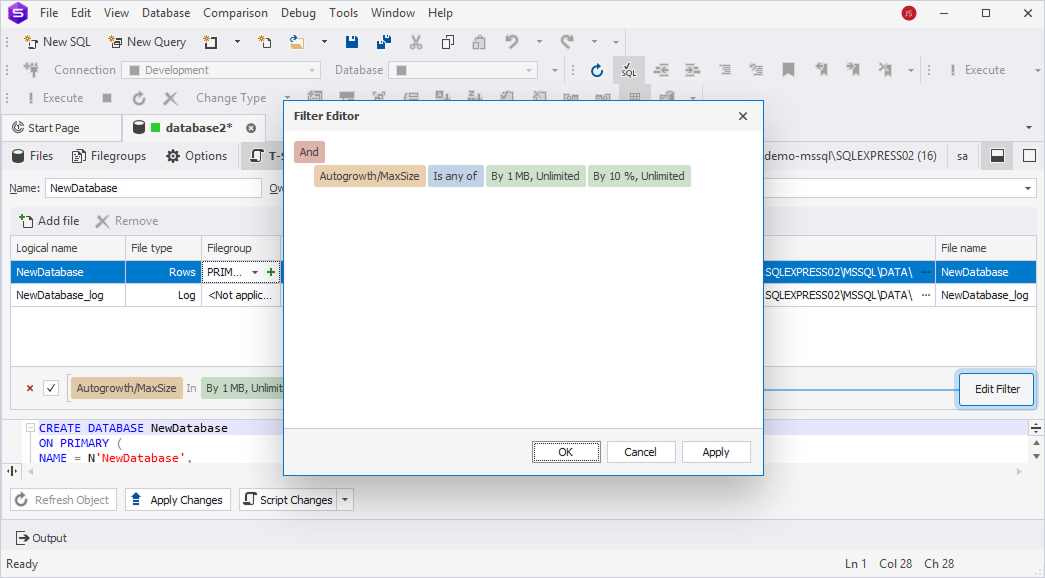
The Filter Editor dialog allows you to:
- Add or remove a filter condition or group.
- Choose a relation type and enter a value to set up a filter condition.
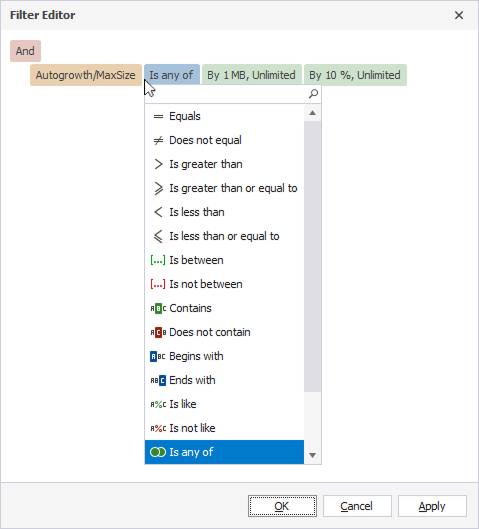
- Choose a logical operator. To change a group logical operator, select it from the menu.
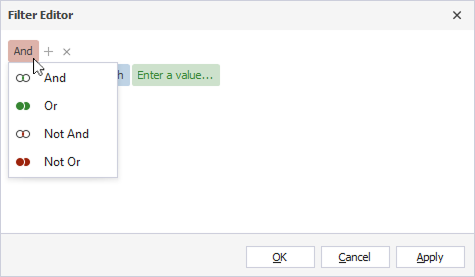
- Add a condition or a group united with a logical operator. Then, choose a database, a relation type, and a value by which the queries will be filtered.
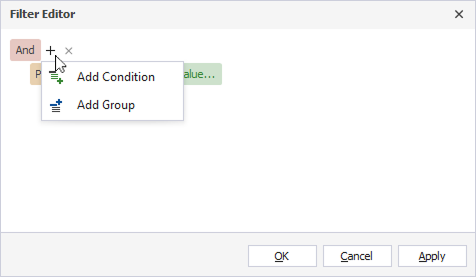
To apply the filter, select Apply. This keeps the dialog open, and you can edit the filter.
To save the changes and close the dialog, select OK.
To discard the changes, select Cancel.
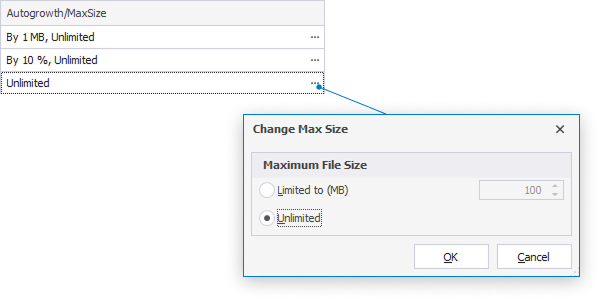
To change the maximum size:
1. In the AutoGrowth/MaxSize column, select ![]() Browse for the required file.
Browse for the required file.
2. In the Change Max Size window that opens, select Limited to (MB) or Unlimited (default option).
3. If you select Limited to, specify the size you want to limit the file.
4. Select OK to save the changes or select Cancel to discard the changes.
Filegroups
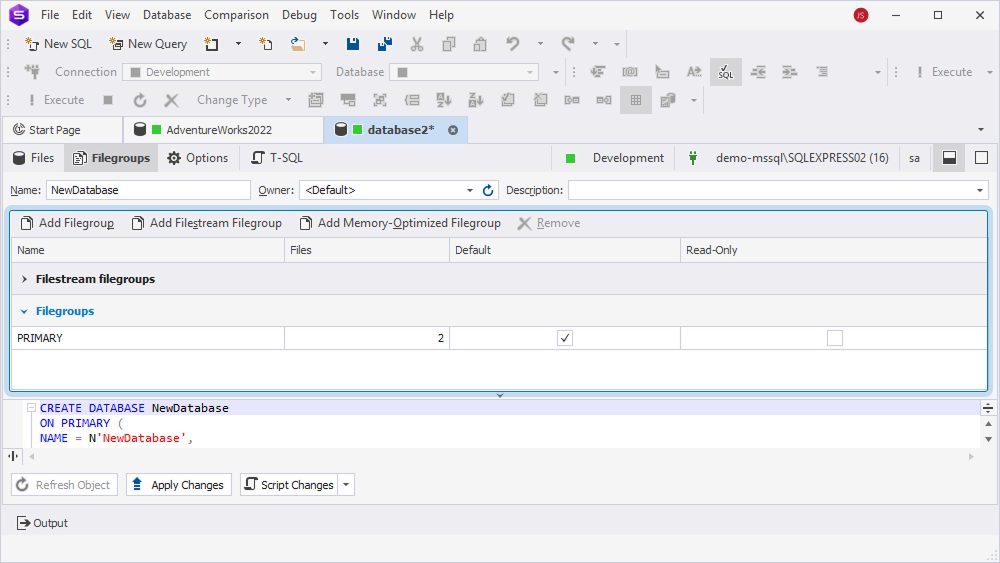
The Filegroups tab allows you to add a filegroup, a filestream group, and a memory-optimized filegroup, or remove it.
The Filegroups tab contains the grid where filegroups can be collapsed and expanded to show the specific files they contain. The grid provides the following details for each group:
- Filegroup name.
- Number of files in the filegroup.
- Default state - A checkbox appears in the Default column if the filegroup is set as default.
- Read-only mode - A checkbox appears in the Read-Only column if the filegroup is read-only.
Options
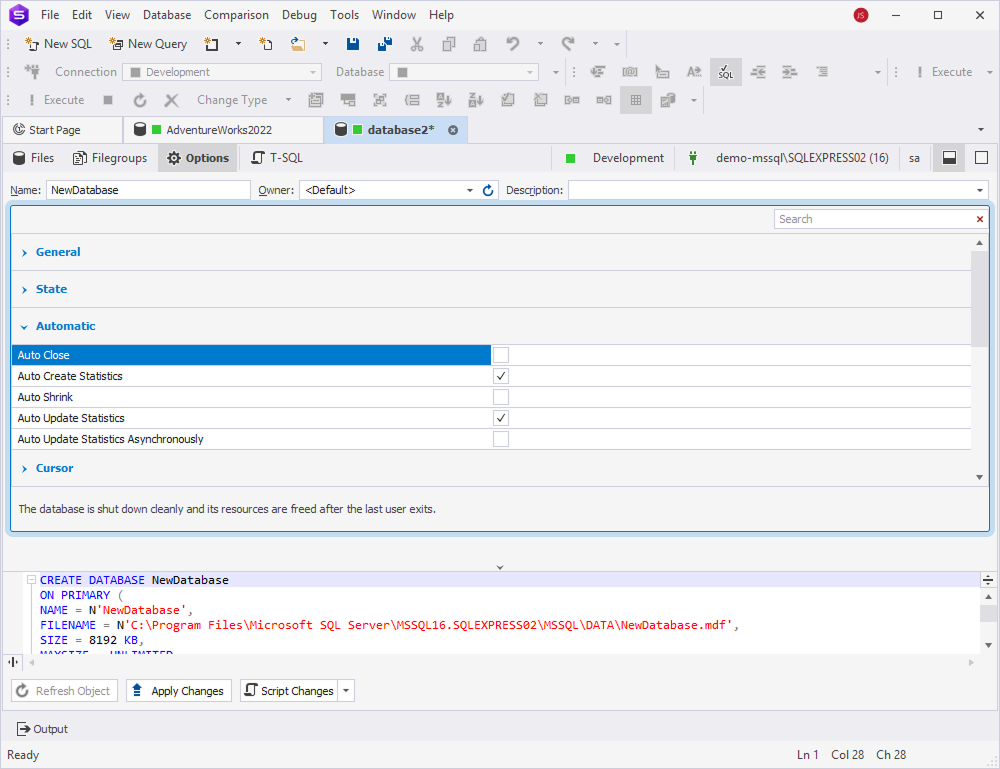
The Options tab allows you to customize the default behavior of the database by including or excluding specific settings.
The settings are organized into the following categories:
- General
- State
- Automatic
- Cursor
- Filestream
- Recovery
- Service Broker
- Change Tracking
- Containment
- Miscellaneous
- Database Scoped Configurations
- Query Store
To include the setting, select the checkbox next to it. The description of the selected setting will appear below the grid.
Search for options
On the Options tab, you can search for specific settings by entering the search text or symbol, such as an underscore, in the Search box. The list will be filtered to show only those settings that contain the search text.
By default, the search is case-insensitive. For example, searching for auto will highlight all settings containing the term, regardless of whether it is capitalized (Auto) or in lowercase (auto). As you type, matching options will be highlighted in yellow, and the number of results will be displayed in the Search box.
If you enter text with spaces, each subsequent input will highlight new results.
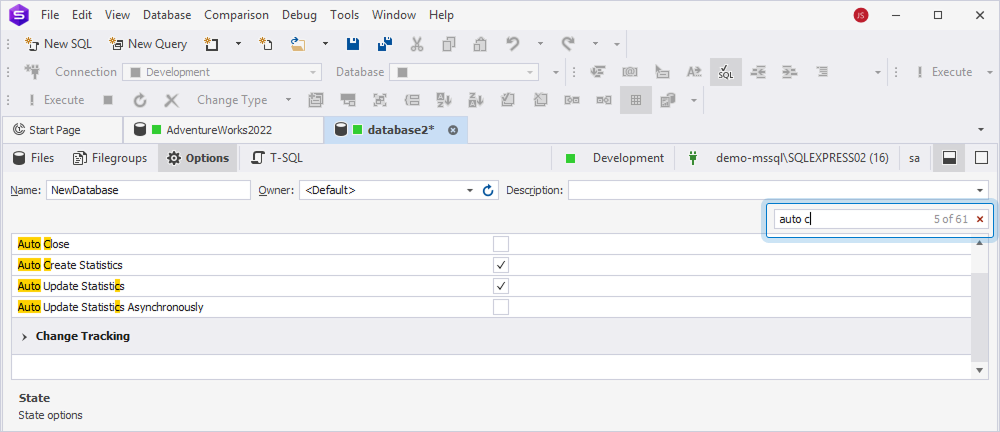
To delete the text in the Search box, select ![]() Delete.
Delete.
In the Search box, you can use the following keyboard shortcuts:
- Ctrl+A to select all.
- Ctrl+Left Arrow (←) to move the caret to the beginning of the word.
- Ctrl+Right Arrow (→) to move the caret to the end of the word.
- Ctrl+Shift+Left Arrow (←) to select text from the current caret position to the beginning of the current word and move the caret to the beginning of the word.
- Ctrl+Shift+Right Arrow (→) to select text from the current caret position to the end of the current word and move the caret to the end of the word.
- Ctrl+Backspace to delete the word to the left of the cursor.
View database options
| Name | Group | Default State | Description |
|---|---|---|---|
| Collation | General | Server Default | Specifies the default collation for the database. |
| Recovery model | General | Full | Controls how transactions are logged, whether the transaction log requires (and allows) backing up, and what kinds of restore operations are available. |
| Compatibility level | General | Server Default | Sets certain database behaviors to be compatible with the specified version of SQL Server. |
| Containment type | General | None | Specified the database containment status. |
| Database Read-Only | State | Turned off | Controls whether updates are allowed on the database. |
| Restrict Access | State | MULTI_USER | Controls, which users may access the database. When SINLE_USER is specified, only one user can access the database at a time. When RESTRICTED_USER is specified, only members of the db_owner, dbcreator, or sysadmin roles can use the database. When MULTI_USER is specified, it returns the database to its normal operating state. |
| Auto Close | Automatic | Turned off | Shuts down the database cleanly and frees its resources after the last user exits. |
| Auto Create Statistics | Automatic | Turned on | Specifies that the query optimizer creates statistics on single columns in query predicates, as necessary, to improve query plans and query performance. |
| Auto Shrink | Automatic | Turned off | Specifies that the database files are candidates for periodic shrinking. |
| Auto Update Statistics | Automatic | Turned on | Specifies that the query optimizer updates statistics when they are used by a query and when they might be out-of-date. |
| Auto Update Statistics Asynchronously | Automatic | Turned off | Specifies that statistics updates for the AUTO_UPDATE_STATISTICS option are asynchronous. |
| Close Cursor on Commit Enabled | Cursor | Turned off | Specifies that any cursors that are open when a transaction is committed or rolled back are closed. |
| Use LOCAL Cursor | Cursor | Turned off | Specifies that the scope of the cursor is local to the batch, stored procedure, or trigger where the cursor was created. |
| Filestream Directory Name | Filestream | Specifies the directory name for the FILESTREAM data associated with the selected database. | |
| Non-Transacted Access | Filestream | OFF | Determines non-transactional access to files stored in SQL Server. |
| Page Verify | Recovery | CHECKSUM | Discovers damaged database pages caused by disk I/O path errors. |
| Broker Enabled | Service Broker | Turned off | Specifies that Service Broker is enabled for the specified database. |
| Change Tracking | Change Tracking | Turned off | Indicates whether change tracking is enabled for the database. |
| Allow Snapshot Isolation | Miscellaneous | Turned off | Specifies that snaphot isolation is allowed. |
| ANSI NULL Default | Miscellaneous | Turned off | Determines the default value, NULL or NOT NULL, of a column or CLR user-defined type for which the nullability is not explicitly defined in the CREATE TABLE or ALTER TABLE statements. |
| ANSI NULLS Enabled | Miscellaneous | Turned off | Determines that all comparisons to a null value evaluate to UNKNOWN. |
| ANSI Padding Enabled | Miscellaneous | Turned off | Determines that strings are padded to the same length before conversion or inserting to a varchar or nvarchar data type. |
| ANSI Warnings Enabled | Miscellaneous | Turned off | Specifies that errors or warnings are issued when conditions, such as divide-by-zero, occur or null values appear in aggregate functions. |
| Arithmetic Abort Enabled | Miscellaneous | Turned off | Specifies that a query is ended when an overflow or divide-by-zero error occurs during query execution. |
| Concatenate Null Yields Null | Miscellaneous | Turned off | Specifies that the result of a concatenation operation is NULL when either operand is NULL. |
| Date Correlation Optimization Enabled | Miscellaneous | Turned off | Specifies that SQL Server maintains correlation statistics between two tables in the database that are linked by a FOREIGN KEY constraint and have datetime columns. |
| Is ReadCommitted Snapshot On | Miscellaneous | Turned off | Enables the Read-Committed Snapshot option at the database level. When it is turned on, DNL statements start generating row versions even when no transaction uses Snapshot Isolation. |
| Numeric Round-Abort | Miscellaneous | Turned off | Generates an error when an expression loses precision. |
| Forced parametrization | Miscellaneous | Turned off | Specifies that SQL Server parameterizes all queries in the database. |
| Quoted Identifiers Enabled | Miscellaneous | Turned off | Specifies that double quotation marks can be used to enclose delimited identifiers. |
| Recursive Triggers Enabled | Miscellaneous | Turned off | Specifies whether recursive firing of AFTER triggers is allowed. |
| Legacy Cardinality Estimation | Database Scoped Configurations | OFF | Indicates Legacy Cardinality Estimation. |
| Legacy Cardinality Estimation For Secondary | Database Scoped Configurations | PRIMARY | Indicates Legacy Cardinality Estimation For Secondary. |
| Max DOP | Database Scoped Configurations | 0 | Indicates Max DOP. |
| Max DOP For Secondary | Database Scoped Configurations | Indicates Max DOP For Secondary. | |
| Parameter Sniffing | Database Scoped Configurations | ON | Indicates Parameter Sniffing. |
| Parameter Sniffing For Secondary | Database Scoped Configurations | PRIMARY | Indicates Parameter Sniffing For Secondary. |
| Query Optimizer Fixes | Database Scoped Configurations | OFF | Indicates Query Optimizer Fixes. |
| Query Optimizer Fixes For Secondary | Database Scoped Configurations | PRIMARY | Indicates Query Optimizer Fixes For Secondary. |
| Operation Mode (Requested) | Query Store | OFF | Indicates the requested query store operation mode. |
T-SQL
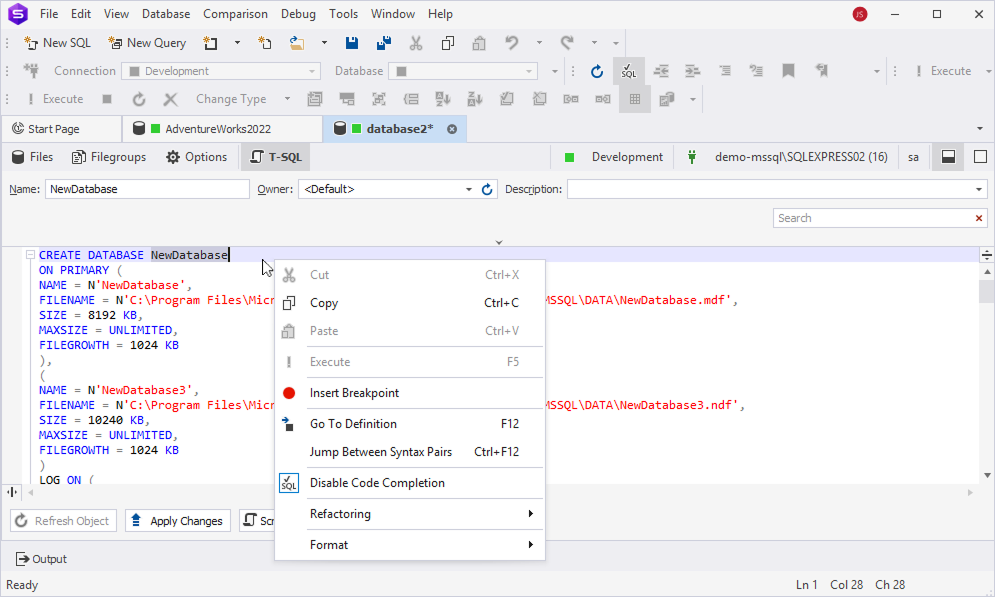
On the T-SQL tab, you can preview a .sql script generated to create or alter a database. To manage the SQL text, right-click anywhere on the T-SQL tab and select the required option.
Object Editor toolbar
On the Object Editor toolbar, you can do the following:
- Refresh Object - Updates the database to reflect the latest changes made in the database.
- Apply Changes - Saves and applies changes made to the database.
- Script Changes - Generates a SQL script, allowing you to review, modify, or execute the script manually instead of applying changes immediately. You can also script changes to a new SQL document by selecting the To New SQL Window option from the Script Changes list or pressing Shift+Alt+C. Alternatively, copy to the clipboard by selecting the To Clipboard option from the Script Changes list.
Want to find out more?
Overview
Take a quick tour to learn all about the key benefits delivered by dbForge Studio for SQL Server.
All features
Get acquainted with the rich features and capabilities of the tool in less than 5 minutes.
Request a demo
If you consider employing this tool for your business, request a demo to see it in action.
