How to edit data in dbForge Studio for SQL Server
When dbForge Studio executes any statement returning a result set, the retrieved data is displayed in Data Editor of the Data view of the same SQL document or the Data window. This topic tells how to edit the data in grid; for information about customizing data grid, as well as sorting, grouping and filtering, visit the Viewing Data in Grid section.
Edit data
- In Data Editor available in the Data view of an SQL document, Object Viewer, or in the Data window, click a cell you want to edit.
-
After editing, confirm the changes by clicking
 under the grid or selecting the End Edit option from the shortcut menu.
Tip: To discard changes, click
 button or select the Cancel Edit option from the shortcut menu.
In dbForge Studio, you can also edit data right after retrieving it from a table or in the data view after any query was executed.
To retrieve data, select Retrieve Data from the shortcut menu of the table in Database Explorer. After this a window asking if you want to make the received data grid editable or not will appear. If you want to make the grid editable, press the Make Editable button, if you want the grid to be read-only, click Keep Read-Only. You can select the Don’t show this message again checkbox, and the message won’t appear any more when you click Retrieve Data.
To make data received after clicking Retrieve Data editable, you can also choose the table name from the Table drop-down list on the toolbar, or leave it read-only by selecting (read-only).

If you choose the read-only mode, you will gain in the performance aspect, as the application will work faster in this mode.
To edit data in join query results, you should set the table you want to edit data from to the editable mode, as described above. After you set one table as editable, the data of other tables included into the result will become light-gray.
Note
When you change the mode of any table from read-only to editable or vice versa, a balloon with the corresponding message is shown on the status bar. Inserting, Deleting, and Copying Data
Insert, delete, and copy data
Use the shortcut menu or the corresponding buttons under the grid. For example, you can do the following:
-
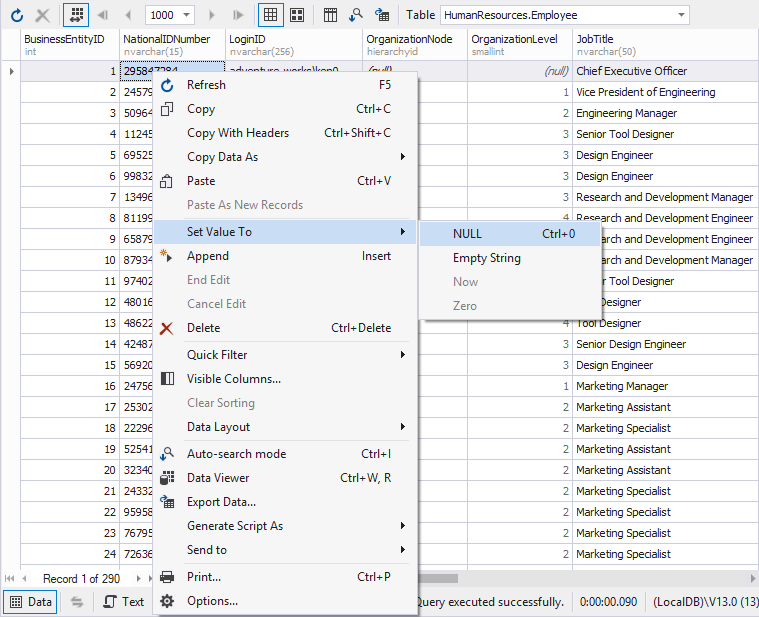
To insert NULL (instead of empty string), select Set Value To from the shortcut menu, and then click NULL. Alternatively, press CTRL+0.
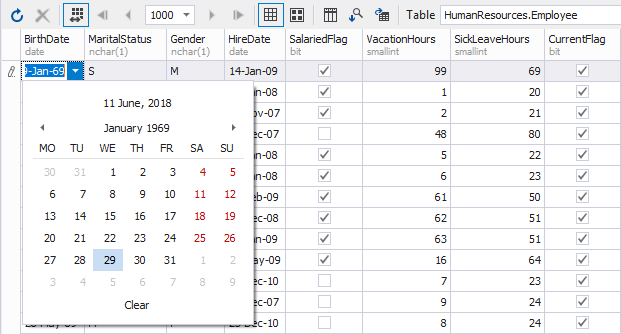
Tip: Use Set Value To menu to quickly set an empty string, zero, or a current date.
- To add a new record, select the Append option from the shortcut menu or click the Append button under the grid. To delete a record from the grid, select the Delete option from the shortcut menu or click the Delete button under the grid or press the CTRL+DELETE keys.
- To copy and paste cell values, use the corresponding options from the shortcut menu.
Select data
You can easily select and copy the data just like cells in a spreadsheet. Do either of these actions:
-
Move the mouse pointer across the grid holding the left mouse button
-
Click the first cell of the data range, press SHIFT, and, holding the SHIFT key, click the last cell. A rectangular range of cells will be selected.
Tip: Using the CTRL key, you may include and exclude cells to selection. Any number of rows may be copied and pasted to some other application, for example, a spreadsheet, but when you paste data in data grid, only the first row will be pasted.
Note
Some queries return read only data, for example, queries with aggregate functions (count, avg etc.), or data, retrieved from non-updatable views. Such data can’t be edited. It is also impossible to edit the result of executing of the script with several select statements.
Row and cell indicators
When working with grid, you can see special indicators near to the focused cell. These indicators reflect current editing state.
![]() The row is focused.
The row is focused.
 The row is being edited.
 The row has been edited.
 Incorrect value was entered into a cell. You must either fix the value or press the ESCAPE key to cancel changes made to the cell.
Download dbForge Studio for SQL Server and try it absolutely free for 30 days!