How to create and edit SQL queries in dbForge Studio
This topic describes how to create and run SQL queries in dbForge Studio for SQL Server using SQL Editor.
To create a query
- Create a server connection. For more information about how to create a server connection see Connecting to a Database.
- On the Start page, click SQL Development and then click SQL Editor. Alternatively, click New SQL on the Standard toolbar or press CTRL+N. An empty SQL document opens.
- Type a query to a database.
- Click Execute or press F5 to see the query results.
dbForge Studio SQL Editor provides many features that make it easier for you to write and manage your code. Let’s explore some Intellisense features that assist you while coding.
Coding technique example
To show you some dbForge Studio Intellisense features, let us perform a query where we need to display all the employees’ addresses from the AdventureWorks2012 database who are registered in the Newton city.
- Open SQL Editor.
-
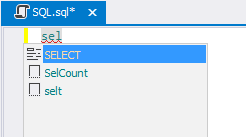
Start typing the select statement. Enter first three letters “sel”. dbForge Studio shows you the list of the relevant keywords and snippets. You can select the SELECT keyword from the list and press ENTER. The keyword appears in SQL Editor.
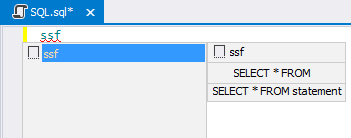
You can also use the select statement fragment. Enter the ‘ssf’ letters, and then press the TAB button. In this case the SELECT * FROM statement appears in SQL Editor.
-
Specify the table you want to retrieve data from. Start typing the first letters of the table name, and dbForge Studio shows you a list of valid tables from the AdventureWorks2012 database. If you continue typing characters, the list is filtered to include only the tables that begin with those characters. After selecting an item, you can insert it into your code by pressing TAB or ENTER. dbForge Studio also shows a quick info for every highlighted item in the list. It allows you to see the object structure immediately.
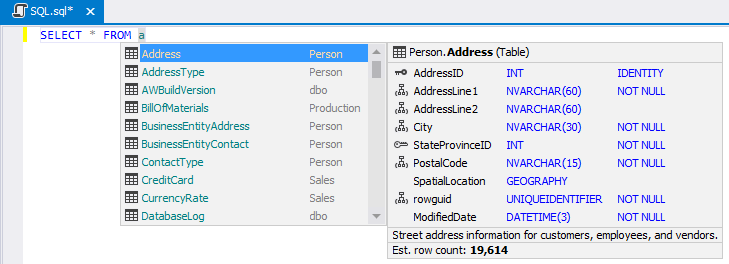
The Address table comes the first in the list, so choose it and press TAB or ENTER to insert it into SQL Editor. dbForge Studio assigns the alias for the Address table automatically.
-
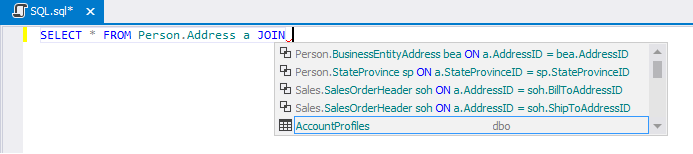
We need to select address categories that are stored in separate tables. In a similar way, either type or insert the JOIN keyword and press the SPACE key. dbForge Studio shows you all available solutions to implement JOIN. Select a required statement and press ENTER.
-
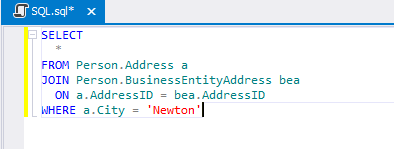
Use the WHERE statement to finish the query creating where we need to display the addresses from the Newton city only. Type the statement, use the prompt to choose the required item to put under the condition, and press ENTER.
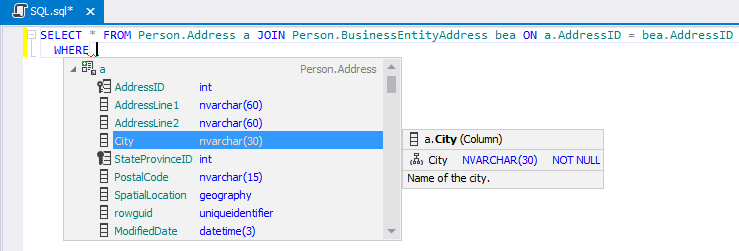
Specify the condition where a.City = ‘Newton’.

-
To format the query text, press CTRL + K, D combination, or choose the Advanced option, on the Edit menu, and click Format Document.
-
To expand the table columns, place the cursor after the asterisk character and press TAB.
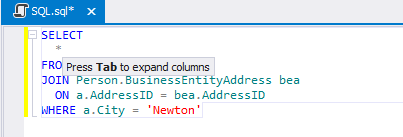
There is no need to retrieve all the columns from the Address table, so we can leave only required ones.
-
Now we can execute the query to see results. To do so, click the Execute button on the Debug toolbar, or press F5.
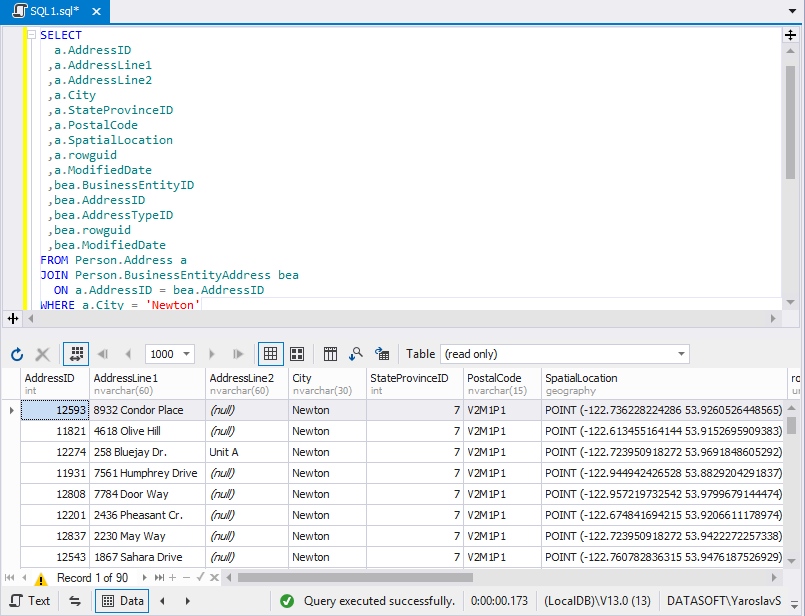
We got what we wanted.
As you can see, the Intellisense feature provided by dbForge Studio allows you to create complex queries in a few keystrokes.