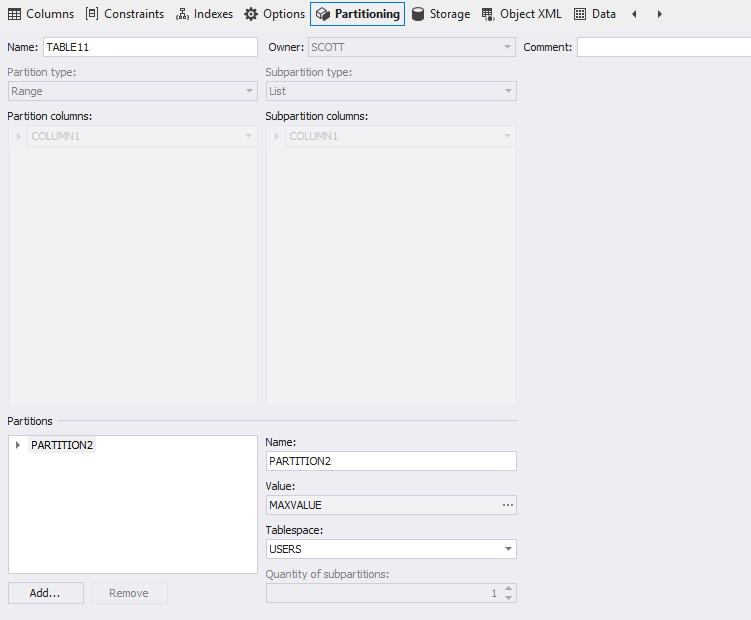
Adding and Removing Partitions and Subpartition
On the Partitioning tab of Table Editor you can manipulate table partitions and subpartitions.

Current table partitions and subpartitions are shown in the Partitions tree. To remove a partition or a subpartition just select its node in the tree and click the Remove button, or click Remove on its shortcut menu. To change a partition name, select a partition in the tree and edit its name in the Name text box.
For hash partitioning you can add each partition manually or set their count. To add a partition, click the Add button.
For range partitioning you can add partition by clicking the Add button too. Range boundaries values must be set for partitions. To edit values for the partition, select it in the tree and click  button in the Value box. The Values Editor dialog box will appear.
To add an item to the list, type the value in the box and click Add. To delete an item, select it in the list and click Delete. To finish editing, click OK to apply changes. Values count must be equal to partitioning key columns count. When using range partitioning, records, having partitioning key values up to the first partition’s values inclusive maps to the first partition. Record maps to n-th partition if record has partitioning key value more than (n-1)-th partition border value and less or equal than n-th partition border value. If partitioning key consists of several columns, database uses the next value only when previous values cannot uniquely identify the partition to store record in.
Each value must correspond to the partitioning key column and they must have the same type. First value must be greater or equal than the first value of previous partition. If the first values are equal than the second value must be greater or equal than the second value of previous partition and so on. All values of different partitions cannot be equal, so if partitioning key contains only one column, the value of current must be greater than the value of previous partition. When adding new partition to existing partitioned table this rule must be kept too. The MAXVALUE keyword can be used for the partitions to set its boundaries to the maximum possible value of the corresponding partitioning key column type.
For list partitioning new partitions can be added in the same way as in other partitioning methods. Values list should be set for each partition. Values can be edited just like when using range partitioning. Values list must contain values for the column of partitioning key. Record will be stored in the partition, having the value of the partitioning key in the list. You can use DEFAULT keyword to identify the partition that accomodates rows that do not map into any other partitions.
For a composite partitioning you can add partition by clicking the Add button and choosing the Add partition on the shortcut menu or right-click in the Partitions tree by choosing Add partition on the shortcut menu. Range boundaries for partitions should be set just like when using range partitioning.
To add a subpartition to the partition, right-click on the partition in the Partitions tree and choose Add subpartition from the shortcut menu or do following:
- Select the partition in the Partitions tree.
- Click the Add button.
- Click Add subpartition on the shortcut menu.
To remove subpartition select it in the tree, and click the Remove button or right-click the subpartition and choose Remove on the shortcut menu.
You can use subpartition template to set subpartitions. Working with subpartition template is described in the topic. Subpartitions can be added to or removed from the template just like described above for adding them to and removing from partitions.
When using composite range-list partitioning you should set list values for subpartitions. You can set them just like list values for partitions when using list partitioning.