How to apply conditional styles
Conditional styles allow you to change a pivot table appearance to make patterns and trends in pivot data more apparent and bring them to user’s attention quicker. For example, you can highlight values of some fields that are greater than 100 with the red color, and values of another field that meet some other condition with the blue color, the difference between data in a pivot table will be clear at a glance.
Besides setting a background color for some cells, you can select an image as a background, change font and its color, specify a condition to apply only for some values in a required field, etc.
Let’s look at how to apply conditional styles to the pivot table that we created in Walkthrough on how to create a pivot table. This table contains data on total sales of bicycles grouped by categories, brands, vendors, it also displays order statuses and dates.
To apply a conditional style
1. Open the Conditional Styles dialog by either of the following ways:
- On the toolbar, click Conditional Styles.
- Right-click the pivot table header and select Conditional Styles on the menu.
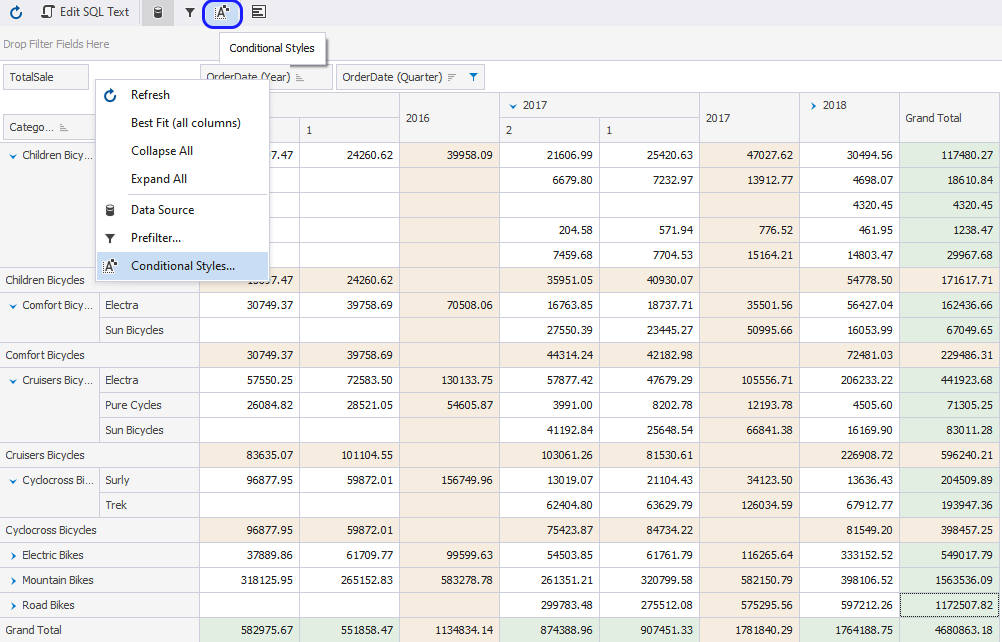
The Conditional Styles dialog will open.
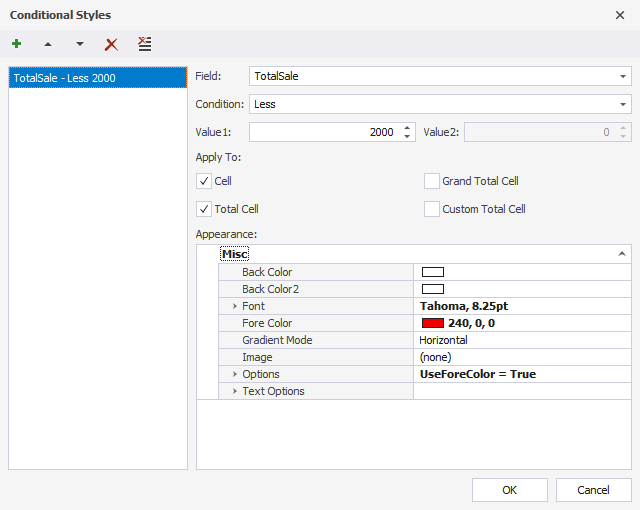
2. To create a new condition, click Add Condition.
3. From the Field drop-down, select the fields you want to apply conditional formatting to.
4. In the Condition drop-down, select the condition. The cells that meet that condition will be highlighted.
5. In the Value 1 and Value 2 boxes, enter the values for the specified condition. For example, we want to highlight the cells with values less than 2000. For this, we select Less condition and in the Value 1 box, enter 2000.
6. In the Apply To section, select the sells to apply the specified condition to.
7. In the Appearance section, you can customize the appearance of your pivot table with fonts, font and background colors, etc.
In the Back Color dropdown, you can select the background color for the cells that meet the specified condition.
In the Back Color 2 dropdown, you can select the second color to make the two-color gradient.
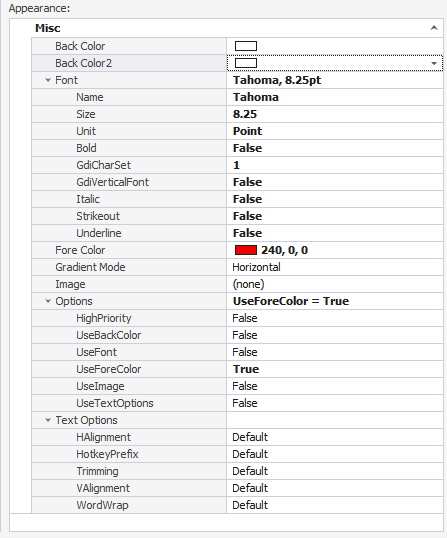
In the Font dropdown, you can select a font to be applied the cells that meet the specified condition. To change font style and size, and add effects, click … and in the Font dialog that opens, make the necessary configurations.
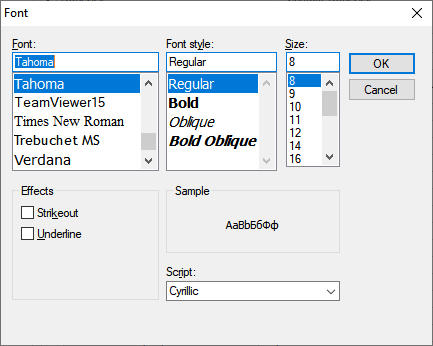
Under Font in the Appearance section, you can:
- select the font
- specify the font size
- specify the font unit
- select to make the text bold
- set the GdiCharSet property
- set the GdiVerticalFont property
- select to make the text italic
- apply Strikeout property to the text
- select to underline the text
8. In the Fore color dropdown, you can select the color for text.
9. In the Gradient Mode dropdown, you can specify the direction of the color change: Horizontal, Vertical, ForwardDiagonal, or BackwardDiagonal.
10. In the Image box, click … to add an image.
11. Under Options in the Appearance section, you can set additional options for conditional formatting.
12. Under Text Options in the Appearance section, you can set additional text options for conditional formatting.
13. To apply conditional styles to the pivot table, click OK.
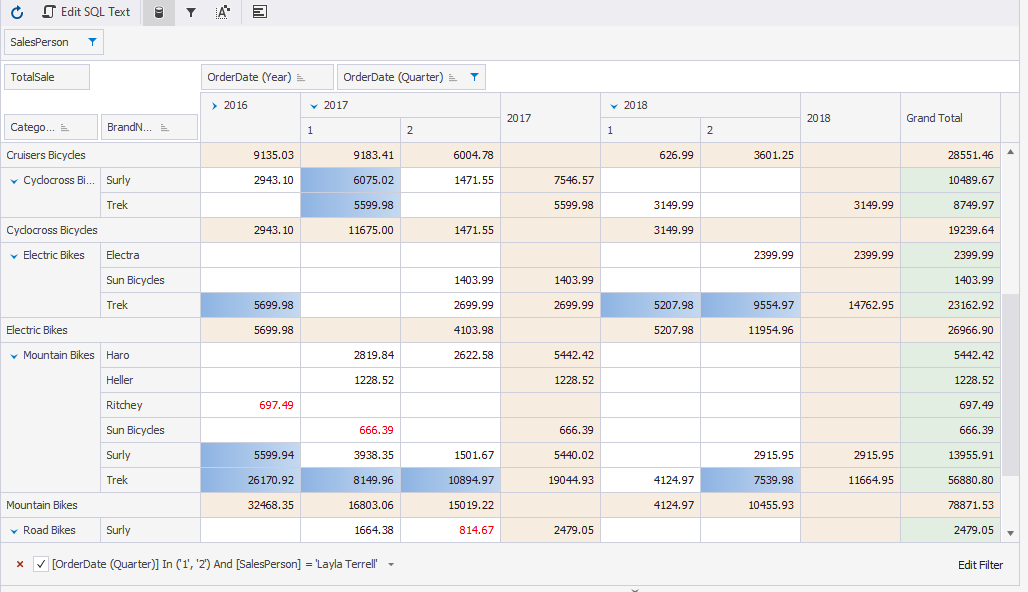
Let’s now look at the pivot table with applied conditional formatting. The table shows the sales figures of bicycles grouped by first two quarters of the year and filtered by a salesperson. Those sales figures that are less than $1000 are indicated with red font to show that the salesperson hasn’t met their sales target. The figures greater than $5000 have blue background to show that the target has been exceeded. In this simple way we can clearly see the performance of the given salesperson.