The Populate task
Synopsis
Populates the database with test data.
Description
The Populate task in an Azure DevOps database pipeline is typically used to populate a database with data after it has been created or updated. This task can be particularly useful in scenarios where you need to seed a database with test data or set up initial data for an application.
How to create the Populate task
To create the Populate task, add the dbForge DevOps Automation for SQL Server – Populate task to your pipeline.
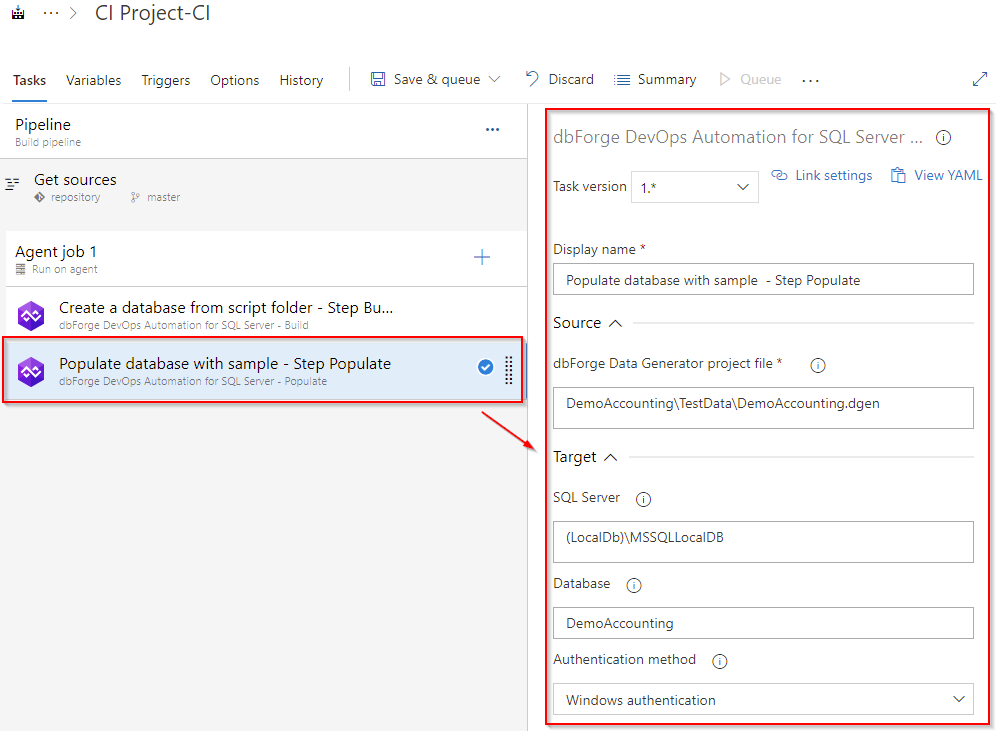
Then, specify the path to the generator project. If you want to use the connection different from that indicated in the generator project file, you will need to enter the server name, database name, and the parameters for this connection. After you have configured everything, your task will look as follows.

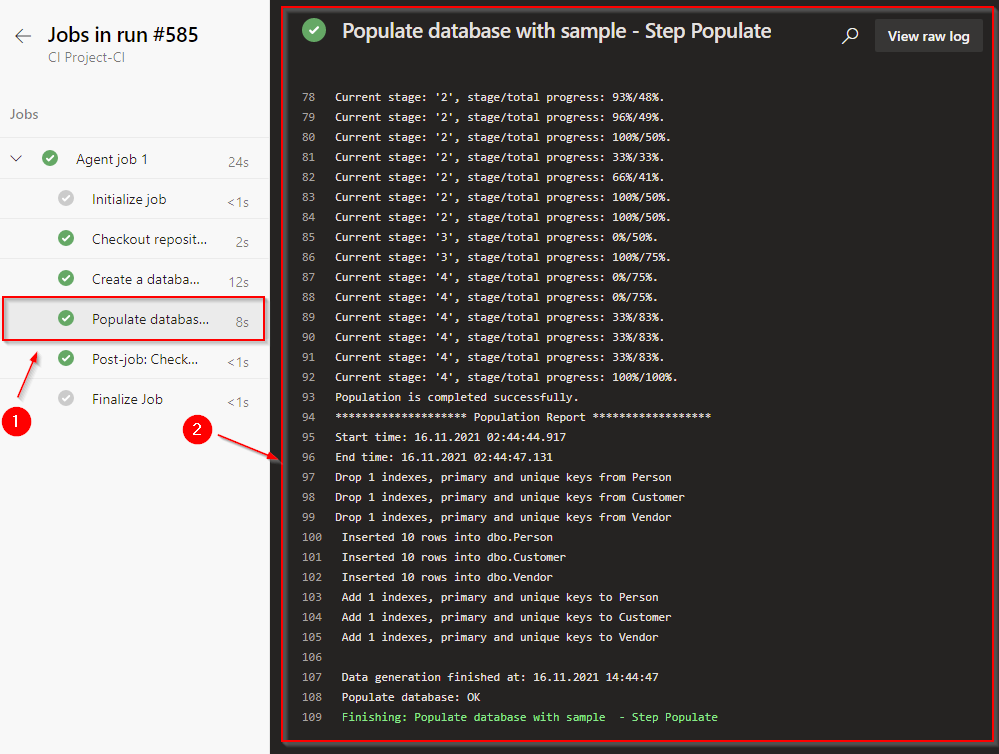
Click Save & queue to verify that your pipeline runs successfully. After the execution, open the log and check that everything is correct.

Customization options
- dbForge Data Generator project file
Enter the path to the dbForge Data Generator project file. Project file name and extension should be included in path.
- SQL Server
Enter target database server. E.g. SERVERNAME\INSTANCENAME. For local default instance use ‘(local).’
- Database
Enter the target database name.
- Authentication method
Select the Authentication method, either SQL Server authentication or Windows authentication.
- User Name
Enter the login name to use for SQL Server authentication.
- Password
Enter the password to use for SQL Server authentication.
Control Options
- Enabled
Select to enable the task in your pipeline. If a task is disabled, it will be skipped during the pipeline execution.
- Continue on error
Select to continue the pipeline running even if this task fails.
- Number of retries if task failed
Specify the number of retries for this task that will happen in case of task failure.
Note
This requires agent version 2.194.0 or later. Not supported for agentless tasks.
- Timeout
Specify the maximum time, in minutes, that a task is allowed to execute before being canceled by server. A zero value indicates an infinite timeout.
- Run this task
Specify when this task should run. Choose Custom conditions to specify more complex conditions.
Here you can select from the following options:
- Only when all previous tasks have succeeded
- Even if a previous task has failed, unless the build was canceled
- Even if a previous task has failed, even if the build was canceled
- Only when a previous task has failed
- Custom conditions
Output Variables
- Reference name
Any changes to the reference name will require updates to downstream tasks that uses this reference name, a valid reference name can only contain ‘a-z’, ‘A-Z’, ‘0-9’ and ‘_’.