Create and configure Azure DevOps Pipelines Agent
When getting to know Azure Devops, the most difficult question is probably what steps you need to follow to make your CI Pipeline work correctly.
The crucial point in running the Azure CI Pipeline is the work of the Azure Pipelines Agent, whose primary task is to establish a connection with the machine on which you want to run your DevOps CI Pipeline.
Note
For the Azure DevOps pipeline involving dbForge SQL Tools, it is necessary for the Azure DevOps agent service to operate under the user who installed and activated those tools. This user should also have appropriate access permissions to the SQL servers used in the CI process.
The figure below displays the Azure CI Pipeline workflow with a Microsoft-hosted agent and a self-hosted agent.
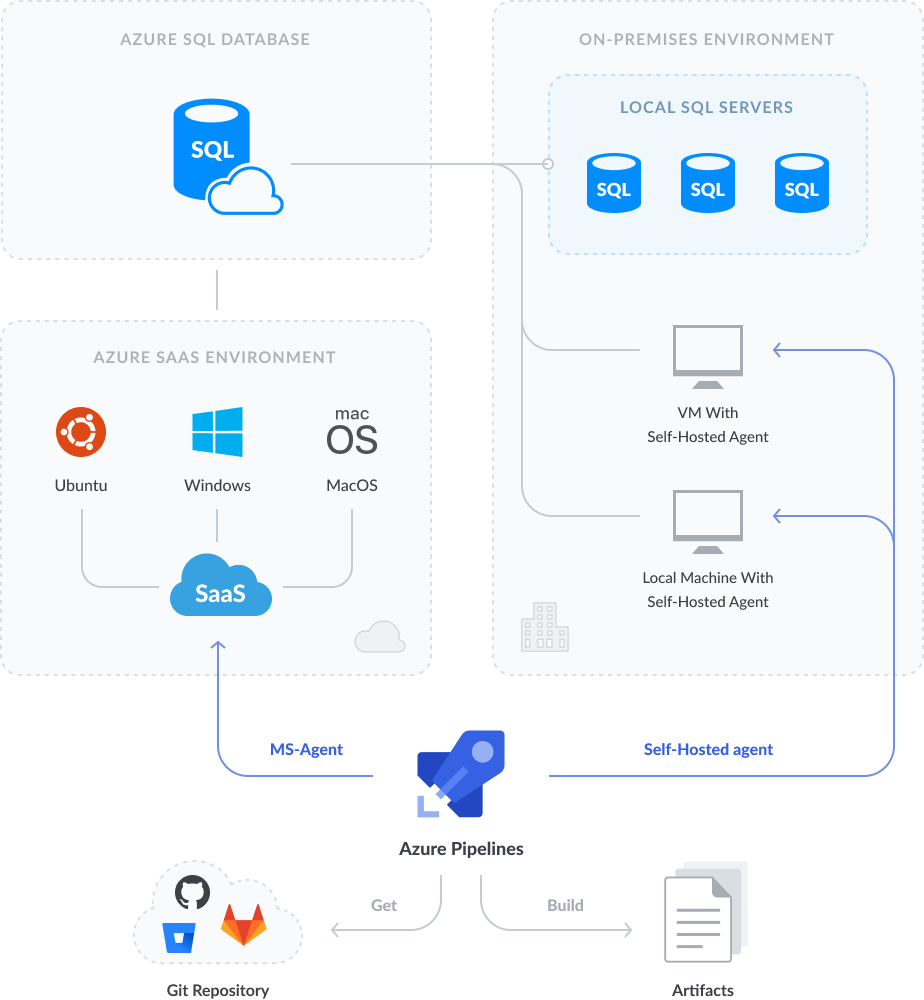
As you can see from the figure above, your pipeline has to be run in some kind of operating environment on some machine. A Microsoft-hosted agent and a self-hosted agent are bound to manage that pipeline execution.
In case of using a MS-Agent, the execution takes place in one of the ready-made operating environments in Azure Windows, macOS, or Ubuntu, which is deployed to Azure on the fly (provided as SaaS).
In case of using a self-hosted agent, the execution takes place on your physical or virtual machine (on-premise environment).
MS-agent vs Self-hosted agent
Thus, the primary difference between a MS-agent and a self-hosted agent lies in the fact that with a MS-agent, you get a ready-prepared virtual machine in the cloud with pre-installed operating system (Windows, macOS, or Ubuntu). You get a fresh virtual machine each time you run a pipeline.
If you use a self-hosted agent, the pipeline will be executed on your physical machine.
The table below shows the main comparative characteristics of the two agents.
| Microsoft-hosted agent | Self-hosted agent |
|---|---|
| Pre-defined virtual machine images: macOS, ubuntu-16, ubuntu-18, vs2015-win2012r2, vs2017-win2016, win1803, windows-2019.Your own computer or virtual machine. | Your own computer or virtual machine. |
| Some images have a broad range of tools and software. For example, Visual Studio Enterprise 2019, Google Chrome, Inno Setup, Python, various SDK packages and other programs are already installed on the Windows-2019 image. | You choose for yourself which programs should be installed on your machine. |
| All virtual machine images have the latest patches/updates. | You yourself must keep track of all patches and updates on your machine. |
| You cannot change hardware or software configuration which means that you cannot upgrade the processor, add or reduce memory, or change HDD. | You can change any hardware components on your machine (CPU, memory, HDD, SDD, etc.) |
| You can install any application you need. For instance, I use the Chocolatey service. Or you can download the application via a direct link and install it in silent mode using the PowerShell script. | You yourself decide which programs and when should be installed for your CI. |
| The virtual machine images for CI Pipelines always come clean and do not contain artifacts from previous runs. When the pipeline completes, the virtual machine image is discarded. | You attend to the removal of CI artifacts between the pipelines on your machine on your own. |
Advanced information about MS-agents
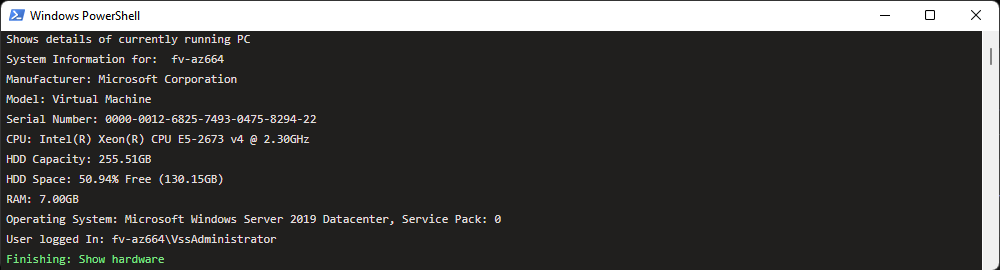
You can get information about the pre-installed software or hardware for a specific MS-agent using PowerShell. For example, to receive information about software and hardware for MS-Agent and a Windows-2019 image, execute the following PowerShell script.
"Shows details of currently running PC"

$computerSystem = Get-CimInstance CIM_ComputerSystem
$computerBIOS = Get-CimInstance CIM_BIOSElement
$computerOS = Get-CimInstance CIM_OperatingSystem
$computerCPU = Get-CimInstance CIM_Processor
$computerHDD = Get-CimInstance Win32_LogicalDisk -Filter "DeviceID = 'C:'"

Clear-Host

Write-Host "System Information for: " $computerSystem.Name
"Manufacturer: " + $computerSystem.Manufacturer
"Model: " + $computerSystem.Model
"Serial Number: " + $computerBIOS.SerialNumber
"CPU: " + $computerCPU.Name
"HDD Capacity: "  + "{0:N2}" -f ($computerHDD.Size/1GB) + "GB"
"HDD Space: " + "{0:P2}" -f ($computerHDD.FreeSpace/$computerHDD.Size) + " Free (" + "{0:N2}" -f ($computerHDD.FreeSpace/1GB) + "GB)"
"RAM: " + "{0:N2}" -f ($computerSystem.TotalPhysicalMemory/1GB) + "GB"
"Operating System: " + $computerOS.caption + ", Service Pack: " + $computerOS.ServicePackMajorVersion
"User logged In: " + $computerSystem.UserName
By executing the script, we get the following information about the virtual machine:
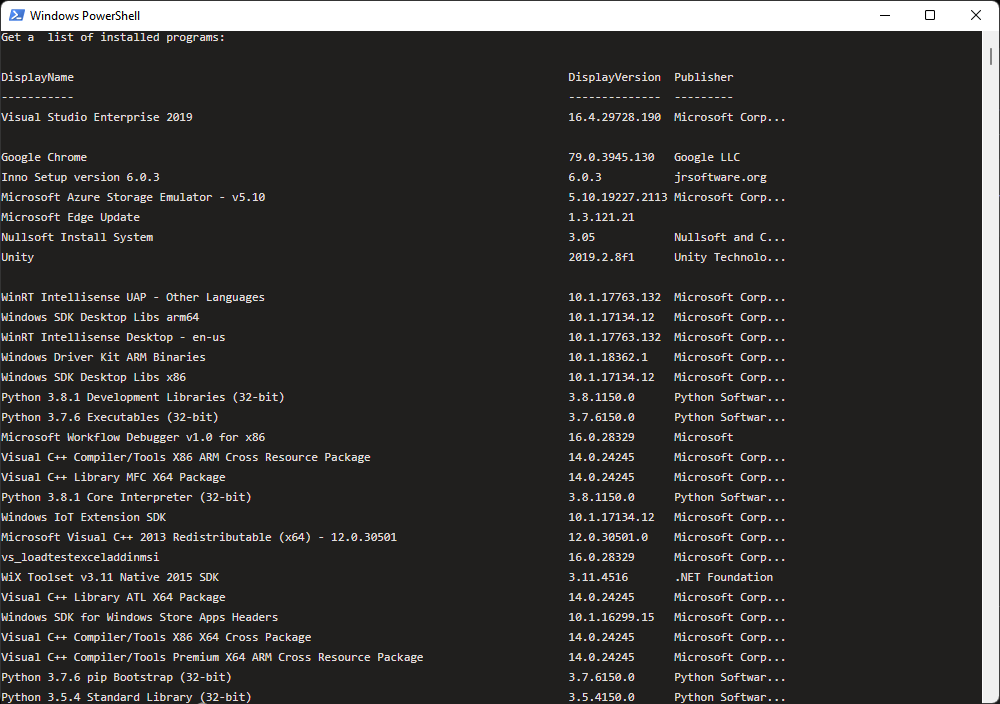
As mentioned in the table above, some virtual machine images for MS-agent have a broad range of useful pre-installed programs. To find out what programs are pre-installed for a Windows-2019 image, we can create a PowerShell task with the following script:
"Get a list of installed programs:"

Get-ItemProperty HKLM:\Software\Wow6432Node\Microsoft\Windows\CurrentVersion\Uninstall\* | Select-Object DisplayName, DisplayVersion, Publisher, InstallDate | Format-Table -AutoSize
After executing this script, we will see a list of pre-installed useful programs (this list is very long and the figure below displays only a part of it):
When to use MS-agents and when to use self-hosted agents
If you have a small project with source code that does not take much time to download, it also does not require a lot of time to compile the project and perform unit tests. In that case, Microsoft-hosted agent will be the best choice. As indicated in the comparison table above, the virtual machine image and all pre-installed programs (Visual Studio, Python, Chrome, etc.) for MS-Agent have the latest updates. After executing a pipeline, this virtual machine image is discarded and does not affect the execution of the subsequent pipelines.
However, if you have problems related to performance, accessibility, security, or other problems of that kind, it is better to settle upon a self-hosted agent. One of the important drawbacks of self-hosted agents is that you will have to keep track of operating system updates, as well as clear the disk of artifacts between pipeline jobs.
Configuring MS-agent
The setup of Microsoft-hosted agent is quite simple and straightforward:
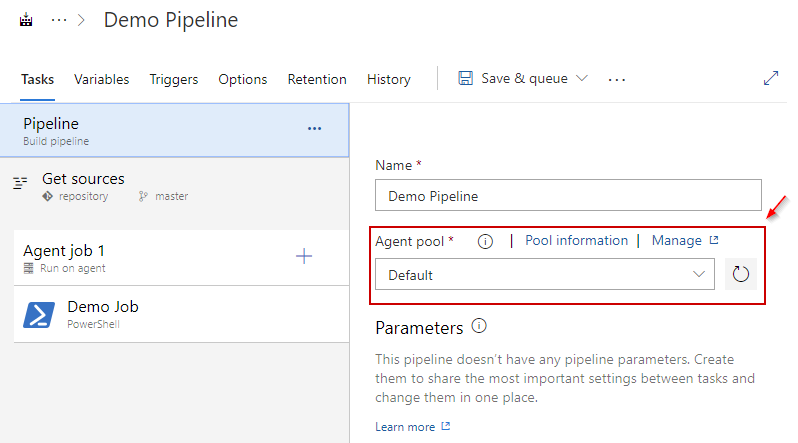
1. In the Agent pool combo box, select Azure Pipelines.

2. In Agent Specification drop-down list box, select a required virtual machine image.
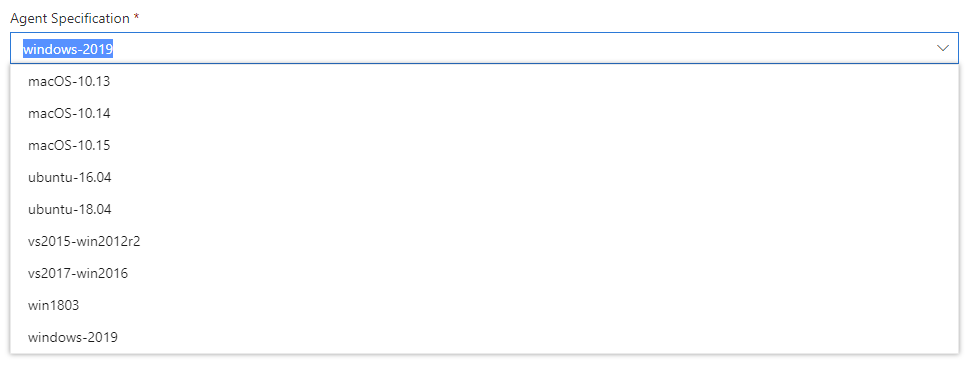
This is all you need to do to get your CI Pipeline running on the desired virtual machine image delivered as SaaS.
Configuring a self–hosted agent
As mentioned above, the primary task of a self–hosted agent is to establish a connection with the machine on which you are going to run your DevOps CI pipeline using all available resources of that machine. To do this, install a self–hosted agent on this machine. That can be your computer or virtual machine.
To install a self-hosted agent:
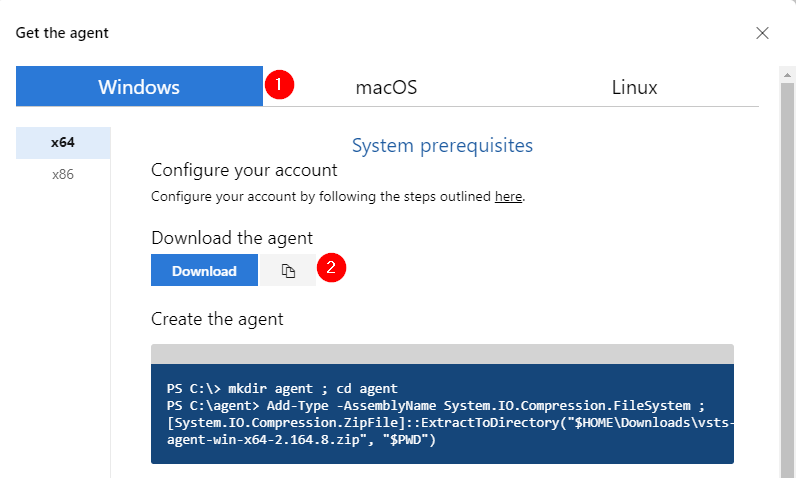
1. Download the agent.
There are several ways to do this. The first and the easiest one is to follow the link and download the agent you need as shown below.
Alternatively, to the Agent pools page of your Azure organization, and click New Agent.

Next, select the necessary operating system and click Download.
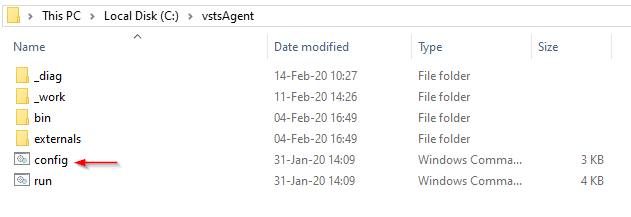
2. Now you need to extract the downloaded ZIP file to folder on your disk.
3. Run config.cmd (Run as Administrator).
4. When the setup asks to Enter server URL for Azure DevOps Services, specify htttps://dev.azure.com/{yourOrganizationName}.

5. When setup asks for your authentication type, press ENTER.

Then setup asks to enter the token.

Paste your token as shown below.

Note
For more information of creating tokens, refer to Self-hosted Windows agents.
6. When the setup asks to Enter agent pool, press Enter if you want yo use default pool.

7. When setup asks to Enter agent name, enter the name of the agent, for example: vmagentvm.

8. When setup asks to Enter work folder, press Enter.

If required, specify the name.
9. When setup asks to Enter run agent as service?(Y/N), press Y.

Note
If you select Y (the preferred choice), your agent will be run as a service and will start automatically with the start-up of the operating system on which it is installed. If you select N, your agent will work as a common process and you will have to start it manually.
10. When setup asks to Enter User account to use for the service, enter a fully qualified name of the service account, for example: DomainName\AccountName. Then, hit Enter.
When setup asks to Enter Password for the account [service account], enter the password for the account and press Enter.
After that, you will see a message about successful configuration:

Also, if you go to the Default page of the Agent pools section, you will see that your agent appeared in the list there:
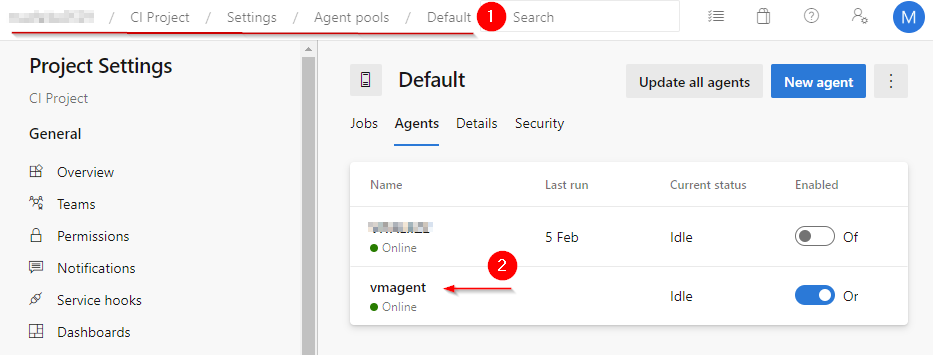
If you select Default pool for your pipeline, the pipeline will be run on the machine where the agent is installed.
Conclusion
The article provides a comparative description of a MS-agent and a self-hosted agent. It also explains when and why to use one or another agent.
This article does not intend to cover in-depth the operating principle of the Azure Pipelines Agent in this article, but try to give the minimum necessary idea of what types of agents exist and how to configure the agent for your Continuous Integration with Azure Pipelines.