Connect to a database
Your first step is to create a new server connection.
To create a connection:
1. On the Database menu, click New Connection. The Database Connection Properties dialog opens.
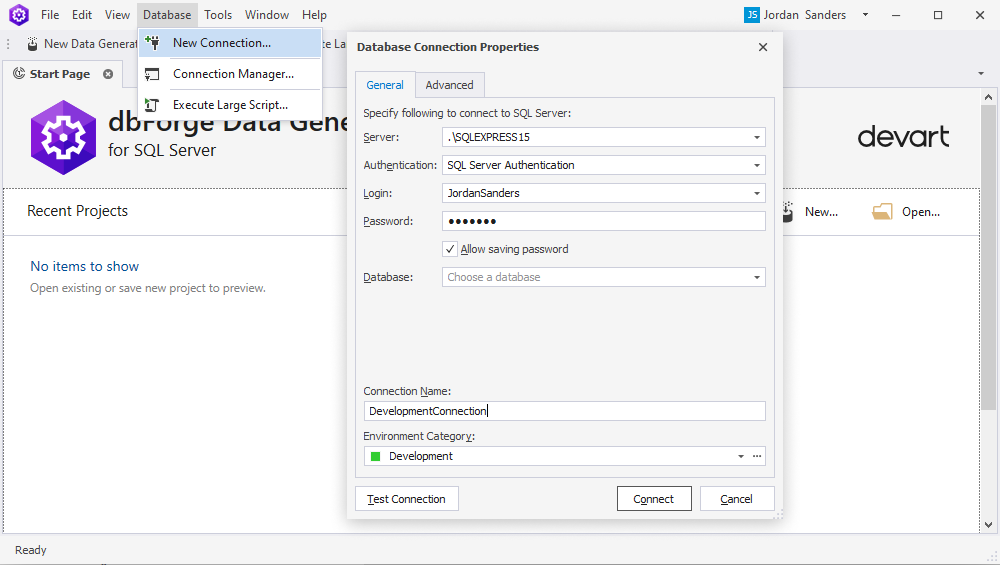
2. In the Server field, open the list of servers and select either a local or network server from the list.
Note
To connect to a SQL Server using a custom port, specify the server name followed by a comma and the custom port number. For example, localhost,62005.
3. Select the authentication type:
- Windows Authentication
- SQL Server Authentication
- Microsoft Entra MFA
- Microsoft Entra Password
- Microsoft Entra Integrated
For more information about how to connect to a database with the Microsoft Entra ID authentication, see Using Microsoft Entra ID Authentication.
4. In the Login and Password fields, enter the login credentials. By default, the password is saved automatically. If you don’t want to save the password, clear the Allow saving password check box.
5. In the Database field, type a database you want to connect to or select the database from the dropdown list.
6. In the Connection Name box, the connection name are automatically generated from the host name. If you want to create a distinctive name for the connection, type the new name.
7. Optional: Assign an environment category (Development, Production, Sandbox, and Test) to the new connection.
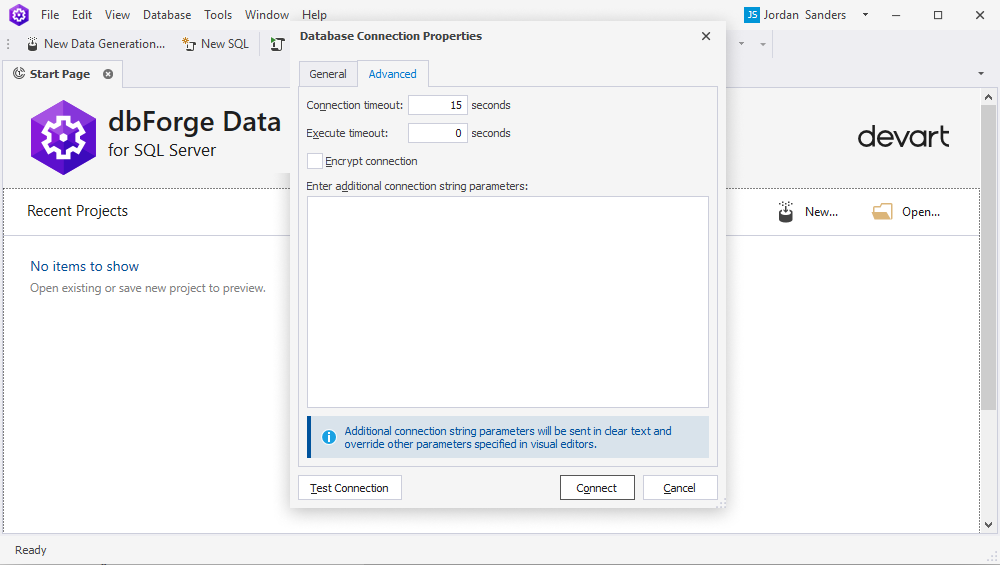
8. Optional: Switch to the Advanced tab to configure advanced connection properties.
- Connection timeout: Set the amount of time (in seconds) during which the server should wait to establish a connection. The default value is 15 seconds.
- Execute timeout: Set the amount of time (in seconds) during which the task should be completed. The default value is 0 seconds.
- Encrypt connection: Select the check box if you want to use the encrypted connection.
- Enter additional connection string parameters: Set additional connection properties to the connection string.
9. Optional: Click Test Connection to verify the connection.
10. Click Connect to create the connection.
Note
If you set up a connection in one of the following tools, it will be automatically added to other dbForge SQL Tools:
- dbForge Data Compare for SQL Server
- dbForge Data Generator for SQL Server
- dbForge Schema Compare for SQL Server
- dbForge Query Builder for SQL Server
- dbForge Documenter for SQL Server
- dbForge Event Profiler for SQL Server
You can migrate connections and assigned categories between dbForge SQL tools (for example, from dbForge Data Compare for SQL Server to dbForge Data Generator for SQL Server). To do that, you should create an export settings file with the help of Import and Export Settings Wizard in one tool and then import it in another dbForge SQL tool. For more information, see Import and export settings.
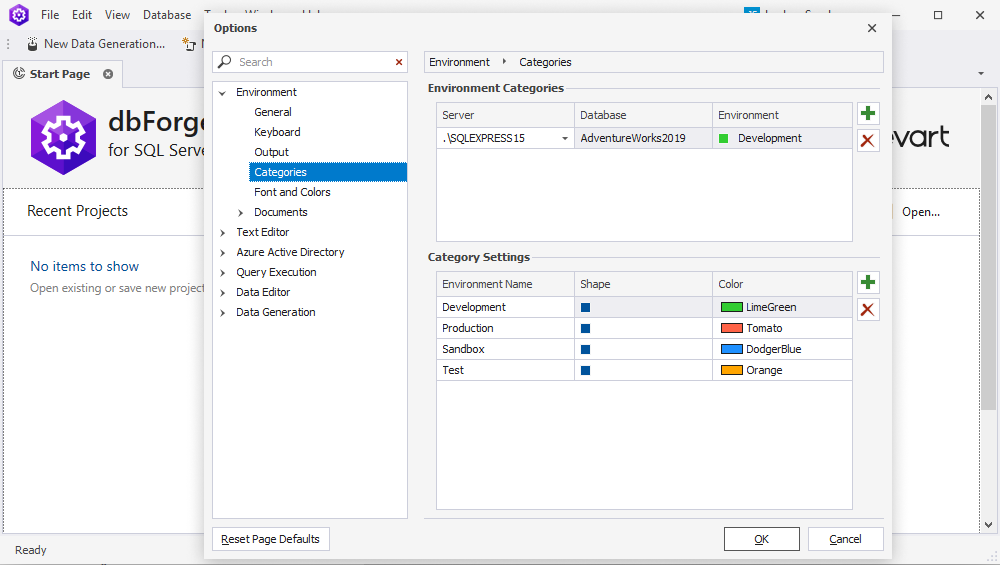
Windows connection coloring
Window connection coloring allows you immediately to know which server you’re connected to. You can add coloring for each server connection in the Environment Category field of the Database Connection Properties dialog box when setting the database connection properties. To do this, click an arrow in Environment Category and the select the coloring from the list.
Alternatively, click … to open the Options wizard where you can select the coloring, edit, add, or delete the category.
Edit a database connection
To edit a database connection, on the Database menu, click Connection Manager. The Connection Manager dialog box opens. Select the connection you want to update and then click Edit. The Database Connection Properties dialog box opens where you can make changes on database connection parameters.
Delete a database connection
To delete a database connection, on the Database menu, open the Connection Manager. Then, choose a connection you want to delete and click Delete.