Set generation options
Before you populate the database, it is recommended to make its backup, so you can adjust settings and redo the data generation if needed.
Generate data
1. On the standard toolbar, click New Data Generation. The Data Generator Project Properties wizard opens.
2. On the Connection page, choose the connection and database for data generation and then click Next.
3. On the Options page, set the data generation options and then click Next.
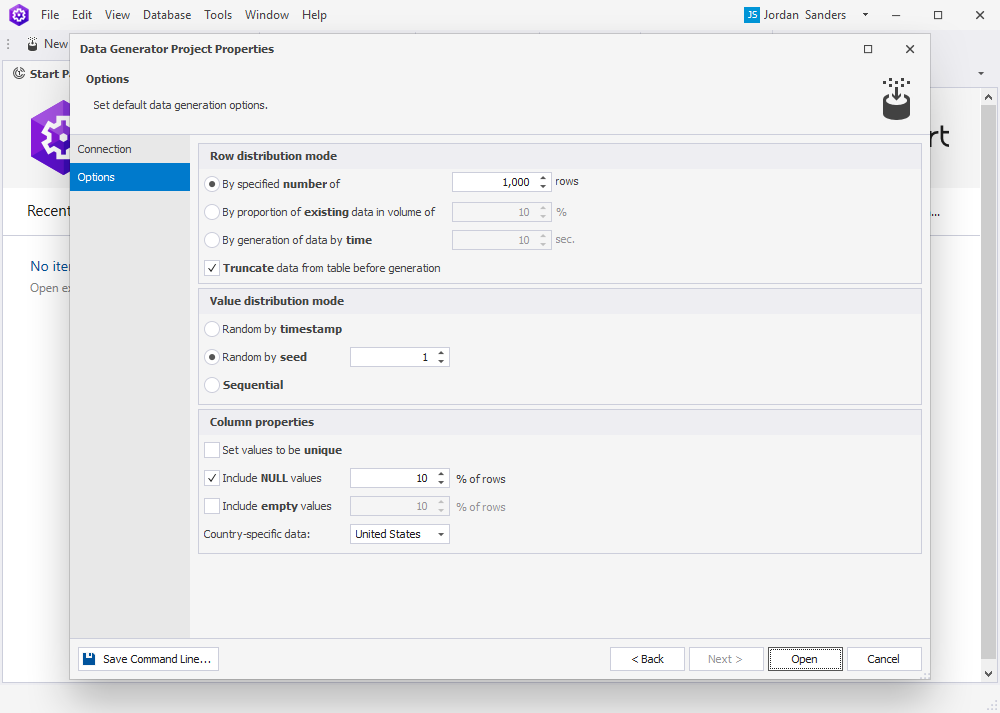
The table describes options you can select in the Data Generator Project Properties wizard.
| Option | Option Group | Description | Default State | Default Value |
|---|---|---|---|---|
| By specified number of | Row distribution mode | Generates the specified number of rows | Enabled | 1000 rows |
| By proportion of existing data in volume of (%) | Row distribution mode | Uses the specified percentage of existing data for data generation | Disabled | 10% |
| By generation of data by time (sec) | Row distribution mode | Generates data within the specified time period in seconds | Disabled | 10 sec |
| Truncate data from table before generation | Row distribution mode | Deletes all data from the table before generating new data | Enabled | - |
| Random by timestamp | Value distribution mode | Generates random data using timestamps | Disabled | - |
| Random by seed | Value distribution mode | Generates values based on the seed value. When you repopulate the column, you will get the same data collection | Enabled | 1 |
| Sequential | Value distribution mode | Generates values sequentially | Disabled | - |
| Set values to be unique | Column properties | Generates unique values | Disabled | - |
| Include NULL values % of rows | Column properties | Generates the specified percentage of NULL values | Enabled | 10 |
| Include empty values % of rows | Column properties | Generates the specified percentage of empty values | Disabled | 10 |
| Country-specific data | Column properties | Generates data in the format specific to a given country | United States |
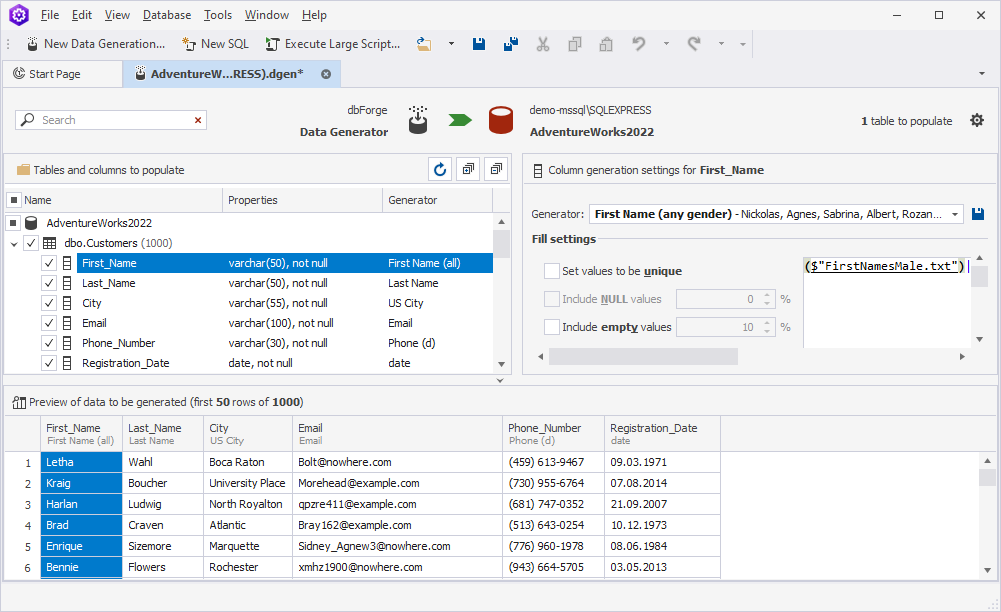
4. Click Open to open your data generation project.
In the left-side pane, you can select the checkboxes next to the tables and columns you want to populate. In the tree view, clicking the table/column name allows you to adjust table/column settings in the right-side pane. All the changes are displayed in real-time.
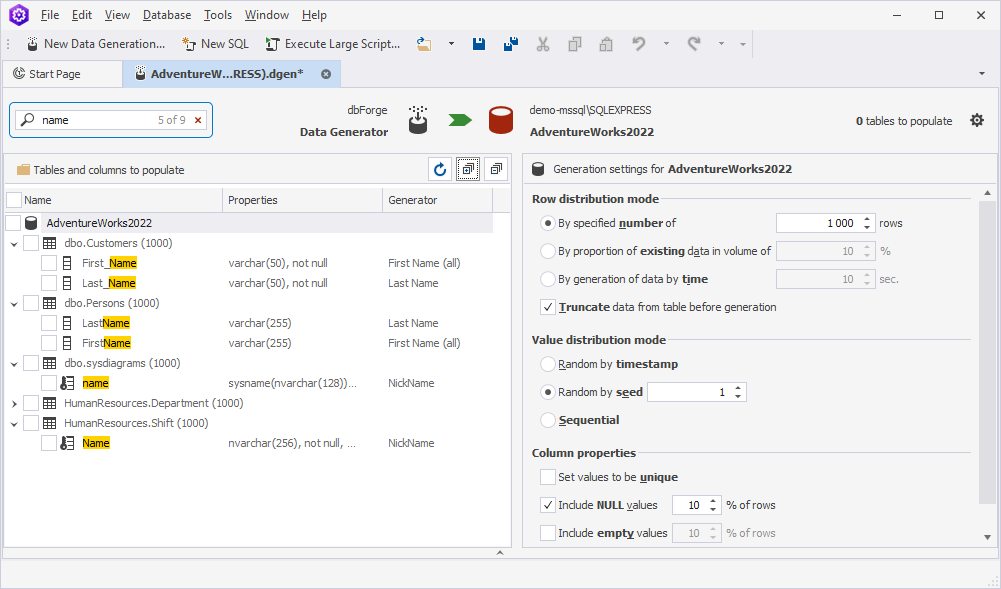
Note
In the Tables and columns to populate tree, you can filter database objects to be displayed by specific name. The default search mode is case-insensitive. It means that searching, for example, for name will highlight the name containing the text Name or name. As you type in the Search box, the text that matches your search criteria will be highlighted in the grid. The number of matching names will be displayed in the search bar.
In the Search box, you can use the following keyboard shortcuts:
- Ctrl+A to select all.
- Ctrl+Left Arrow (←) to move the caret to the beginning of the word.
- Ctrl+Right Arrow (→) to move the caret to the end of the word.
- Ctrl+Shift+Left Arrow (←) to select text from the current caret position to the beginning of the current word and move the caret to the beginning of the word.
- Ctrl+Shift+Right Arrow (→) to select text from the current caret position to the end of the current word and move the caret to the end of the word.
- Ctrl+Backspace to delete the word to the left of the cursor.
5. Click ![]() Populate data to the target database to populate the database.
Populate data to the target database to populate the database.
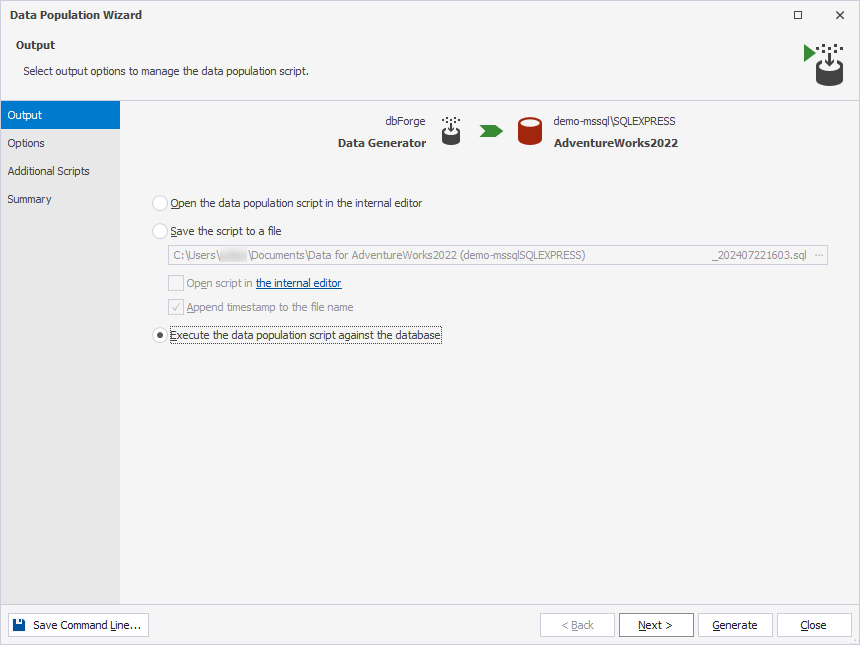
6. On the Output page of the Data Population Wizard that opens, select one of the following options and then click Next:
- Open the data population script in the internal editor
- Save the script to a file
- Execute the data population script against the database
7. On the Options page, configure the data population options, and then click Next.
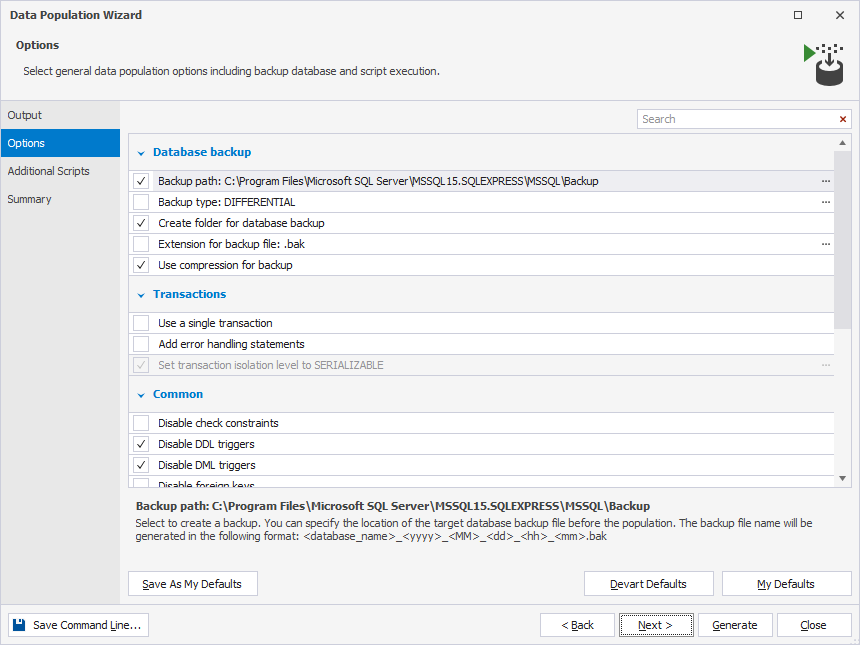
The table describes options you can select in the Data Population wizard.
| Option | Option Group | Description | Default State |
|---|---|---|---|
| Backup path | Database backup | Creates a backup file of the database and allows specifying its location. The format of the backup file name would be: <database_name>_yyyy_MM_dd_hh_mm.bak | Enabled |
| Backup type | Database backup | Creates a backup in the selected mode. Note that creating a differential database backup requires a previous full database backup. If no previous backup exists, a full database backup will be created. The copy-only mode is available for SQL Server 2008 or later versions | Disabled |
| Create folder for database backup | Database backup | Creates a folder for database backup | Enabled |
| Extension for backup file | Database backup | Defines the file extension for a backup. When the option is disabled, the backup file will use the default extension (.bak) | Disabled |
| Use compression for backup | Database backup | Performs the backup compression. This option is available for SQL Server 2008 or later versions | Enabled |
| Use a single transaction | Transactions | Executes a data population script as a single transaction. Any errors occurred during the script execution will result in all changes being rolled back | Disabled |
| Add error handling statements | Transactions | Stops executing a script when an error occurs | Disabled |
| Set transaction isolation level to | Transactions | Sets the transaction isolation level to the selected value. This option becomes available when the Use a single transaction option is selected. The following transaction isolation levels can be specified: SERIALIZABLE, SNAPSHOT, REPEATABLE READ, READ UNCOMMITTED, and READ COMMITTED | Disabled |
| Disable check constraints | Common | Drops check constraints at the beginning of data population. When it is complete, check constrains will be restored with the WITH NOCHECK parameter | Disabled |
| Disable DDL triggers | Common | Disables DDL triggers at the beginning of data population. When it is complete, triggers will be enabled | Enabled |
| Disable DML triggers | Common | Disables DML triggers at the beginning of data population. When it is complete, triggers will be enabled. This options is applied to tables and views | Enabled |
| Disable foreign keys | Common | Drops foreign keys at the beginning of data population. When it is complete, foreign keys will be restored | Disabled |
| Disable primary keys, indexes and unique constraints | Common | Drops primary keys, indexes, and unique constraints at the beginning of data population. When it is complete, primary keys, indexes, and unique constraints will be restored | Disabled |
| Exclude comments | Common | Excludes comments from the data population script | Disabled |
| Include print comments | Common | Includes comments in the data generation script. These comments are printed in the output of the script and can provide information about the execution steps, data being processed, and other relevant details. The inclusion of comments can make it easier to understand the script and debug any issues that may arise during its execution | Dsiabled |
| Include USE <database_name> | Common | Adds the USE <database_name> clause to a script | Disabled |
| Insert multiple rows of data | Common | Inserts multiple rows of data into a table using a single INSERT statement, instead of inserting one row at a time. The option will be ignored for sql_variants columns | Disabled |
| Restore constraints using WITH CHECK | Common | Creates constraints with the WICH CHECK parameter. The option increases execution time due data validation, and there is a high chance it may fail. Disabling the option will create constraints with the WITH NOCHECK parameter | Disabled |
| Synchronize database in the single user mode | Common | Synchronizes a database in the single user mode | Disabled |
8. On the Additional Scripts page, type or select the script to be executed before and\or after data population.
9. Optional: On the Summary page, view Action plan and Warnings if any.
10. Click Generate to finish the process.