How to organize a DevOps process using the dbForge DevOps Automation Jenkins Plugin
dbForge DevOps Automation for SQL Server is a solution designed for the management and deployment of changes to a SQL Server database. With it you can automate the deployment of database changes and build a full-cycle database CI/CD pipeline using any continuous integration or continuous deployment server that supports running PowerShell. To make getting set up easier, dbForge DevOps Automation includes plugins for Azure DevOps, TeamCity, Bamboo, and Jenkins automation servers.
dbForge DevOps Automation comes as part of the SQL Tools suite and is used in conjunction with other dbForge tools such as Unit Test, Data Generator, Data and Schema Compare, etc. dbForge DevOps Automation allows organizing a comprehensive continuous delivery pipeline for your database.
How to build a CI/CD pipeline with Jenkins
dbForge DevOps Automation Jenkins Plugin provides all the necessary features to configure Continuous Integration. It allows you to quickly and easily create a database on the server, test it and then deploy.
The guide provides step-by-step procedures to create the Jenkins job using the dbForge DevOps Automation Jenkins Plugin for SQL Server.
Preparing the environment
To configure the CI process on the Jenkins server using the dbForge DevOps Automation for SQL Server toolset, you must first install the dbForge tools (according to your needs in the CI process) on the machine that will act as a build agent. This is usually the following set of tools:
You can install all the tools mentioned above and some more in one pack, dbForge SQL Tools.
Additionally, to organize the CI process, you’ll need:
-
Jenkins server (configure if you have not installed it yet).
-
dbForge DevOps Automation for SQL Server PowerShell module. It is a set of PowerShell cmdlets to coordinate dbForge Tools. You can download and install it from the PowerShell website or from the Devart website, click DOWNLOAD next to Jenkins.
-
Windows PowerShell plugin for Jenkins. Open the Devart website and click DOWNLOAD next to Jenkins.
As soon as everything is installed and ready, you can create a new project on the Jenkins server. First, let’s install the dbForge DevOps Automation for SQL Server plugin.
Installation
The dbForge DevOps Automation for SQL Server plugin installation is performed in the same way as for the rest of the Jenkins plugins. To learn how to configure the Jenkins plugin, see Install the Jenkins Plugin.
Creating a new SQL Continuous Integration job
After you have installed the plugin, you can create a Continuous Integration job based on it. This is as simple as any other job for Jenkins.
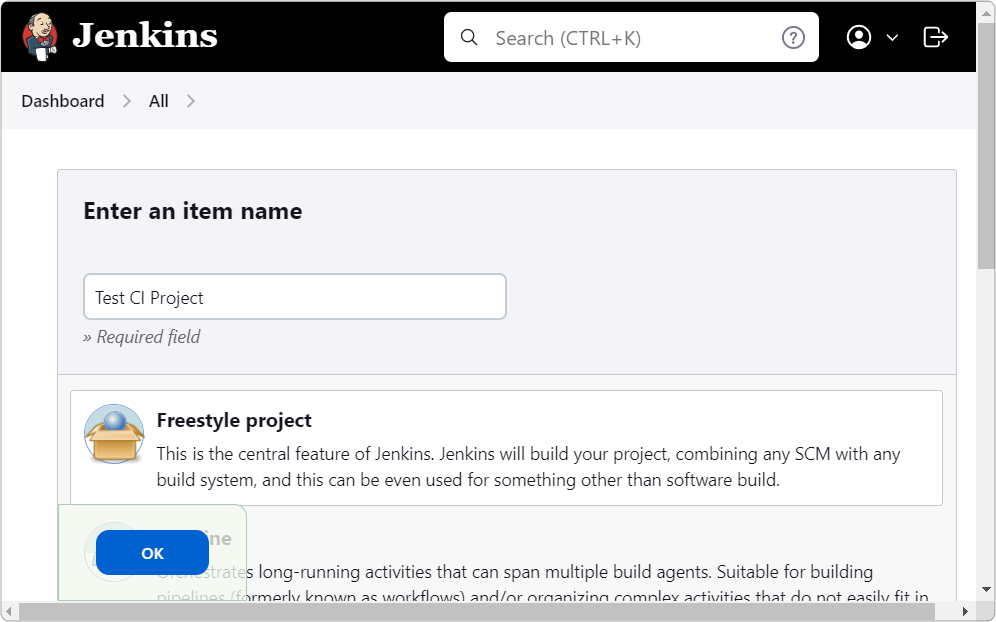
On the Jenkins main page, click the New Item option, enter a new project name, select a project type, and click OK. Freestyle project is displayed as an example of the project type.
The Configuration page gets opened. It’s required to adjust three sections there:
General
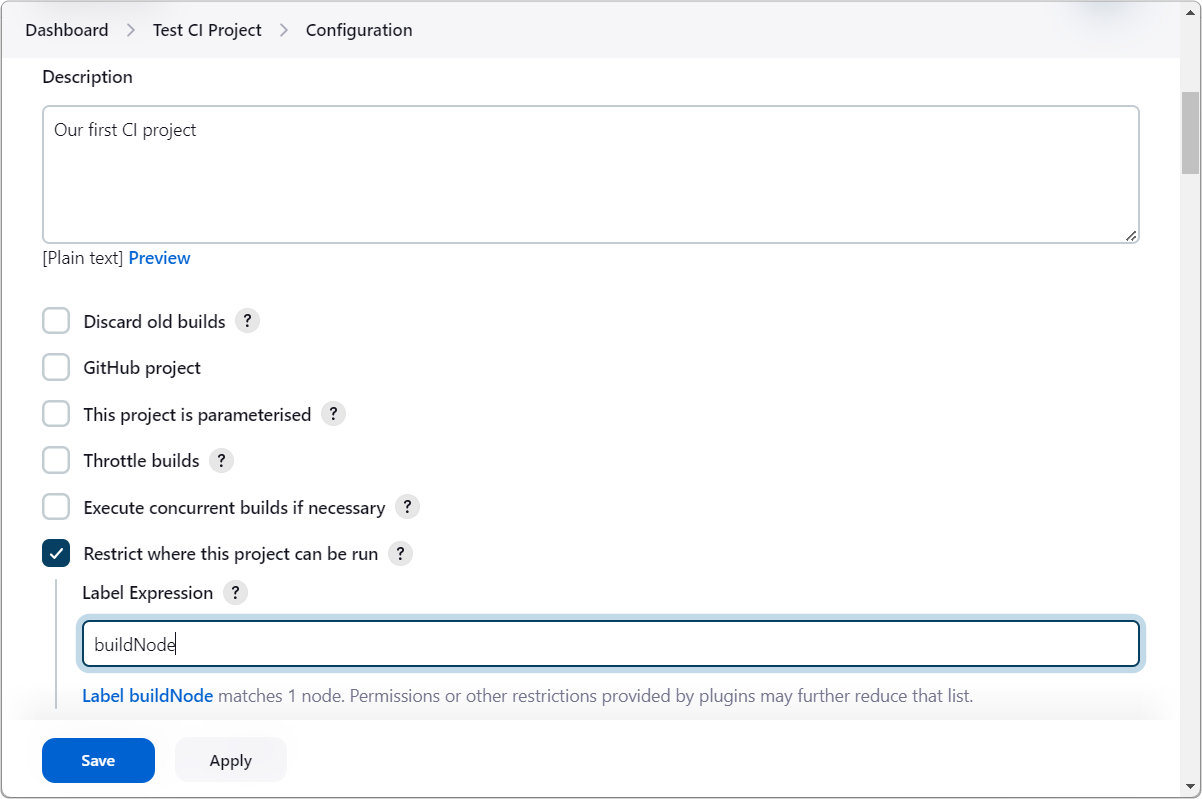
1. Enter a description of the project, select Restrict where this project can be run and type the label of the node where you want to launch the job. For example.
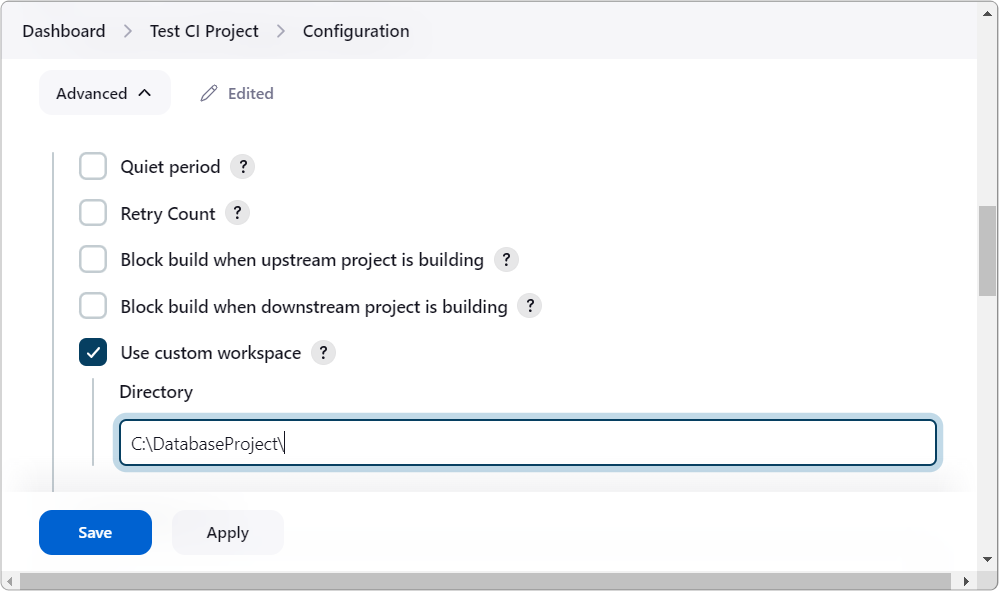
2. Click Advanced, select Use custom workspace and type the path to your working folder. It is anticipated that this working folder contains a subfolder with Scripts Folder. It is also assumed that you have already set up a versioning system in order to pull new changes for the Scripts Folder subfolder. Anyway, getting new changes can be arranged as a separate job in Jenkins.
Build Triggers
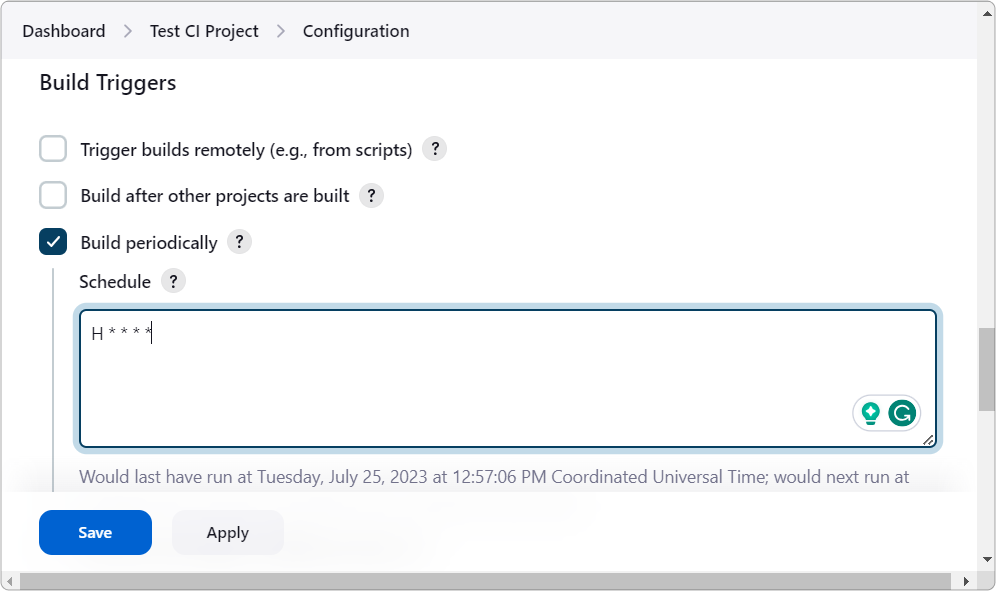
In this section, you can choose the desired condition for running your job. You can, for example, set the job to be launched every hour:
Build Steps
Now it’s time to customize the installed plugin.
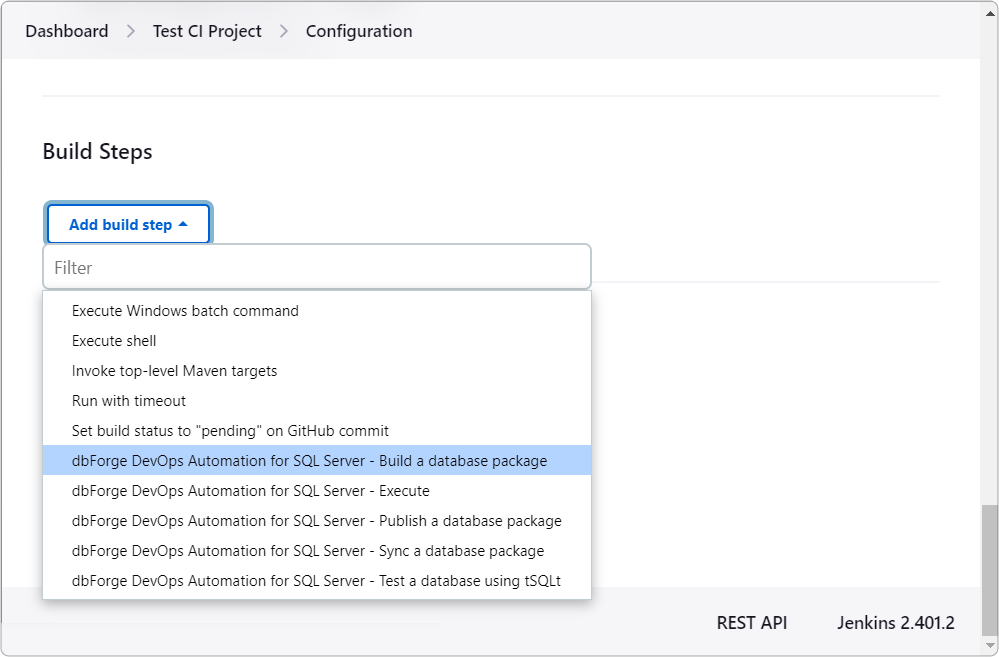
Step 1. Building a database package
The first step comprises building a database package and serves to deploy your database from a Script Folder on a given server.
1. Click Add build step and select the Build a database package step as shown below.
2. In the dialog window that opens, select Database folder is a subfolder of my VCS root and enter the subfolder name of your Script Folder. Remember, that this subfolder should be relative to the path that you have already set above (Use custom workspace → Directory).

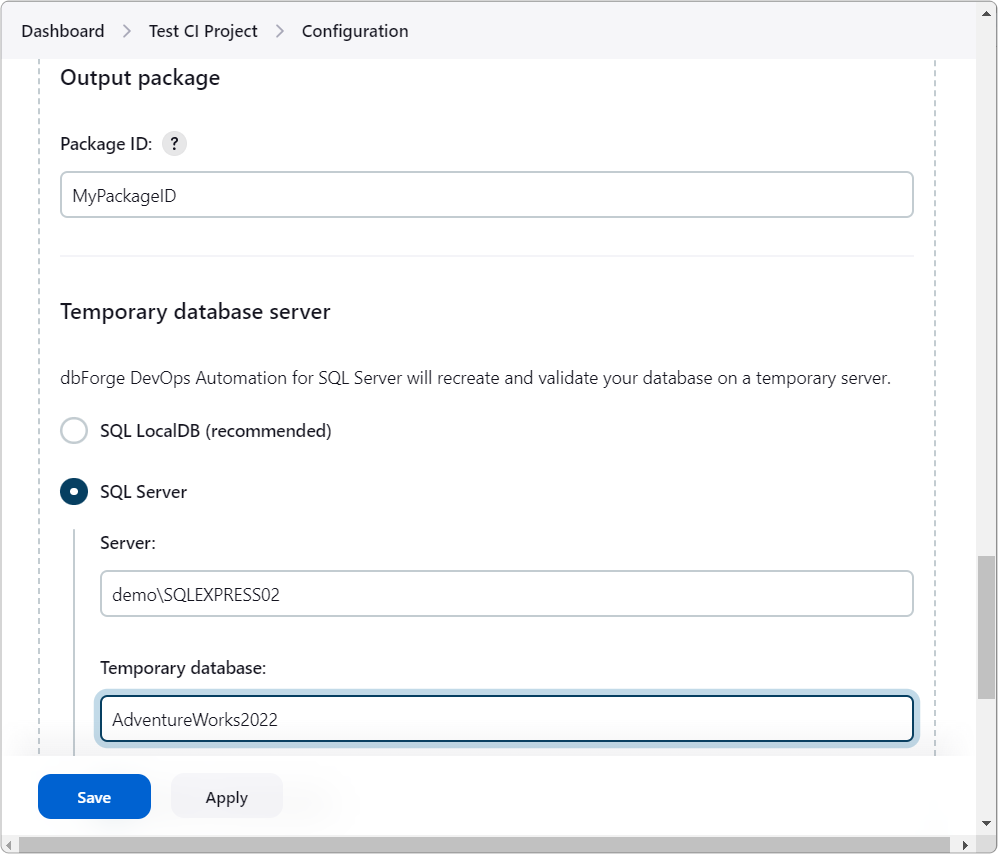
3. Enter the package name, select SQL Server and provide the server name and the name of the database that you want to deploy to the server as shown below.
Step 2. Testing a database using tSQLt
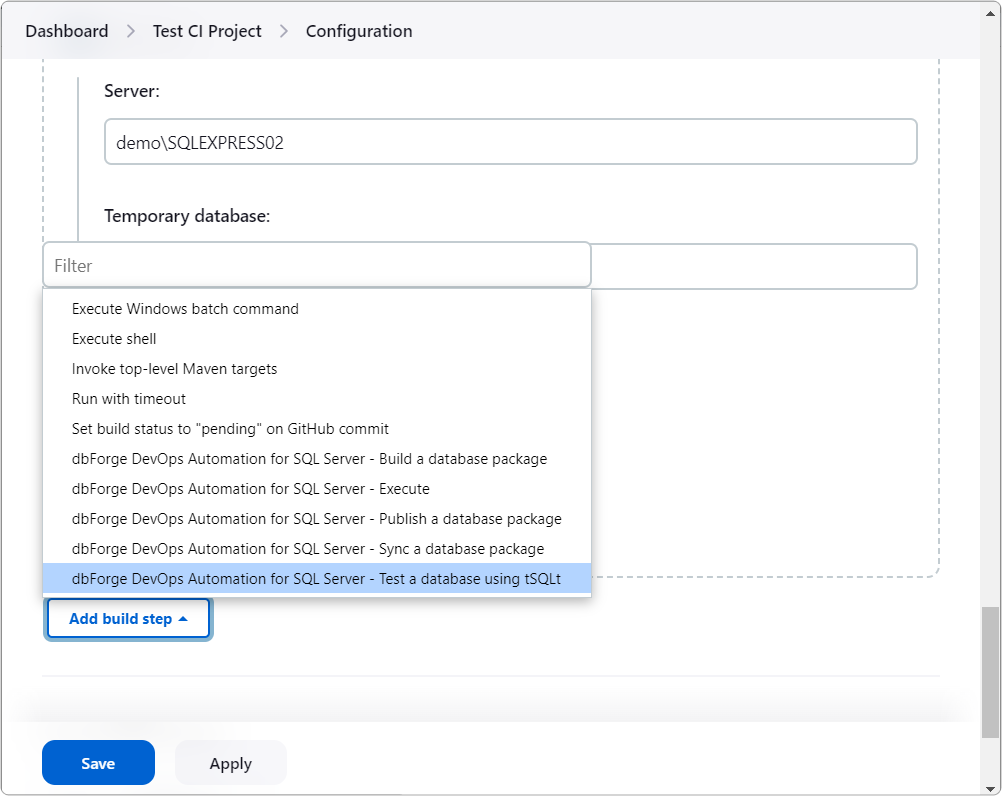
Now you are ready to test your SQL Server database. The Test step involves running unit tests on a deployed database.
1. Click Add build step and select the Test a database using tSQLt step.
2. Provide the Package ID, names of the server and the database that you want to test.
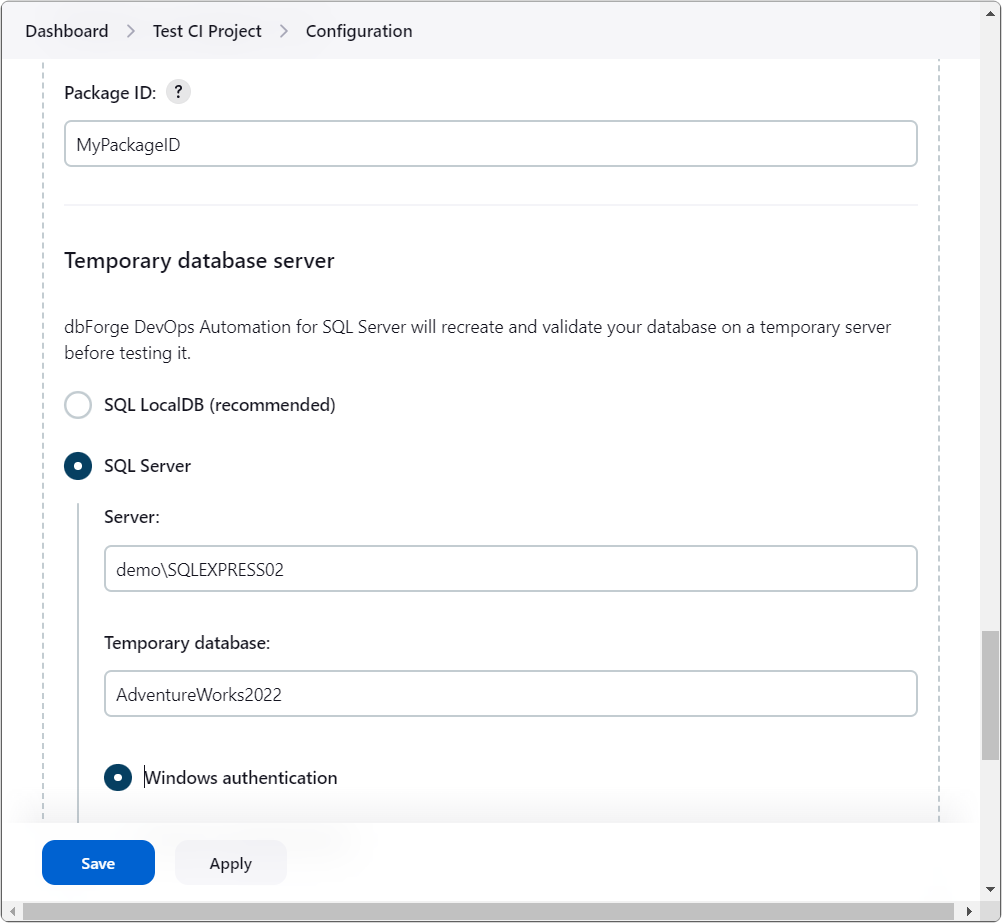
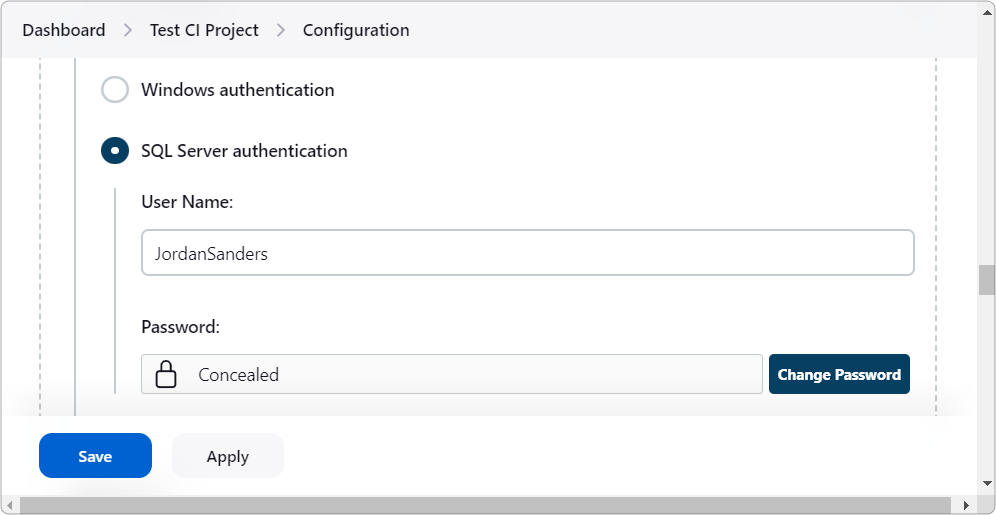
3. Select SQL Server authentication and enter your user name and password.
Step 3. Publishing a database package
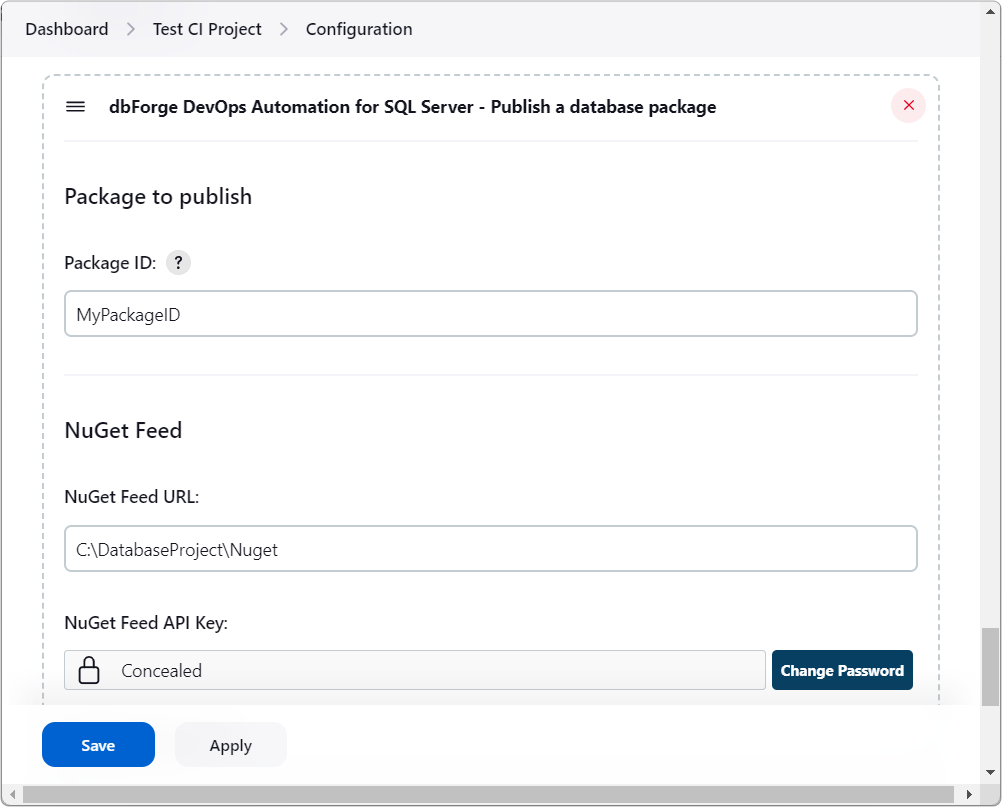
Now you can move to publishing your package. The Publish step entails packing the Script Folder into the package and then publishing it at the specified location.
1. Click Add build step again and select the Publish a database package step.

2. Specify the Package ID, upload path for your NuGet package, and key for the NuGet feed.
3. Finally, click Save.
Trial run of your project
Launch your project and check the results.
1. Click the button shown on the screenshot.

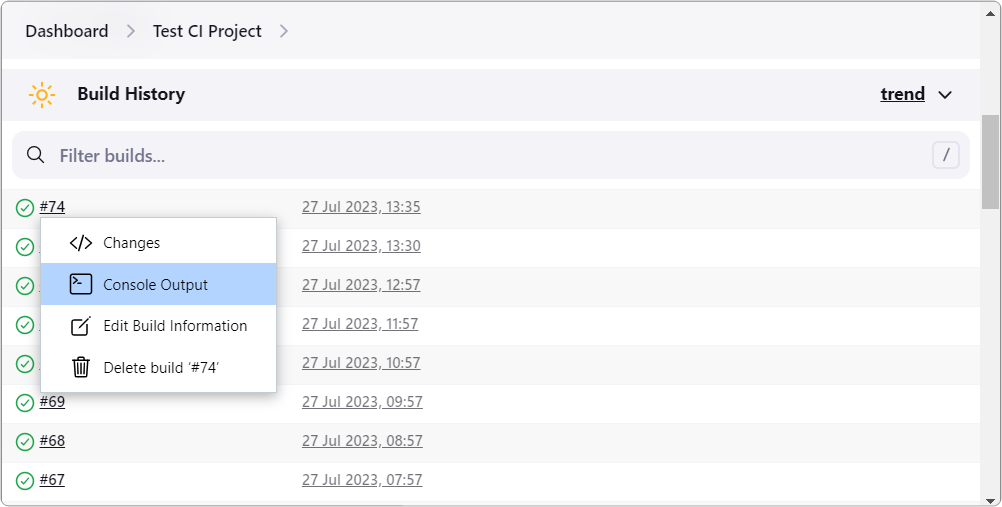
2. To check the result, click the job and on Dashboard. Then point to the required build number and select Console Output.
Step Execute
The next is the Execute step. It allows running flexibly random SQL scripts in our pipeline. This step can be applied in order to:
- Create a database from custom scripts
- Run migration scripts to update a deployed database
- Add unit tests for already deployed database
1. Return to Dashboard, click the job, and select Configure.
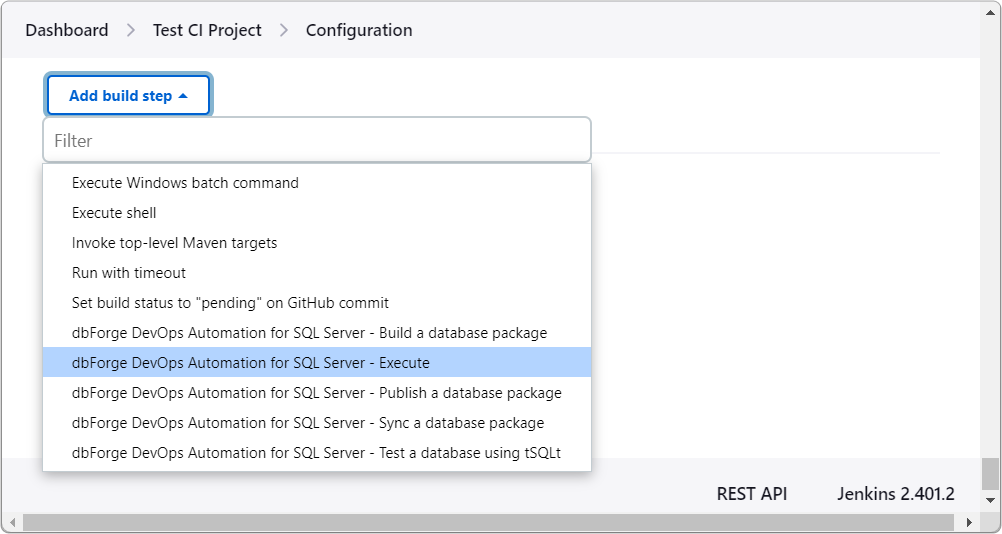
2. On the Configuration page, scroll till the Build Steps section, and click Add build step. Then select dbForge DevOps Automation for SQL Server - Execute.
3. Adjust the fields.
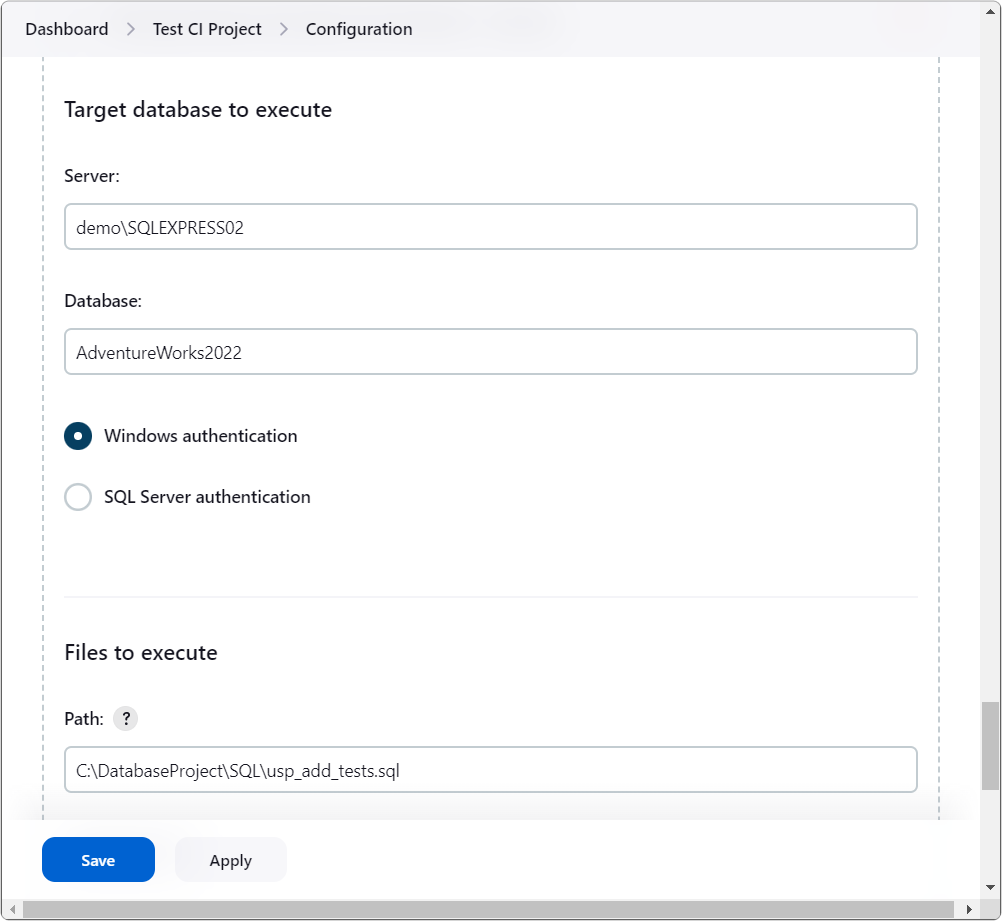

4. Click Save.
Conclusion
We have observed a simple example of the CI process organization with the dbForge DevOps Automation Plugin for Jenkins that allows you to quickly configure the SQL Server database CI process, since the plugin steps already encapsulate all cmdlet commands in the correct sequence, and you do not need to enter them from the keyboard when creating a job.
This plugin along with dbForge SQL Tools allow you to organize your own agile CI process of any complexity.
Download dbForge DevOps Automation to implement Continuous Integration and Continuous Delivery practices in Jenkins.
Additionally, watch these videos to discover how dbForge products can boost database development.
- How dbForge SQL Complete is involved in the Database DevOps process
- How to import data to SQL Server database with dbForge Data Pump during the DevOps process
- Creating database documentation during the Continuous Integration workflow
- How to automate database schema changes for the CI process during database deployment
- dbForge Source Control in the DevOps pipeline
- How dbForge SQL Complete is involved in the Database DevOps process
- Unit Testing for SQL Server Database in DevOps process