Role-based access control
Role-based access control (RBAC) in SQL Server helps you control access to database resources and manage permissions according to the principle of least privilege.
This topic shows how to set up and maintain RBAC in SQL Server with dbForge Studio tools such as Security Manager, SQL Editor, Schema Compare, Unit Test, and AI Assistant, with practical examples.
Prerequisites
-
A SQL Server instance with administrative privileges to create users, roles, and grant permissions.
-
A target database to implement RBAC.
Step 1: Review your security requirements
Before you implement RBAC, define user groups and required permissions based on job functions:
- Identify application roles, for example,
Admin,Developer,Analyst, andRead-only. - Identify the database objects that each role must have access to, for example, tables, views, or stored procedures.
- Specify the required permissions for each role and object, for example,
SELECT,INSERT,UPDATE, andEXECUTE. - Ensure you have the required administrative rights: assign the account to the sysadmin fixed server role, or grant enough privileges to create logins, users, and roles.
- Define the
ALTER ANY LOGIN,ALTER ANY USER, andALTER ANY ROLEpermissions in the relevant databases. - Use the dbForge Studio Documentation feature to create a security plan for reference.
Tip
Always follow the principle of least privilege when assigning permissions to users. The
sysadminrole and other broad permissions mentioned above are required only for the administrator who sets up RBAC. Never grant them to users or to the roles you create.
Step 2: Create SQL Server logins and database users
A login provides server-level authentication, while a database user maps that login to a particular database.
You can create logins and users by using Security Manager or SQL Editor.
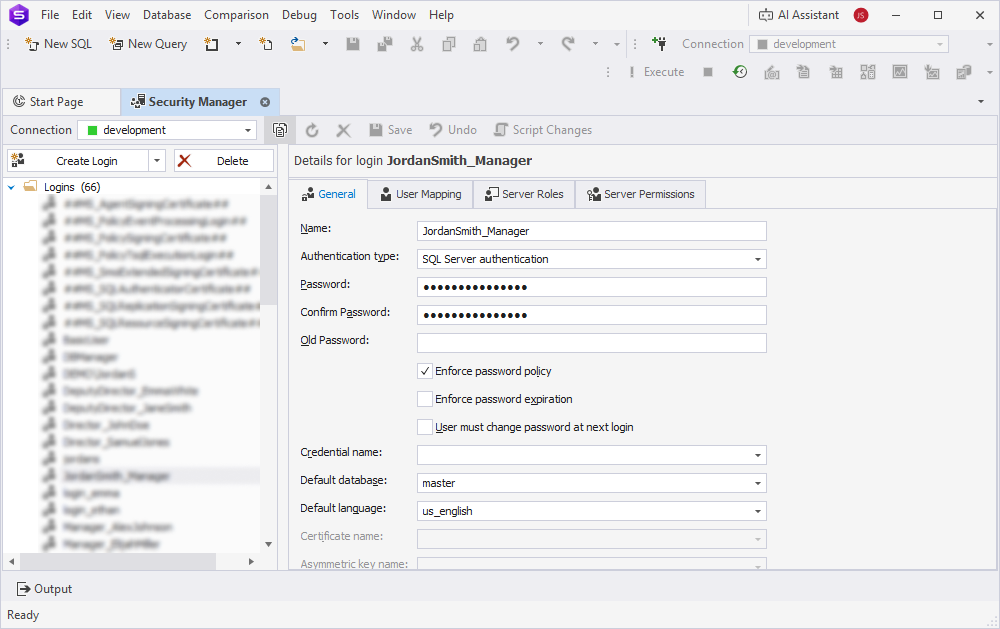
Create logins and database users using Security Manager
To create a login and database user in Security Manager:
1. Open Security Manager.
2. Create a new login:
2.1. Specify the login name.
2.2. Select the authentication type.
2.3. If applicable, enter the password.
For more information, see Create a new login.
3. On the User Mapping tab, map the login to the target database. Enter the database username and default schema.
Note
If the database user doesn’t exist, create it before you complete the mapping.
4. Save the changes.
Create a SQL Server login and a database user in SQL Editor
To create a SQL Server login and a database user in SQL Editor, open SQL Editor and run the following statements:
CREATE LOGIN <login_name> WITH PASSWORD = '<password>';
GO

USE <database_name>;
GO

CREATE USER <user_name> FOR LOGIN <login_name>;
where:
<database_name>– The database in which you want to create the user.<user_name>– The database user to create.<login_name>– The SQL Server login that the user maps to<password>– The password for the login.
Warning
If the
CREATE USERstatement fails with a permissions error, ensure your login has theALTER ANY USERpermission on the target database.-- Run as db_owner or sysadmin GRANT ALTER ANY USER TO <your_login>;
Tip
Use Windows Authentication for integrated security whenever possible to simplify credential management and improve security.
Step 3: Create database roles
You can use database roles to group permissions and make them easier to manage and assign to users. To create custom database roles, use Security Manager or SQL Editor.
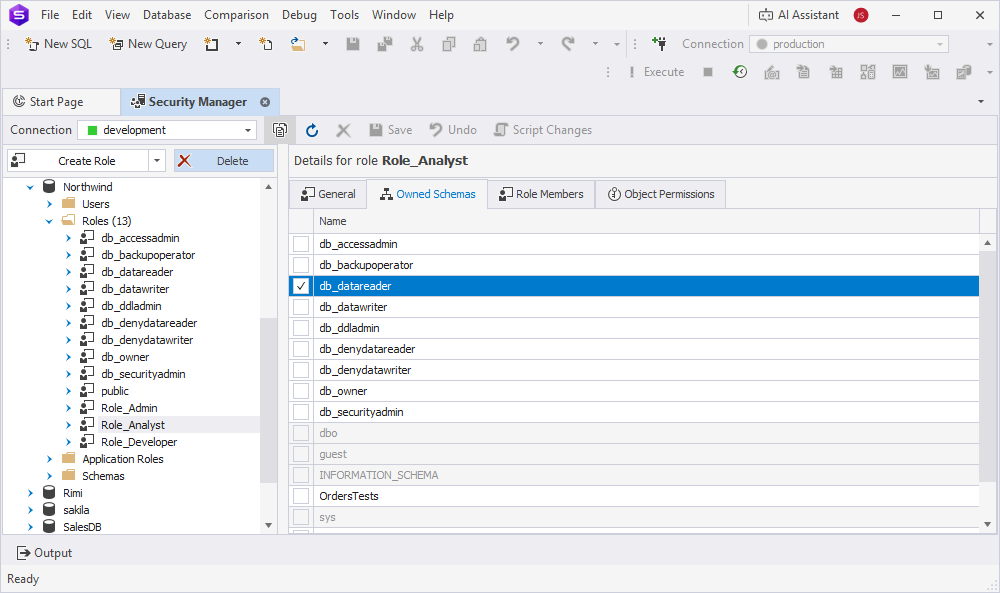
Create a database role using Security Manager
1. Open Security Manager.
2. Create a role, for example, Role_Analyst, and assign a schema owner if needed.
3. Save the changes.
4. On the Owned Schema tab, select db_datareader.
Note
The role must have permission to read the database.
5. Save the changes.
6. Repeat these steps for each role you want to create.
Tip
Use descriptive role names that clearly reflect their purpose. For example, use
Role_Finance_ReadOnlyfor finance team members who need read-only access.
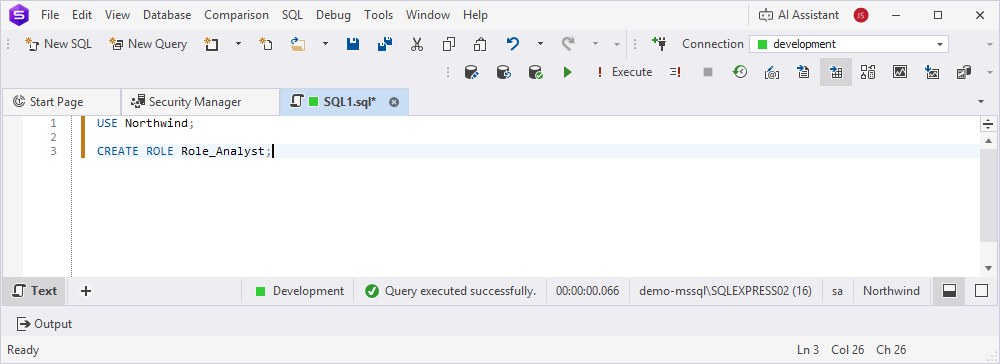
Create a database role using the CREATE ROLE statement
To create a database role using the CREATE ROLE statement, open SQL Editor and execute the statement.
USE <database_name>;

CREATE ROLE <role_name>;
where:
<database_name>– The database for which you create a database role.<role_name>– The name of the role you want to create.
Step 4: Grant permissions to roles
You can grant specific permissions to roles to control access to database objects. To grant permissions to roles, use Security Manager or SQL Editor.
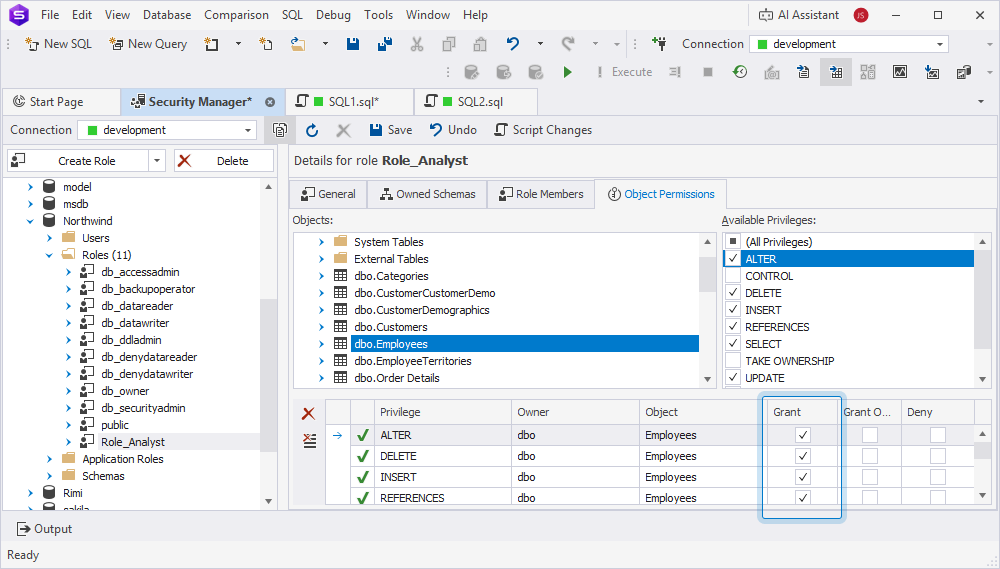
Grant permissions using Security Manager
1. Open Security Manager.
2. Select the role to which you want to grant permissions, for example, Role_Analyst.
3. On the Object Permissions tab, select the required database objects such as tables, views, or stored procedures.
4. Under Available privileges, assign permissions, for example:
SELECTfor read-only access.INSERTandUPDATEfor data modification.EXECUTEfor stored procedures.
5. Under Grant, select the privileges for the database objects.
6. Save the changes.
Grant permissions using SQL Editor
To grant permissions using SQL Editor, open SQL Editor and execute the statement.
GRANT SELECT ON <table_name> TO <role_name>; -- Gives the role permission to read data from the table.

GRANT EXECUTE ON <stored_procedure_name> TO <role_name>; -- Grants the role permission to execute the stored procedure.

GRANT INSERT, UPDATE ON <table_name> TO <role_name>; -- Grants the role permissions to add new rows (INSERT) and modify existing rows (UPDATE) in the table.
where:
<table_name>– The name of the table from which you want the role to read or manage data.<stored_procedure_name>– The name of the stored procedure.<role_name>– The name of the role to which you want to grant permissions.
Tip
Grant permissions at the schema level to simplify broader access control.
GRANT SELECT ON SCHEMA::<schema_name> TO <role_name>;where:
<schema_name>– The name of the schema for which permissions are granted.<role_name>– The name of the role to which permissions are granted at the schema level.
Step 5: Deny permissions
To restrict access, you can deny specific permissions using the DENY statement in SQL Editor.
DENY DELETE ON dbo.Sales TO Role_Analyst;
Alternatively, in Security Manager, select the checkbox in the Deny column for a specific permission.

Step 6: Assign users to roles
Map database users to roles to grant them the associated permissions.
You can assign users to roles by using Security Manager or SQL Editor.
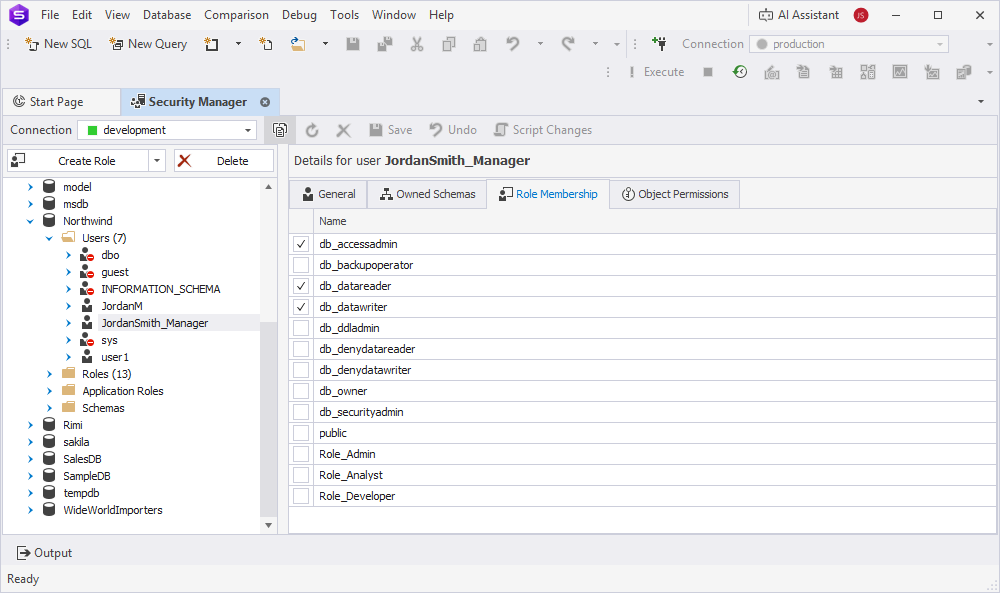
Assign users to roles using Security Manager:
1. Open Security Manager.
2. Select the user for the target database.
3. On the Role Membership tab, select the role.
4. Save the changes.
Repeat these steps for each user you want to assign the role.
Assign users to roles using SQL Editor
To assign a user to roles, open SQL Editor and execute the statement.
USE <database_name>;

ALTER ROLE <role_name> ADD MEMBER <user_name>;
where:
<database_name>– The database on which you want to execute the statement.<role_name>– The name of the role that you want to assign to the user.<user_name>– The name of the user to which the role will be assigned.
Tip
Use Windows groups as logins, for example,
DOMAIN\FinanceTeam, and map them to roles to simplify user management for large teams.
Step 7: Test role-based access
After you assign permissions, verify that users have the appropriate access and can’t access unauthorized resources:
You can verify permissions by using SQL Editor:
1. In dbForge Studio for SQL Server, create a new connection.

2. Open SQL Editor.
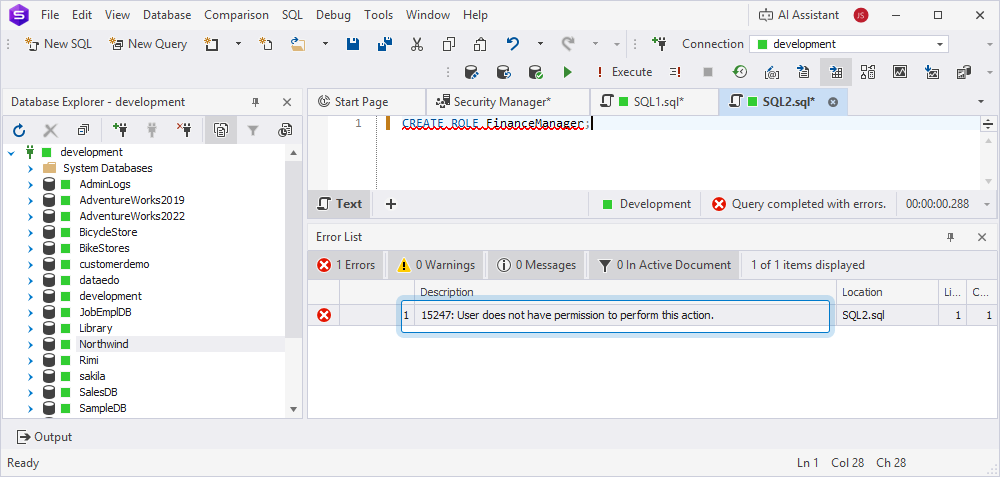
3. Attempt unauthorized actions.
For example, create a role in the database. Since the user doesn’t have permission to create roles, the error occurs.
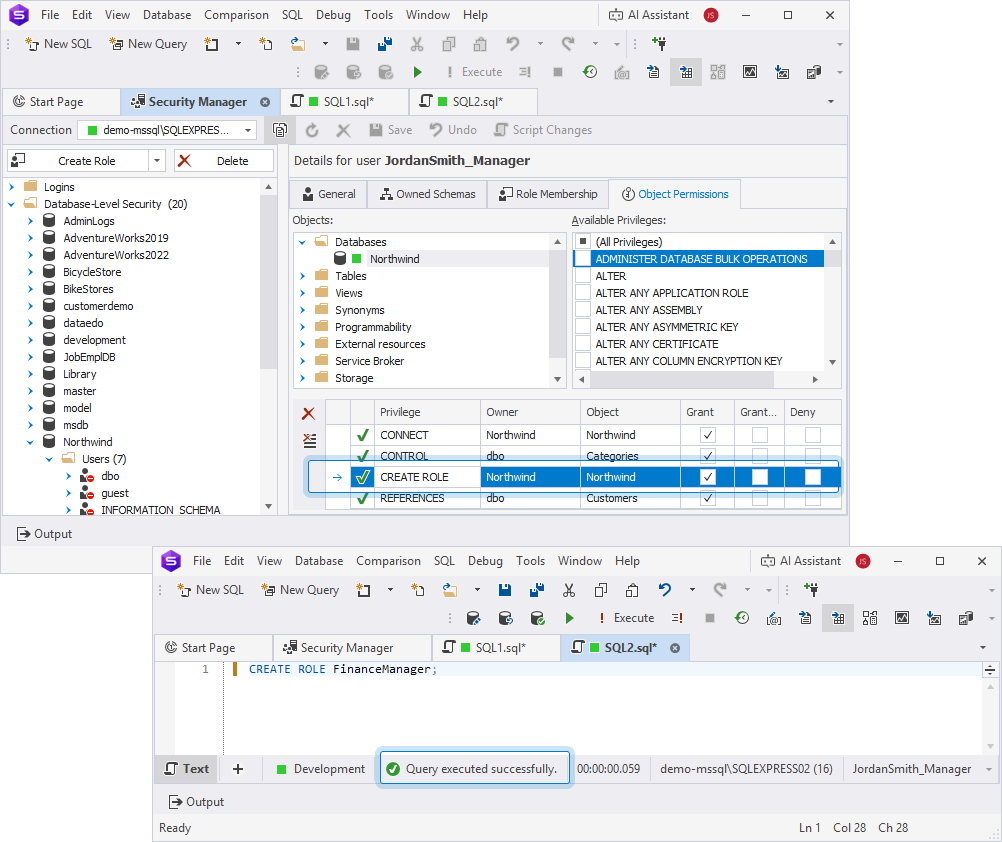
4. In Security Manager, grant permission to create roles, then create a role.
Tip
Use the Unit Test feature to automate permission testing for critical database operations.
Step 8: Monitor and audit role-based access
Regularly audit roles and permissions to ensure compliance and detect security issues. To monitor and audit access, use Security Manager, SQL Editor, or SQL Server Audit, if supported by your edition:
-
In Security Manager, verify the assigned permissions for each role and user.
-
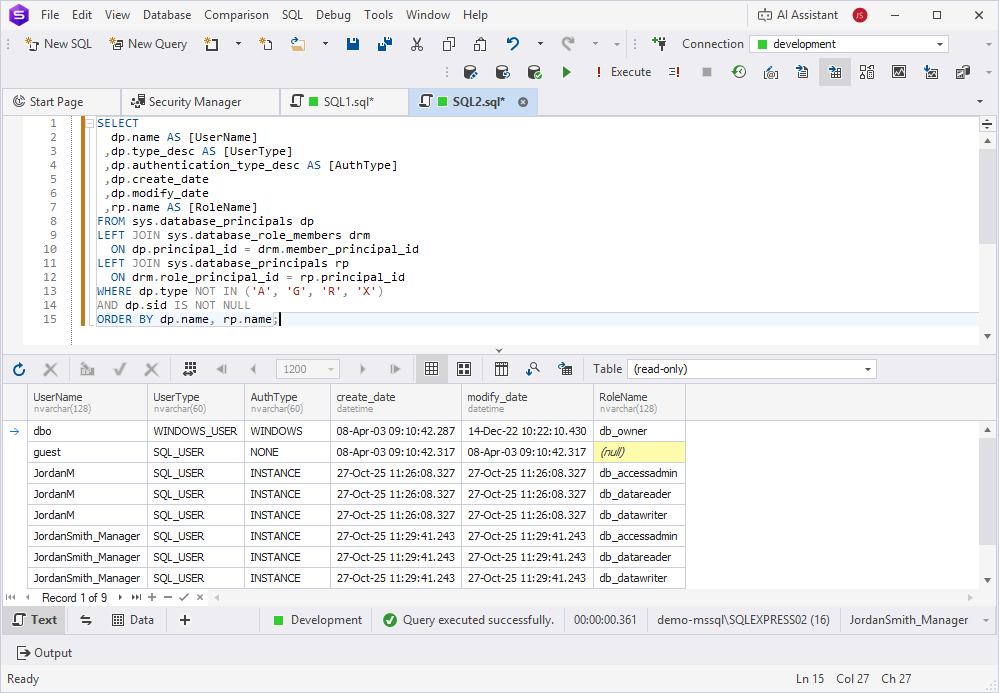
In SQL Editor, execute the system views for auditing to review the permissions assigned to each role.
SELECT
  dp.name AS [UserName]
 ,dp.type_desc AS [UserType]
 ,dp.authentication_type_desc AS [AuthType]
 ,dp.create_date
 ,dp.modify_date
 ,rp.name AS [RoleName]
FROM sys.database_principals dp
LEFT JOIN sys.database_role_members drm
  ON dp.principal_id = drm.member_principal_id
LEFT JOIN sys.database_principals rp
  ON drm.role_principal_id = rp.principal_id
WHERE dp.type NOT IN ('A', 'G', 'R', 'X')
AND dp.sid IS NOT NULL
ORDER BY dp.name, rp.name;
Enable SQL Server audit to track login and permission changes
1. In SQL Editor, create a database, a table to store logs, and a trigger to log all server logon events.
Click to open the SQL script that creates the database and table
IF NOT EXISTS (SELECT * FROM sys.databases WHERE name = 'AdminLogs')
    CREATE DATABASE AdminLogs;
GO

USE AdminLogs;
GO

CREATE TABLE dbo.UserLogins (
    LogID INT IDENTITY PRIMARY KEY,
    LoginName SYSNAME,
    HostName NVARCHAR(255),
    AppName NVARCHAR(255),
    LoginTime DATETIME DEFAULT GETDATE(),
    ClientIP NVARCHAR(64)
);
GO

USE master;
GO

CREATE TRIGGER trg_LogUserConnection
ON ALL SERVER
FOR LOGON
AS
BEGIN
    SET NOCOUNT ON;

    DECLARE @Login SYSNAME = ORIGINAL_LOGIN(),
            @Host NVARCHAR(255) = HOST_NAME(),
            @App NVARCHAR(255) = APP_NAME(),
            @IP NVARCHAR(64) = (SELECT client_net_address FROM sys.dm_exec_connections WHERE session_id = @@SPID);

    INSERT INTO AdminLogs.dbo.UserLogins (LoginName, HostName, AppName, ClientIP)
    VALUES (@Login, @Host, @App, @IP);
END;
GO
2. Execute the following query to view all logons on the server:
SELECT * FROM dbo.UserLogins ORDER BY LoginTime DESC;
where:
dbo.UserLogins– The user-defined table that stores the logon data.LoginTime– The column used to sort the data in descending order so that the most recent logins appear first.
This query returns all user logon records, with the latest logins displayed at the top of the result set.

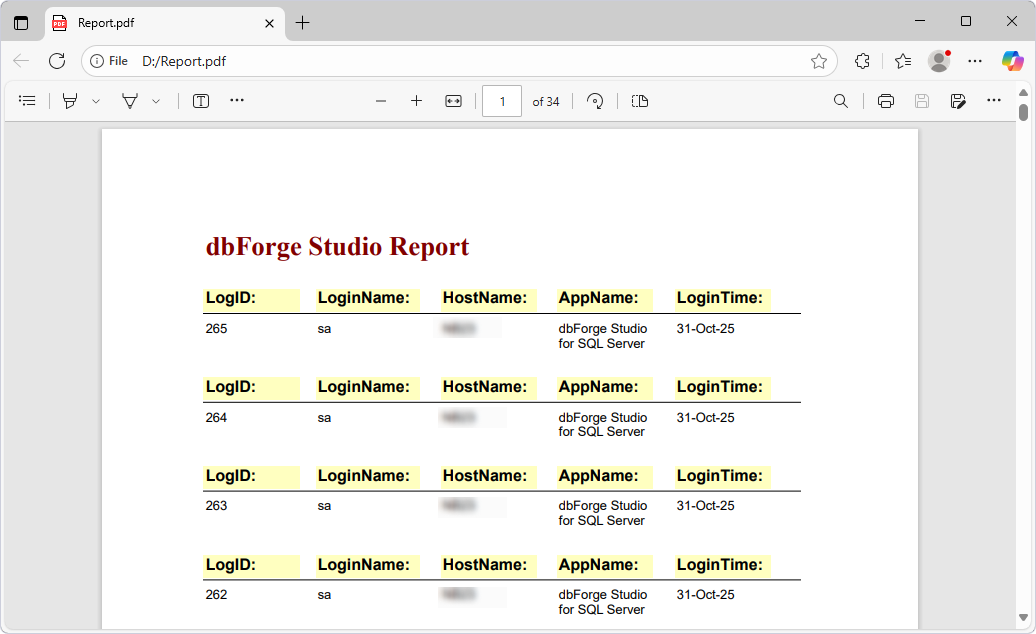
Generate audit reports
Use dbForge Studio Report Designer for compliance reviews and audit reports.
Schedule periodic audits
You can schedule periodic audits with SQL Server Agent to run audit queries and export results to a report.
Tip
Use dbForge Studio AI Assistant to generate queries that identify users or database principals with the
DELETEpermission.
Step 9: Maintain and update RBAC policies
Regularly review and update roles and permissions to reflect changes in user responsibilities or database structure.
You can manage changes by using:
-
Security Manager to modify roles to grant or revoke permissions as needed.
-
Schema Compare to identify schema changes and update role permissions accordingly.
-
SQL Editor to remove obsolete users or roles.
USE <database_name>;

DROP USER <user_name>;
DROP ROLE <role_name>;
where:
<database_name>– The database name from which you want to drop the user and role.<user_name>– The name of the user you want to drop.<role_name>– The name of the role you want to drop.DROP ROLEdoesn’t work if the role has members. Remove the members first.
-
Schedule scripts in SQL Server Agent to automate permission reviews.
Tip
Use the dbForge Studio Documentation feature to document changes for compliance and team collaboration.
Use version control for RBAC scripts and track changes with dbForge DevOps Automation in your CI/CD pipeline.
Recommendations
In addition to using dbForge Studio for SQL Server tools such as Security Manager, SQL Editor, Schema Compare, Unit Test, and AI Assistant, follow these recommendations to implement and manage role-based access control effectively and maintain a secure, compliant SQL Server environment.
| Best Practice | Description |
|---|---|
| Follow the least privilege principle | Grant only the permissions each role needs to perform its tasks. |
| Use roles instead of assigning permissions directly | Assign permissions to roles rather than directly to users to simplify management and improve scalability. |
| Use Windows Authentication | Use Windows groups for login management and Active Directory integration. |
| Audit permission rules | Test role changes in a development environment with SQL Editor before applying them to production. |
| Document security policies | Use the dbForge Studio Documentation feature to document roles, users, and permissions. |
| Test permissions after changes | Test permission changes in a development environment with SQL Editor before applying them to production. |
| Use descriptive role names | Create clear, descriptive names such as Role_Finance_ReadOnly to reflect the role’s purpose and scope. |
| Enable auditing for sensitive data | Use SQL Server Audit or custom scripts to track access to sensitive tables and schemas. |
| Restrict server-level permissions | Avoid granting server-level roles such as sysadmin to application users. Prefer database-level roles whenever possible. |
| Secure credentials | Store SQL Server login passwords securely and enforce strong password policies in Security Manager. |
| Monitor role membership | Query sys.database_role_members regularly to verify user assignments. |
| Use schema-level permissions | Grant permissions at the schema level (for example,GRANT SELECT ON SCHEMA::dbo) to ensure consistency. |
| Avoid granting permissions to the public role | Avoid granting additional permissions to the public role to help prevent unintended access. |
| Test application compatibility | Ensure that the application behaves correctly under the assigned roles. |
| Automate permission reviews | Use SQL Server Agent to schedule regular permission audits. |
| Control temporary access | Create temporary roles for short-term access and remove them when they are no longer needed. |
| Use DENY permissions sparingly | Apply DENY only when necessary, because it can make troubleshooting more difficult. |
| Back up security configurations | Export security settings before making major changes. |
| Train teams on RBAC | Train users on role-based access control and use the Documentation feature to support clarity and consistency. |
| Use AI for security | Use dbForge Studio AI Assistant to analyze permission scripts, optimize them, and help identify misconfigurations. |
| Understand DENY and REVOKE | REVOKE removes an explicit permission grant but does not prevent access granted through role membership. DENY explicitly blocks access and overrides granted permissions. REVOKE removes specific grants. Use DENY sparingly when you need to block access regardless of the role membership. Document all DENY statements to simplify troubleshooting. |