Creating, Viewing, Dropping, and Editing Tables
This topic describes ways to create, view, drop, and edit a table in a database with the help of dbForge Studio.
Creating a Table
1. On the Standard toolbar, click New Database Object and specify the Table type in the dialog.
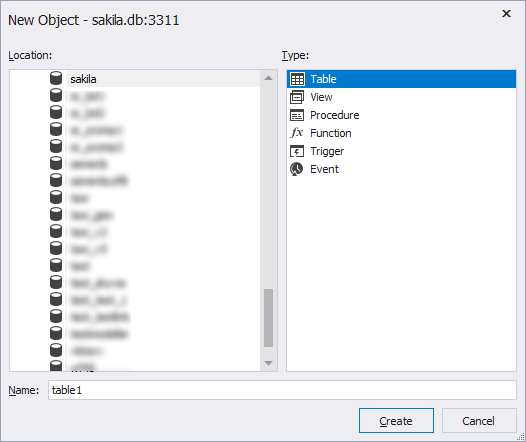
2. Input the table name.
3. Click Create and, if specified name is unique, the table editor will appear.
4. Add at least one column to the table.
5. Optionally, alter the name, change database (owner) in which the new table will be created, or set comment for the table.
6. Save the document.
-or-
1. In Database Explorer, right-click the Tables node and select New Table.
2. Input the table name.
3. Add at least one column to the table.
4. Optionally, alter the name, change database (owner) in which the new table will be created, or set comment for the table.
5. Save the document.
Note
To learn about adding columns, constraints, indexes to the table and defining other table parameters, see Defining Table Structure.
Viewing a Table
To view a table, double-click it in Database Explorer.
By default, the Colums tab is active.
You can make the Data tab to be active when you open a table. For this, go to Tools > Options > Database Explorer > General and under Table and View Default Action select Open Data in Object Editor.
Note
You can also select how to open a table using a shortcut menu. Right-click the table name in Database Explorer and select:
Open Editor—To have the Colums tab active.
Open Data in Editor—To have the Data tab active.
Dropping a Table
Drop a table by selecting Delete on the table shortcut menu.
Note
When you drop a table, all data contained in it is lost.
Editing a Table
Editing a table implies editing its structure: changing, removing, or adding columns, indexes, modifying table options. Table editor allows performing all these actions and viewing changes in the script of the table.
To edit a table and view changes:
- Right-click it in Database Explorer.
- Select Open Editor on the shortcut menu.
- Make necessary changes in the table structure. See topic Defining Table Structure for detailed information.
-
Click Script Changes to view changes.
Note
If you modify column names, a message asking if refactoring should be used will appear.
- To apply changes, click Apply Changes. If you want to undo all actions made since the table document (or any another object editor) was opened or saved, click Undo on the Standard toolbar. However, you cannot issue a Redo command for database objects, because when you click Undo, the database object is reloaded from the server, and all unsaved changes are lost.