Building and Deploying Project
dbForge Studio for MySQL enables you to efficiently build and deploy database projects, customize build results, and synchronize your project with the server database.
Building a Project
After you have edited the database project, you can build it to create a script that will deploy all the project changes to the database on the server. A project can be built to a single ready-to-deploy script or a set of scripts with a batch to run it in the MySQL Command-Line Tool.
To build a project
1. On the Project menu, select [Project_Name] Properties.
2. On the Build tab, choose a project configuration to build.
3. In Project Explorer, right-click the project and select Build [Project_Name].

Project building is enhanced with the following features:
- Syntax check in project scripts. (If any errors are found, the build is stopped.)
- Check of references to schema objects in all statements.
- Check of any object duplicates.
Customizing build results
Before building the project, you can set project options to customize build results.
To customize project build
1. In Project Explorer, right-click the project and select Properties.
-or-
On the Project menu, click Properties. The Project Properties window opens. It contains three tabs: Build, Build Configuration, and Database.
2. On the Build tab, customize the project build:
- Define project configuration
- Select whether to ignore errors and check references during source validation
- Specify a path to the build output file
- Edit the target project name
- Select whether to keep original object scripts
- Select whether to generate a single SQL script file or a batch script file
3. On the Build Configuration tab, define the order of files in the build script and deploy execution.
- Select the file(s) and click Add to add .sql files excluded from the current Build Project list but included in the project. In the Add project files dialog, select the files you want to add and click OK.
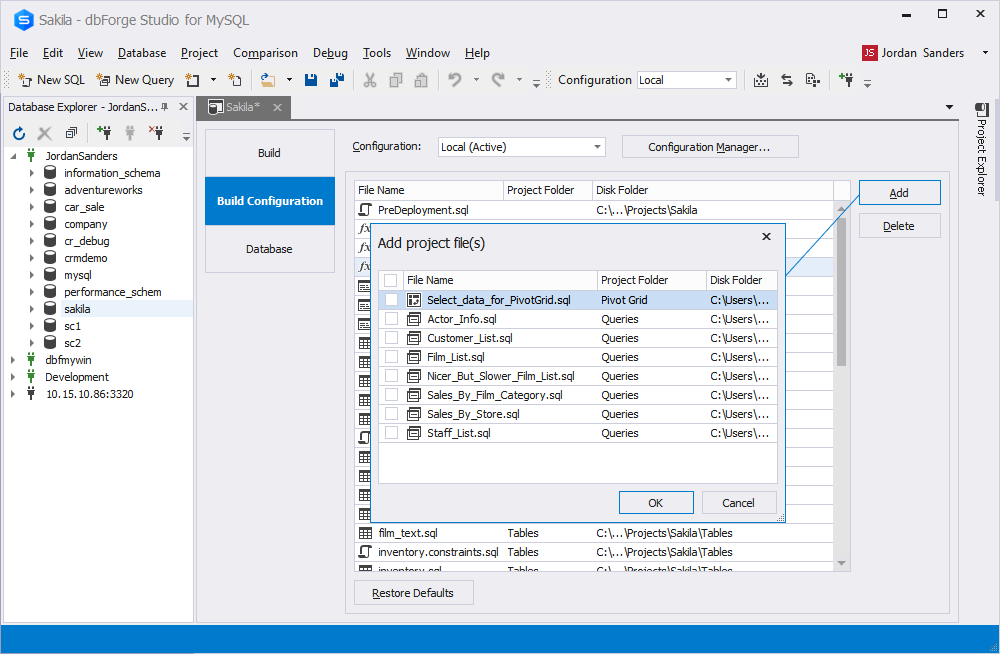
- Select the file(s) and click Delete to remove the file(s) from the current configuration of the project build. In the confirmation pop-up window, click OK. Once removed, the files appear in the Add project files dialog.
If you want to reset the current build configuration to the original list, click Restore Defaults and then click OK to confirm the action.
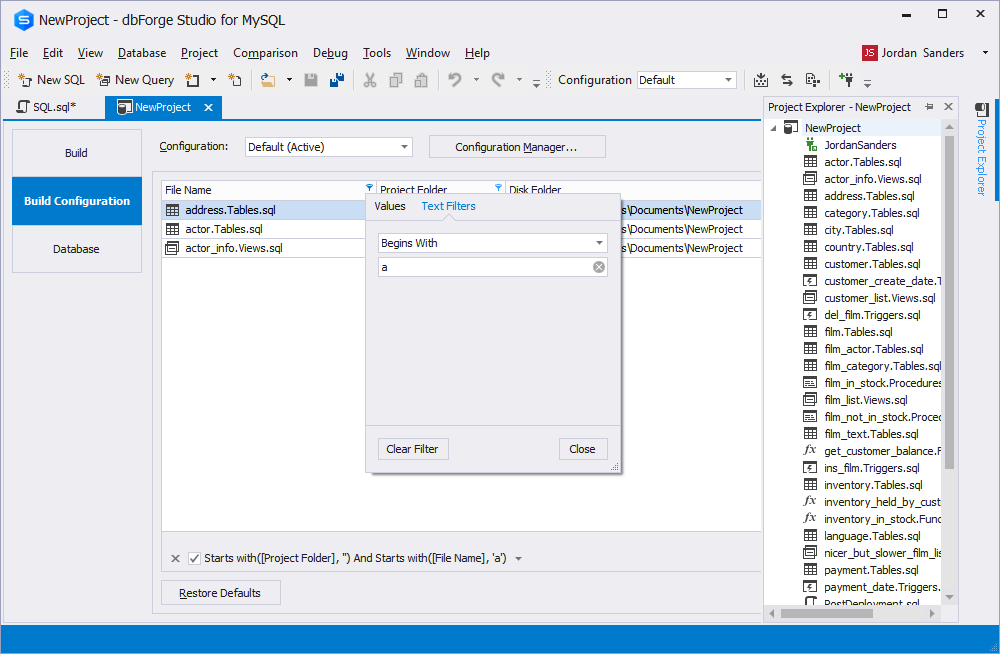
On the grid, you can:
-
Sort the columns
-
Filter the columns by values or text
The deployment script will contain the contents of all files included in the configuration.
4. On the Database tab, customize the target database settings. For example, you can set a server version to generate SQL statements, using the syntax of this server version.
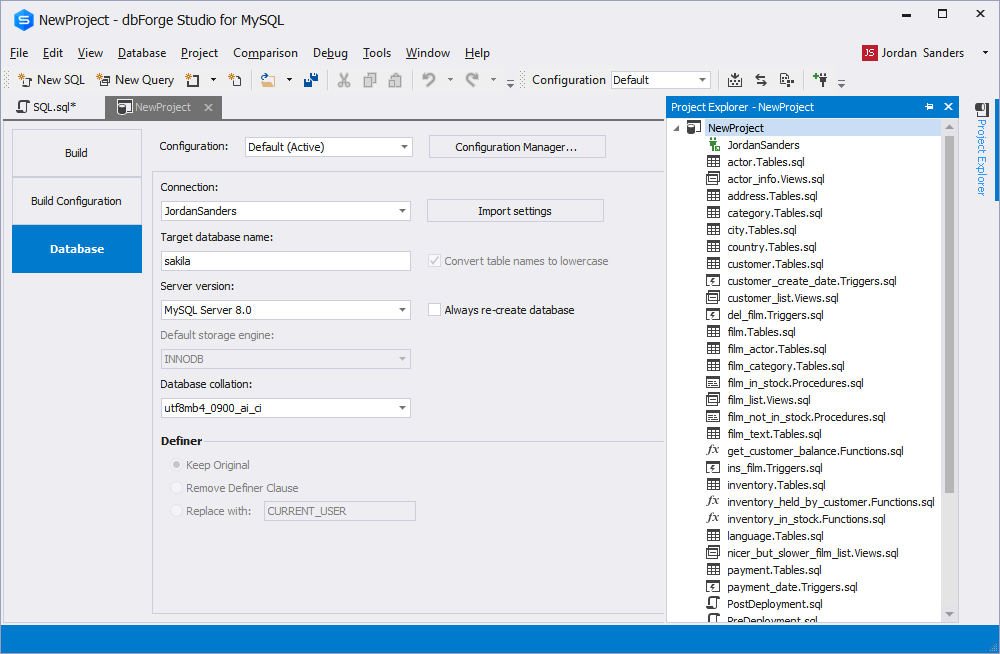
Select the Always re-create database option to ensure database integrity.
Deploying a project to the server
You can deploy either the entire project or only the changes in the project to the database on your server.
Note
Project files can be deployed only if the connection was assigned to the project.
Deploying an entire project
To deploy an entire project:
On the Project menu, click Deploy [Project_Name].
-or-
In Project Explorer, right-click the project and select Deploy [Project_Name].
Deploying changes from the project
When you want to deploy only the changes from your project to the server, you should compare your project with the database on the server and create a special schema synchronization script. The script will deploy only required changes to the server.
To deploy changes from your project
1. In Project Explorer, right-click the project and select Synchronize Project with Server. The comparison document opens.
2. By default, the synchronization actions are automatically selected for each compared object. You can change them, for example, by selecting None to prevent applying the change.
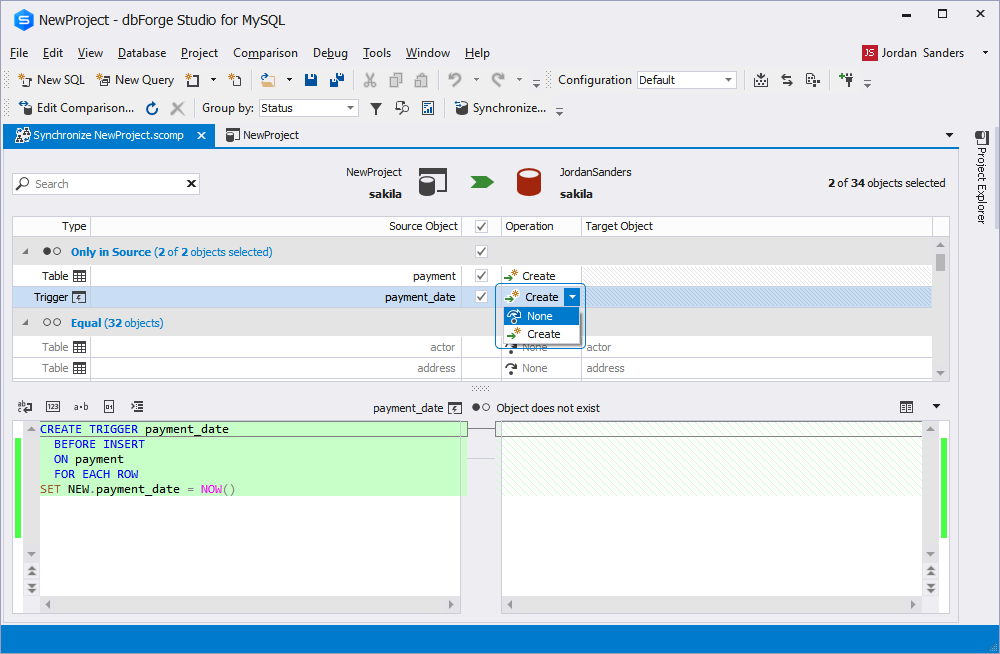
3. On the Comparison menu, click Synchronize to deploy the project changes to the database.
Synchronizing changes from the database on the server with the project
To synchronize changes from the database with your project
1. In Database Explorer, right-click the required database and select Tools > New Schema Comparison.
2. In the New Schema Comparison wizard, select the database as Source and the project as Target, and click Next.
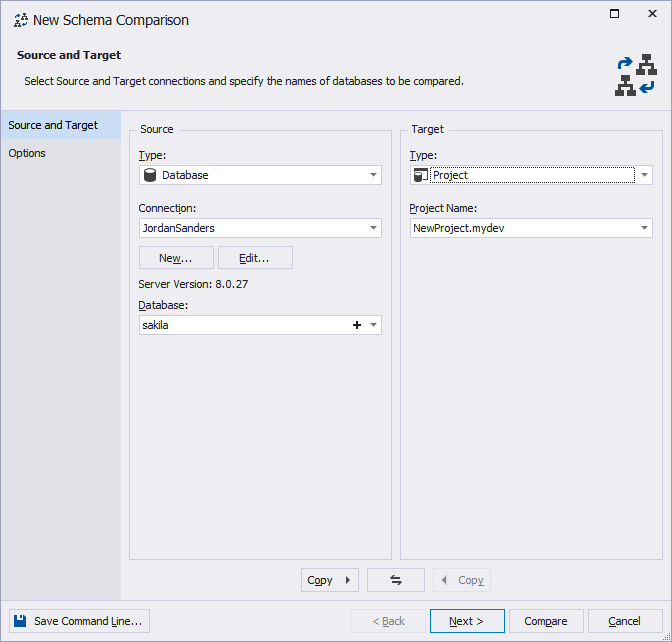
3. (Optional) On the Options tab, set synchronization options, and click Next.
4. Click Compare and see the comparison results in the comparison document that opens.
5. Select the objects you want to synchronize. By default, the synchronization actions are automatically selected for each compared object, but you can change them if required.
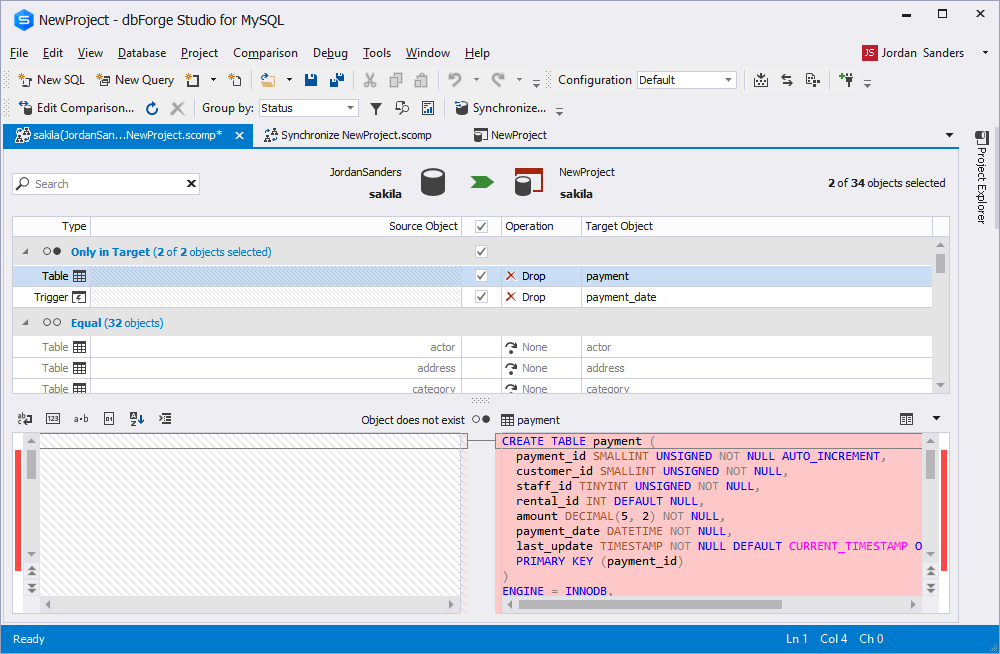
6. Click  Synchronize objects to the target database to synchronize the database with the project.
While comparing, the project can be either Source or Target. Note that the project is automatically built during comparison, so if any errors occur during this process, the comparison fails.