Setting up Schema Comparison
dbForge Studio for MySQL allows comparing and synchronizing schemas using the built-in Schema Comparison tool. So, to start a new comparison project, users need to specify the source and target data sources in the New Schema Comparison wizard.
To open the New Schema Comparison wizard, use any of the options:
- In Database Explorer, select two databases holding the CTRL key and select Tasks > New Schema Comparison from the shortcut menu. The databases will be automatically preselected as the Source and Target.
- Navigate to the Comparison menu and click New Schema Comparison.
- Go to the File menu and select Open Project. In Project Explorer, right-click the project and select New Schema Comparison.
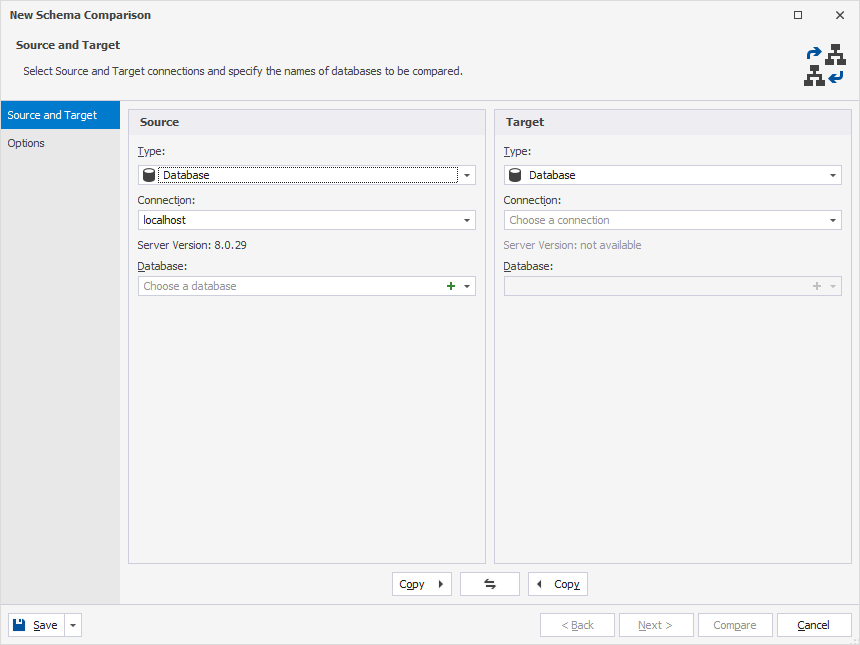
On the Source and Target page of the New Schema Comparison wizard that opens, you need to select source and target data sources including:
- Type of the Source and Target
- Server connection
- Source and target data sources you want to compare
After the source and target data sources are set up, you can specify additional options for schema comparison on the Options page of the wizard to customize the default behavior. This step is optional.
Once done, click Compare to run the schema comparison process.
Selecting source and target data sources
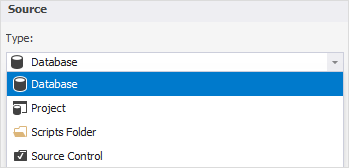
The following types of data sources can be compared:
You can select a data source from a Type dropdown list.
Select a database
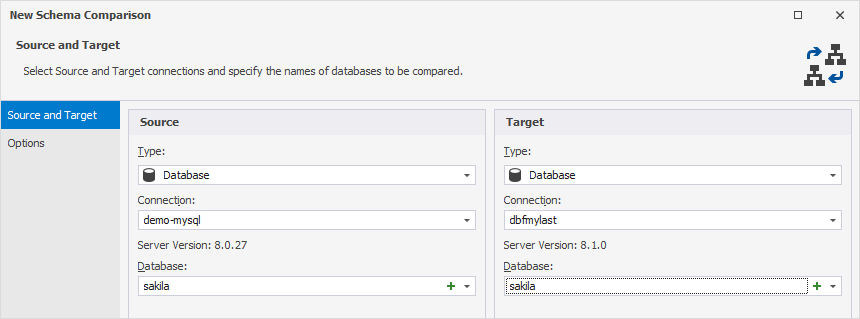
1. From the Type dropdown list, select a Database type.
2. From the Connection dropdown list, select the previously connected server required for comparison.
Note
To use a new connection, select Manage from the dropdown list and then click New in the Connection Manager window. The Database Connection Properties window opens where you need to specify the server properties you want to connect to. For more information, see Connecting to a database.
In the Connection Manager window, you can also edit or delete the selected connection by clicking Edit or Delete respectively.
3. From the Database dropdown list, select a database you want to compare. To refresh the database list, click Refresh on top of the list.
Select a project
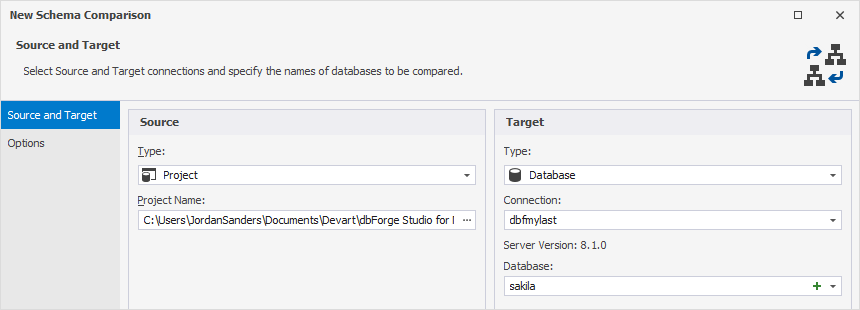
1. From the Type dropdown list, select a Project type.
2. In the Project Name field, click ![]() Browse to select a project stored on the machine.
Browse to select a project stored on the machine.
Select a scripts folder
1. From the Type dropdown list, select a Scripts Folder type.
2. In the Database scripts folder field, use either of the following options:
- From the dropdown list, select the previously used scripts folder.
- Click
 New to create a scripts folder.
 - Click
 Browse to select an existing scripts folder.
3. The Server Version and Default Collation options are automatically inherited from the current connection.
4. Optional: You can select the Use target database properties checkbox to apply the properties of the target database to the source.

Select a source control version
1. From the Type dropdown list, select a Source Control type.
2. In the Repository field, use either of the following options:
- From the dropdown list, select the previously linked source control or click Manage to open the Repository Manager and create a new connection between a database and a source control or update the existing one.
- Click New or Browse to link to a new repository.
Note
Selecting the New and Browse options will open the Source Control Repository Properties dialog where you can specify the repository properties. For more information, see Link to source control.
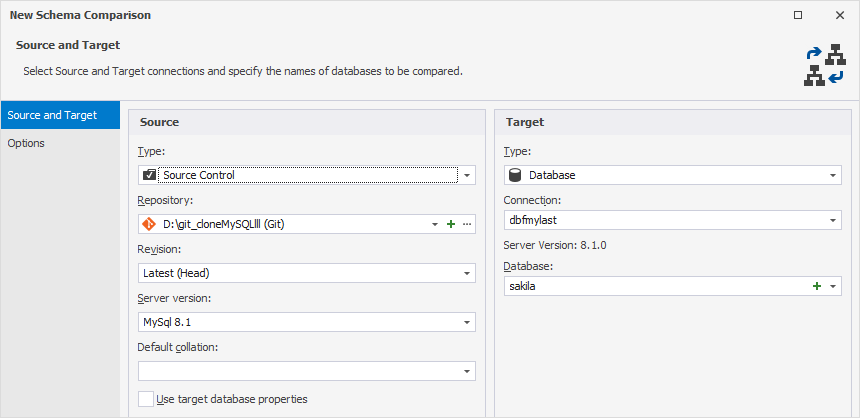
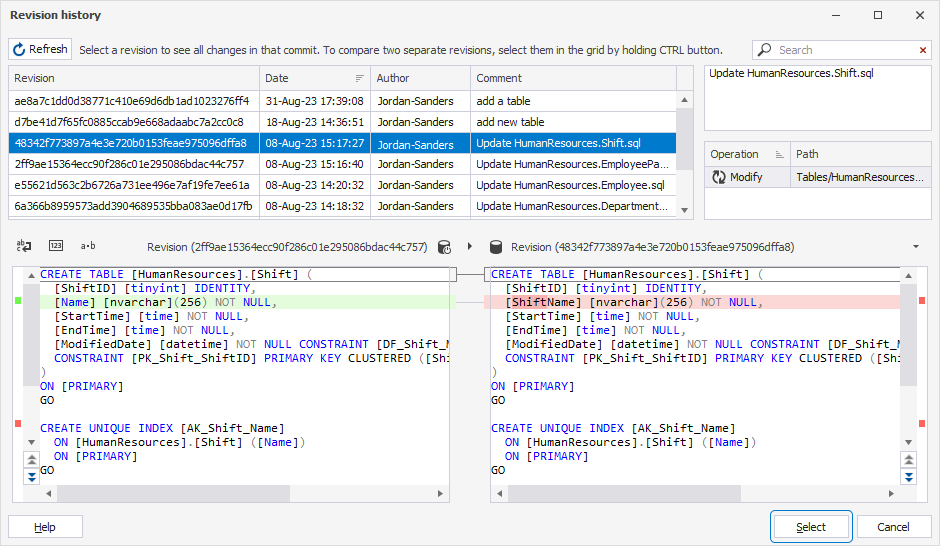
3. In the Revision field, the Latest (Head) option is selected by default. If you want to apply another revision, select Select a specified revision from the dropdown list. In the Revision history window that opens, select the required revision and click Select.
4. The Server Version option is automatically inherited from the current connection.
5. Optional: You can select the Use target database properties checkbox to apply the properties of the target database to the source.
Note
You can copy the details from the source to the target and vice versa using the following options:
to copy the Source database details
to copy the Target database details
You can click
Swap to swap the Source and Target data sources.
If you want to close the wizard and cancel the comparison, click Cancel.
To compare a schema and a project:
1. Open a project you want to compare.
2. In Project Explorer, right-click the project and select New Schema Comparison to open the wizard.
3. On the Source and Target page of the wizard, select a Database type as source and a Project type as target in the Type fields.
4. From the Database field, select the database you want to compare. Each Database field shows the list of all databases available on the selected MySQL server.
5. In the Project Name field, click ![]() Browse to select a project stored on the machine.
Browse to select a project stored on the machine.
6. Optional: If you want to ignore some schema options during comparison, go to the Options wizard page and select the required options.
7. Click Compare to close the wizard and start the comparison.
Note
A schema and a project cannot be compared if a project build is invalid. Synchronization cannot be done if a project was modified after the beginning of the comparison.
Note
The following statement from a project is ignored during the comparison:
ALTER TABLE statement where more than one object is modified or where a column is modified.
Working with scripts folders
A scripts folder is a set of scripts that represent a database schema and (optionally) data. The scripts folder can be used for:
- Version-controlling databases
- Comparing database schemas
- Comparing databases on unconnected MySQL Servers
- Database reverse engineering
Creating a scripts folder
There are two methods to create a new scripts folder via Schema Compare.
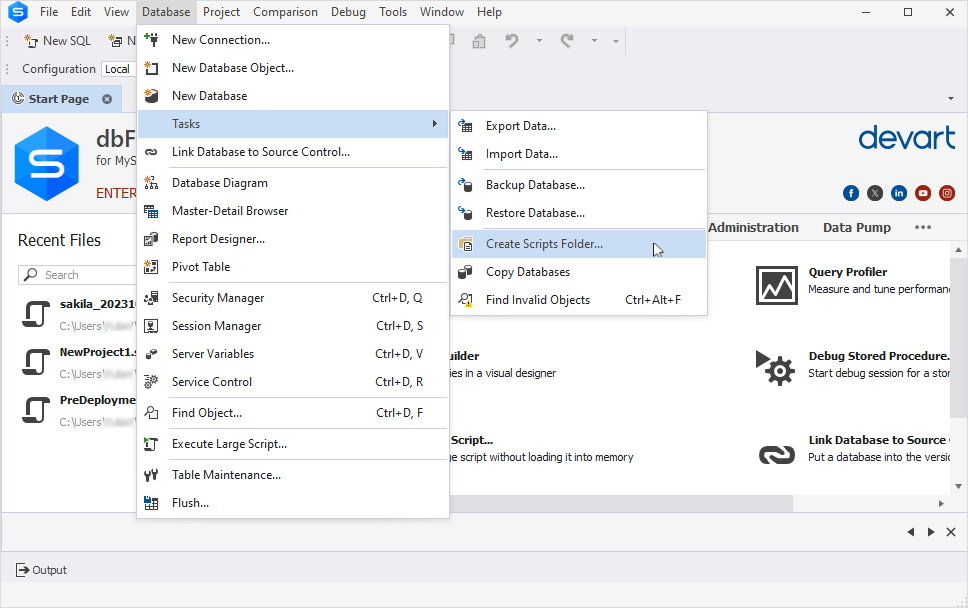
Method 1
Create a scripts folder from the Database menu > Tasks > Create Scripts Folder.
1. In the Create Scripts Folder dialog that opens, specify the source object type, required connection, database name, output type (Scripts Folder), and the path for your scripts folder to be saved to.
2. Optional: You can go to Scripts Folder Structure and specify the structure for your scripts folder and file name templates.
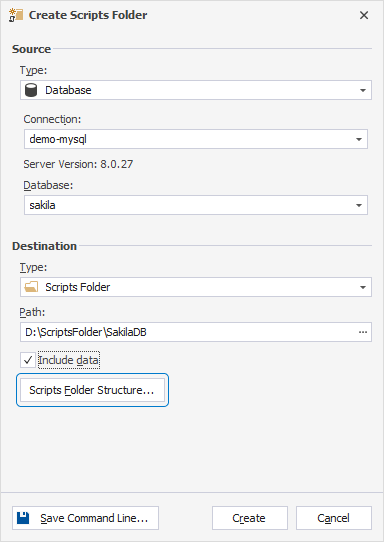
3. Once you configure everything, click Create.
Method 2
Create a scripts folder through the synchronization of the required database with an empty folder.
1. Navigate to the Comparison menu and select New Schema Comparison to open the wizard.
2. In Source, select the Database type, the required connection and database.
3. In Target, select the Scripts Folder type and set a path to an empty folder in Database scripts folder.
4. Click Compare. When the comparison is finished, you can specify the objects that will be added to the scripts folder (or select all of them).
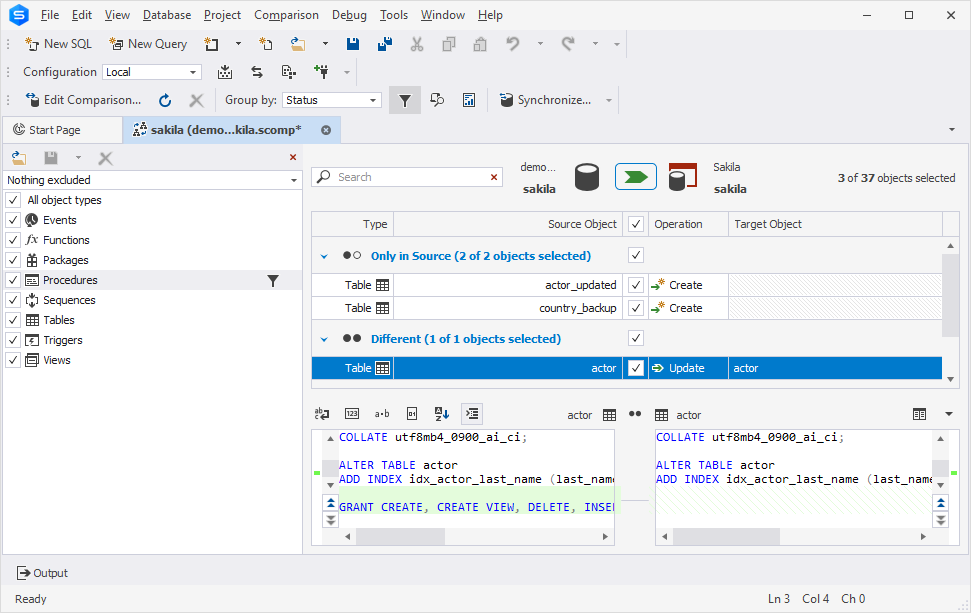
5. In the Schema Comparison document, Synchronize objects to the target database to open the Schema Synchronization wizard.
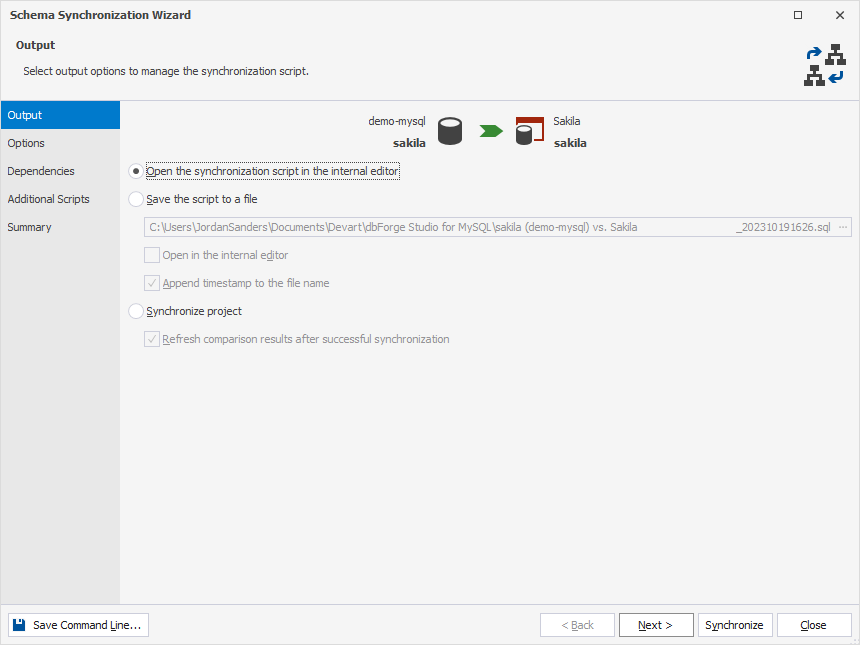
6. In the wizard, select the output option and click Synchronize.
Comparing and synchronizing scripts folders
When comparing and synchronizing scripts folders as a target or a source, a synchronization script is created. It can be saved to a file or opened in an internal editor.
When a scripts folder is selected as a source, you can execute the synchronization script directly against the target database.
When a scripts folder is selected as a target, you can update the scripts folder after synchronization.
Scripts folder synchronization issues
When you select a scripts folder as a target data source, comments that are part of a table definition will be lost when the table is modified, and the object creation script is updated.